
Wrapping a Polo Wrap
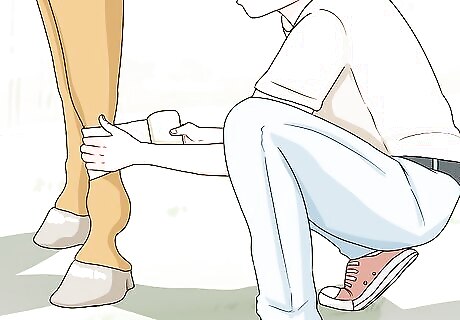
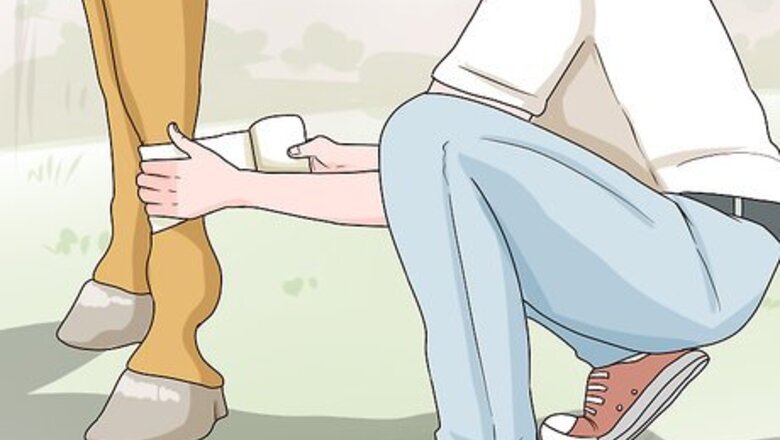
Bend over, don’t kneel. When working with a horse’s feet and legs, you should bend over or squat rather than kneel. Planting yourself on the ground is dangerous. Instead, position your body so that you can reach the horse easily and also move away quickly if the horse gets agitated or begins kicking. Be mindful at all times that a horse is a strong animal with significant kicking power. Horses also get spooked pretty easily and have several blind spots. Always have an exit strategy in mind so that you know what to do if the horse spooks or kicks out.
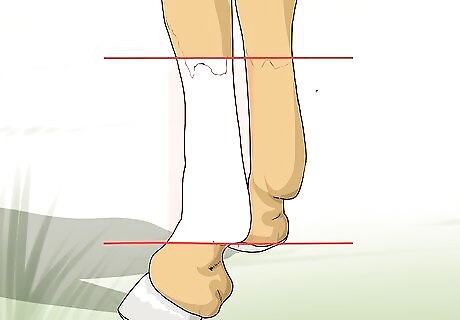
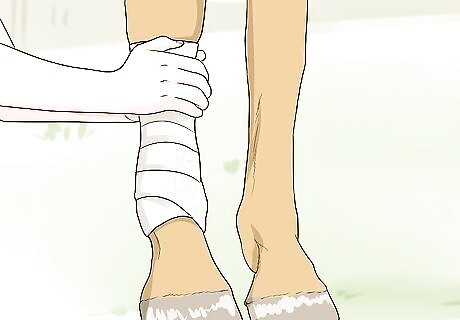
Wrap the leg in the right place. It’s important that you wrap your horse’s legs in the correct position on their legs so that the wraps provide maximum benefit and so that you avoid injuring your horse’s legs. Wraps should be placed on the cannon bone, which is between the knee and fetlock joint. The knee is the big, knobby joint in the middle of the leg. The fetlock joint is the knobby joint near the hoof. The cannon bone is the straight section of leg located between the knee and fetlock joint.
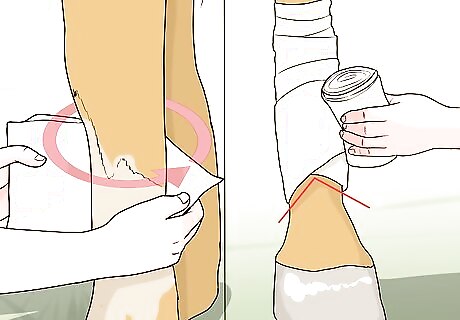
Wrap to the back. Place the wrap on the inside of the first leg at the top of the cannon bone. You’ll begin to wind the wrap around the horse’s leg, always making sure to wrap from front to back, and only tightening or applying pressure at the front of the leg. Bring the wrap down below the fetlock joint (the bottom joint) so that it’s protected as well, and then wind upward again. You want the wrap to feel snug, not tight. Your wrap will make an upside-down “V” shape over the fetlock joint if it’s done correctly. A useful phrase to remember is “Always wrap to the back". Think F.B.I.O. – Front to back, inside to outside. Close the wrap with the Velcro tab, which will secure the wrap in place and keep it from slipping. Never use duct tape or another immobile tape to secure your wrap as this can provide severe damage to the tendons underneath.
Don’t reroll when you unwrap. As you remove the wraps from your horse's leg, never roll them back up as you unwrap. Re-rolling adds extra time that you’re by your horse’s feet, and also adds an additional tripping hazard for your horse. You want to get the wraps off your horse's legs as quickly as possible, and once you are safely away from his/her legs, you may roll and store the polo wraps. Reroll them exactly opposite as you unrolled them so that they’re ready to go next time.
Using Caution
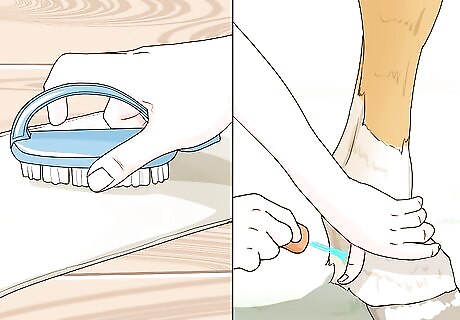
Clean wraps and legs. You need to use wraps that are free of debris and dirt, and you also need to make sure that the horse’s legs are clean. Trapping any debris or particles in between the wrap and horse’s legs can cause irritation, and if left on too long, abrasions. Before you apply a wrap, inspect your materials and the horse’s legs. Gently brush or wipe any debris or particles away that might irritate your horse’s skin.
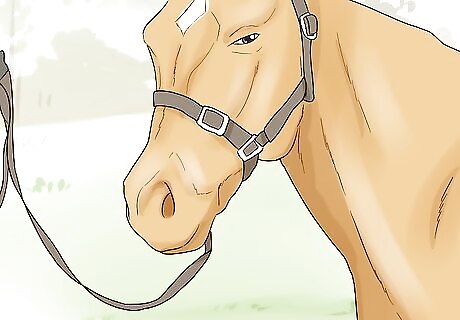
Place a lead on their head. Put a lead on your horse’s head and then tie them to a steady object or have someone hold the lead for you. This prevents the horse from moving around too much while you’re wrapping their legs, keeps them pointing in the right direction, and keeps you safer if the horse should kick out. You can tie the lead to a fence, gate, or even the stable.
Apply pressure evenly while wrapping. If possible, your goal should be to apply even pressure as you wrap the bandage around the legs. If you need to tighten it more, make sure to only apply that tightening pressure as you go around the front of the leg. Applying pressure at the front ensures a firm wrap, but applying pressure around the back can actually pinch the horse’s tendons and cause injury. Use two hands when you apply the wrap so that you can guide it as you circle the horse’s legs. This will also let you apply pressure around the front and prevent pressure from being applied to the rear of the leg.
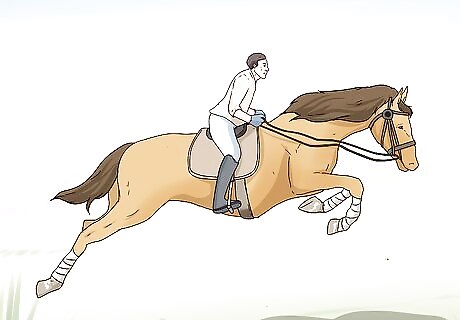
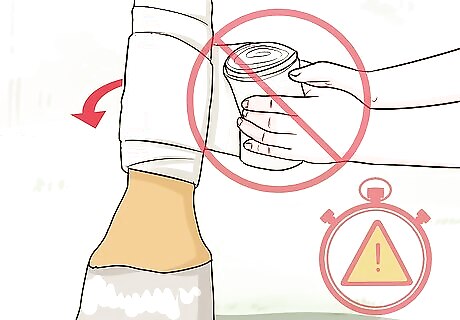
Use polo wraps for mounted work. There are several boots and wraps available to protect your horse’s legs and feet and each are appropriate for specific functions. Polo wraps are great for mounted work, such as riding, jumping, and longeing. Polo wraps aren’t to be used when the horse is in the stall or in turnout, because the wraps can unravel and the horse might step on the wrap tail, which effectively creates a cinch and can cause bad injury.
Purchasing Supplies

Distinguish polo wraps from standing bandages. Because polo wraps and standing bandages look similar, some supply stores mislabel them. If you’re buying your wraps from a reputable supply store, this shouldn’t be an issue. Make sure that you’re getting the right dressing for mounted work to help prevent injury to your horse. Polo wraps are made of thicker material, like fleece, and standing bandages are made of thinner woven material, like cotton.
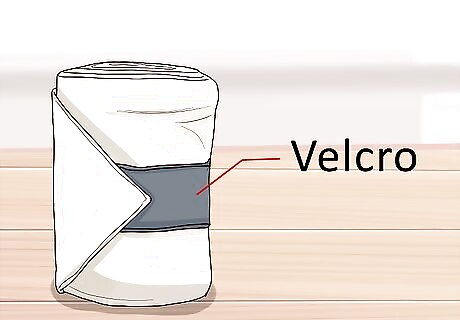
Look for Velcro. Anymore, polo wraps come with 2-inch Velcro tabs sewn on to each wrap, although you may find some older wraps that don’t have the Velcro tabs. Opt for wraps that have the Velcro sewn in so that you don’t have to rely on tape, such as duct tape, to hold your horse’s wraps on. Velcro also makes the wrapping process quicker and easier for you and your horse.
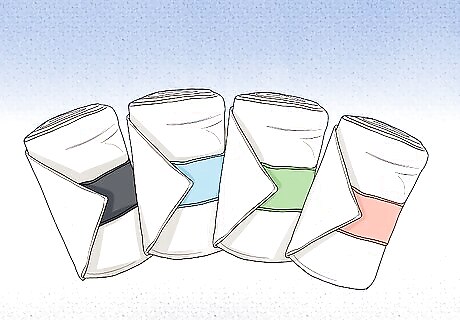
Choose from a variety of colors. You might want your horse to have flashy wraps, especially if you’re doing your mounted work in front of others. Whether you’re performing or practicing, you have a variety of color options, such as red, pink, green, and even patterns like argyle and camouflage. Your local supply store may only carry standard colors, so look online and get creative with your color choices. You can find a wide range of color and pattern options from online suppliers.
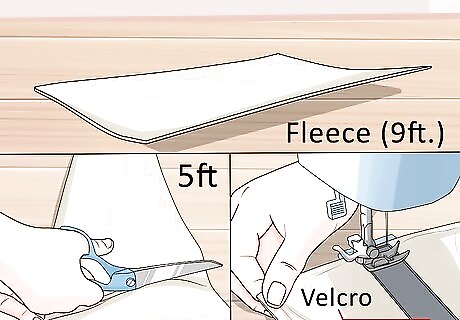
Make your own wraps. You can make your own wraps fairly easily and relatively inexpensively. Purchase 3 yards (9 feet) of fleece, and cut into 5-inch strips. Fold the corners on one end into a point and sew them in place. Then sew on 6-inch strips of Velcro to each end. The Velcro strips will be on opposite ends of the strip, as well as opposite sides of the fabric.


Comments
0 comment