views
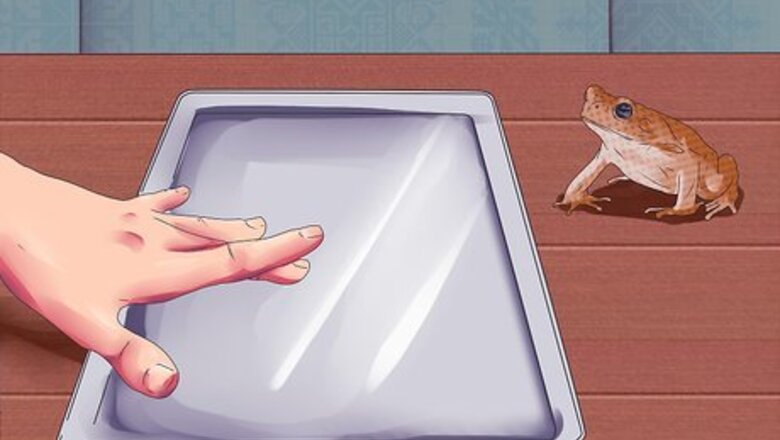
- Set the frog on its back on the dissection tray before you get started.
- Examine the exterior of the frog first. Take a closer look at its head, inside of the mouth, and cloaca.
- Identify the key organs (like the fat bodies, heart, and lungs) and remove the stomach and digestive tract. Then, identify the urogenital organs (like the kidneys and genitals).
Getting Started
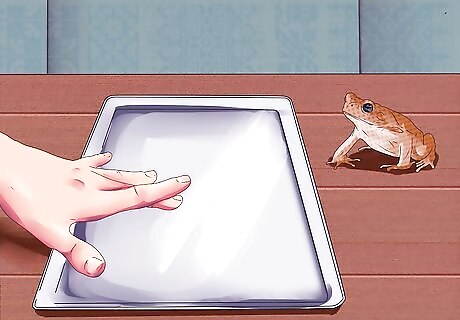
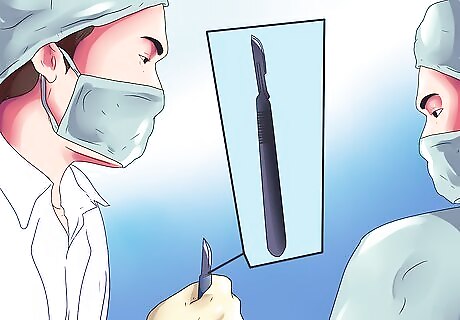
Prepare the dissection tray and get your frog. Frogs and other small animals are typically dissected in biology labs to learn anatomy. If your class is going to dissect a frog, your teacher should provide all the necessary tools for the job. It doesn't take much, though. You'll usually need a clean dissection tray and some pins to hold the frog’s skin out. The tray is a bit like a baking pan with a rubber lining on the bottom. To make incisions, you'll need a sharp scalpel and a pair of tweezers, or some other kind of poking device, dissection pins, lab instructions, and your frog. In the old days, advanced science students would be required to put down their frogs themselves, using chemicals. While this resulted in fresh frogs for dissection, the practice is pretty rare nowadays. For the most part, you'll get frogs that have been dead for quite some time.
Consult any supplementary materials provided by the instructor. Most frog dissection labels involve a basic identification procedure. You'll be required to open the frog, identify the basic organs and systems of the frog, explore the anatomy of the animal, and probably fill out a short lab report to accompany the project. Always defer to materials provided to you by your instructor. If you're not comfortable dissecting a frog in class, tell your teacher. Digital alternatives are common.
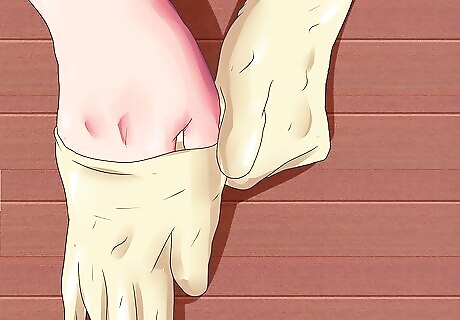
Wear the proper safety equipment. It is important to use latex or rubber gloves, safety glasses, and lab coats. For the most part, dissection specimens are sterilized and safe, but it's still very important to keep your hands, eyes, and mouth free of the formaldehyde used to preserve the frogs for dissection. Sit up straight while you work, wear the protective materials provided to you in the lab, and wash your hands thoroughly afterward.
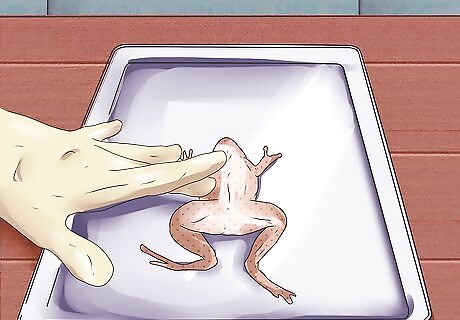
Place the frog in the dissection tray on its back. To start the lab, remove the frog from its packaging and place it on its back, belly-up in the tray. Some frogs will be slightly stiff from the preservative solution, meaning that you may need to massage them out slightly, bending the legs and softening the joints until the frog sits comfortably on its back.
Examining the Exterior
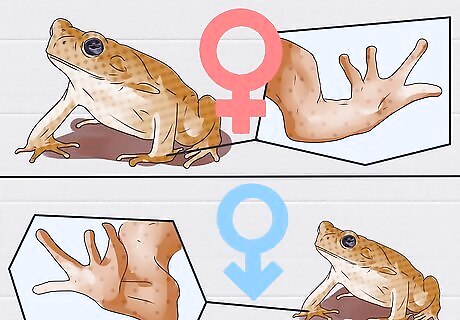
Identify the sex of the frog. The easiest way to quickly tell the difference between male and female frogs isn't to look between the legs, but to look at the feet. The front feet of male frogs should have a fatter thumb pad, and the thumb should look bulbous and fatter than the thin fingers of the female frog. If the specimen is female, keep an eye out for eggs and enlarged ovaries, which may need to be removed before you can identify certain organs.
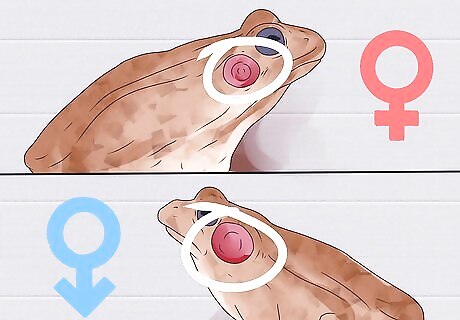
Examine the head. On the head of the frog, most labs will want you to label and recognize a few important features. The eyes and the thin nictitating membranes that cover the eyes, so the frog can see under water, are the most important and probably easiest to locate on the frog's head. You should also locate and label the mouth. The external nares are the technical term for the frog's nostrils, which are used for breathing and should be far forward, above the mouth opening. Each tympanum is located behind the eyes, and is a flattish round spot used for sensing sound.
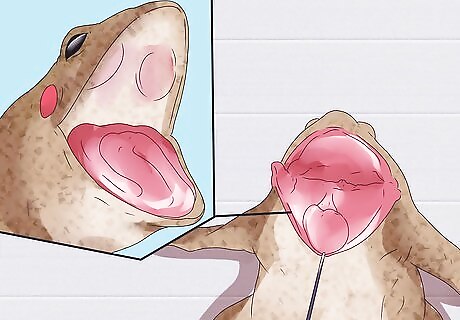
Examine the inside of the mouth. Use your scalpel to cut the membrane that connects the hinges of the frog’s mouth and open the mouth widely to examine the inside. You should be able to see and label the esophagus, which connects to the stomach, and the glottis, which connects to the lungs. Also easy to identify is the tongue, which is quite large and stretchy. The eustachian tubes are to the left and right of the back of the throat, and are used to equalize pressure. The vomerine teeth are behind the maxillary teeth, though both are used to secure prey and keep it secure in the mouth.
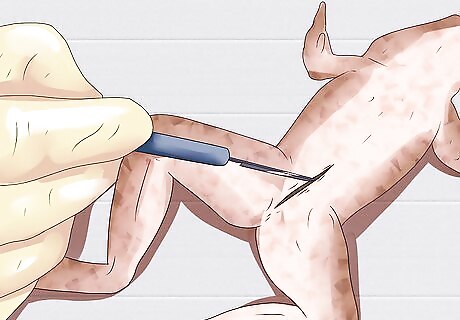
Find the cloaca. The cloaca, which is where you will begin the incision to open the frog’s body cavity, should be between the frog’s hind legs. Use scissors to lift the abdominal muscles away from the body cavity at the cloaca, if necessary, and make your incision when you're instructed to. It's always important to wait for specific instructions in the lab.
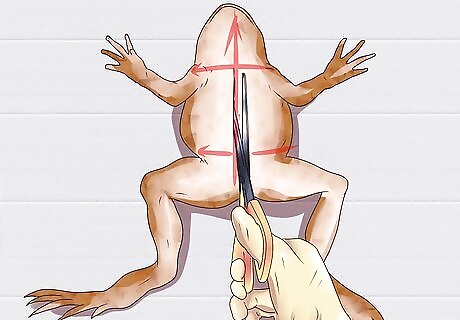
Open the frog as instructed. Different instructors will have different opening techniques, but for the most part you'll start with a basic "X" pattern: one cut down each leg, connected by a single cut up the belly. To start, cut out toward each leg, then connect them with a single straight cut up the "girdle" in the center of the frog's belly. Cutting open the torso with an "H" pattern is also common. To do this, make transverse (horizontal) cuts just inside the arms and legs, and connect them with a lateral cut up the belly. This should create two hefty flaps that you can pull back and open the frog, pinning them to the tray if necessary.
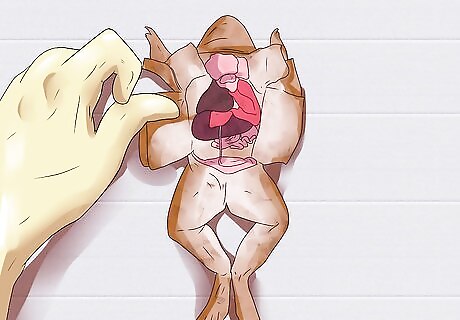
Lift the flaps of the body wall and pin back. To get the skin out of the way and open up the frog to work, it's usually common to pull the skin back and secure it into the rubber bottom of the dissection tray with pins. Pull it back gently until it connects with the bottom of the tray, then use a pin at each corner to secure the skin back. Be careful not to tear the skin.
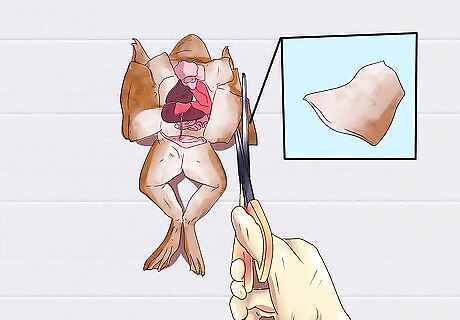
Remove the peritoneum membrane. There is a spiderweb-like membrane that covers many of the organs, which you may have to carefully pick off to get a clear view of the organs inside. Make a careful incision to pierce it, being careful not to poke any of the organs, then pull it loose and free of the body cavity to expose the organs and move forward.
Identifying Key Organs
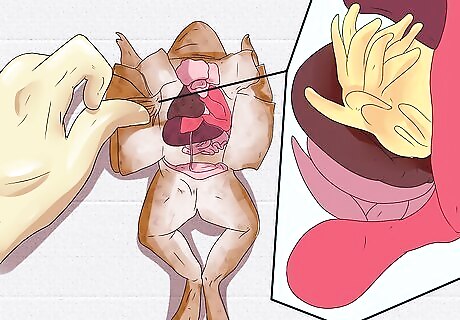
Locate the fat bodies. These should look spaghetti-like with orange and yellow grids of tubes along the abdominal wall. If you have a larger frog, the fat bodies may actually need to be removed to see the other organs. If you have trouble seeing beyond this stuff, make sure it's OK with your teacher to remove it before moving forward.
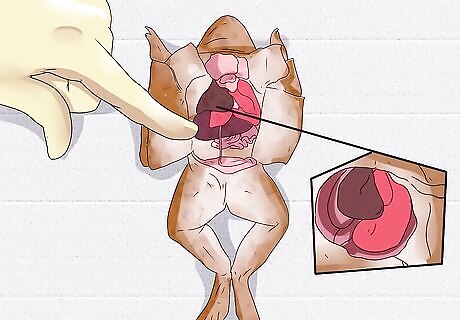
Find the liver. The liver is the biggest organ in the frog's body, and should be the easiest to locate. It's usually brownish and composed of three big structures, or lobes. Sometimes, it's also streaked with a greenish or bluish color, as well. For the most part, you won't want to remove the organs until you've identified them. They can help to keep an accurate portrait of the anatomy, finding other organs in relation to what you've already identified. Follow the instructions of your lab instructor, however, and remove them when it comes time to do so.
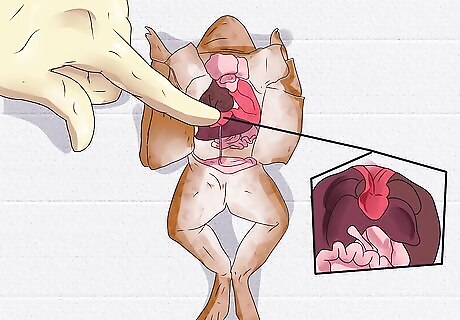
Identify the heart. The heart has a triangular shape, and it's just above the liver. It's composed of left and right atriums on top and a single ventricle that runs along the bottom of the frog's heart. The conus arteriosus is the big vessel that comes out of the heart and pumps blood throughout the frog's body.
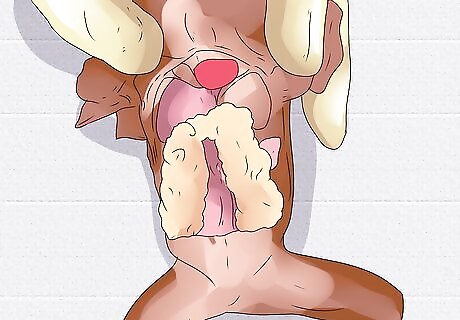
Locate the lungs underneath the heart and liver. The frog's lungs are quite small, shaped like little beans, and should feel slightly spongy in texture. You may have to pull the liver and heart up and out of the way to find them. If you have trouble finding the lungs, you're not alone. Ask your teacher for help if you're struggling.
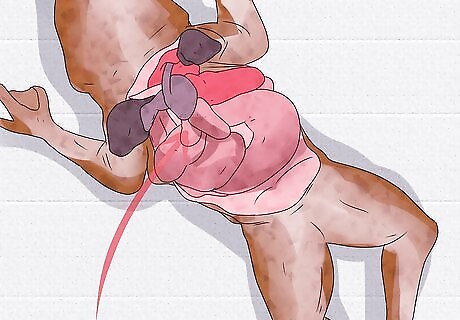
Locate the gallbladder. There should be a small and greenish sac under the lobes of the liver, where digestive bile is stored for the frog's digestive system. This is usually quite striking, because it looks a whole lot like snot.
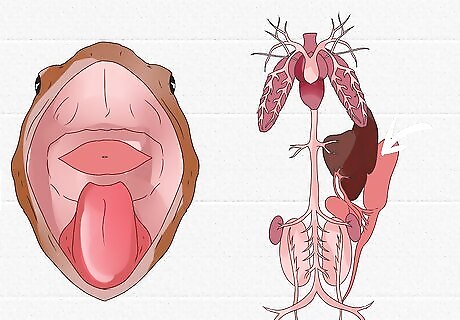
Follow the esophagus to find the stomach. The esophagus is the tube that leads from the frog’s mouth to the stomach. Open the frog’s mouth and find the esophagus, then gently poke your probe into it and see where it leads. Follow that tube to find the stomach and begin examining the digestive tract of the frog, your next major step in the dissection process.
Removing the Stomach and Digestive Tract
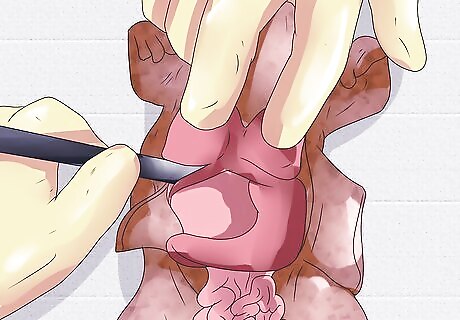
Lift the liver and intestines and remove them to find the stomach. If you haven't already, it's usually common to remove the liver at this point to continue exploring the cavity inside. The stomach curves under the liver. When you find the stomach, follow its curve down to the bottom to look for the pyloric sphincter, which is a valve that channels digested food into the small intestine.
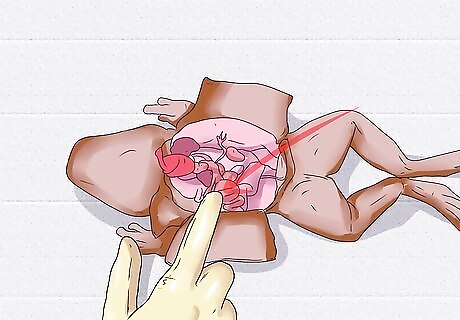
Identify the small intestine. The small intestine is what attaches to the end of the stomach, and is made up of the duodenum and the ileum, connected by the mesentery. Blood vessels that trail away from the mesentery are used to carry the energy from the digested food away from the intestines and into the blood stream. It's how the frog gets its strength and energy from the food it eats. Follow the small intestine to the large intestine. The large intestine, also known as the cloaca, should widen at the bottom of the small intestine. This is where waste exits the body of the frog.
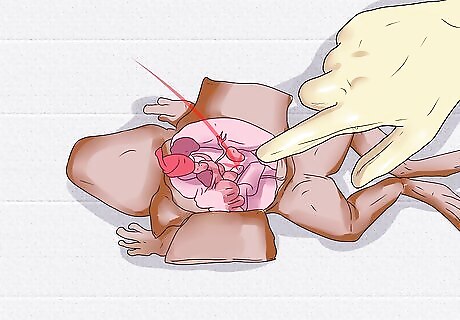
Find the spleen. The spleen of the frog should be dark red, and shaped like a little orb. This is where blood is held during the digestion process, aiding in carrying away the energy from the frog.
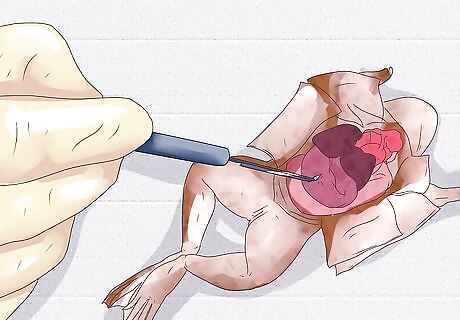
Open up the stomach very carefully. Depending on your assignment, some instructors will want you to open the stomach and some may not. Always follow instructions. If it is part of the project, use your scalpel to carefully open the stomach with a small horizontal cut. Keep your face up and away, in case any spitting occurs. What seems to be inside? You might notice bile or even some partially digested food.
Identifying the Urogenital System
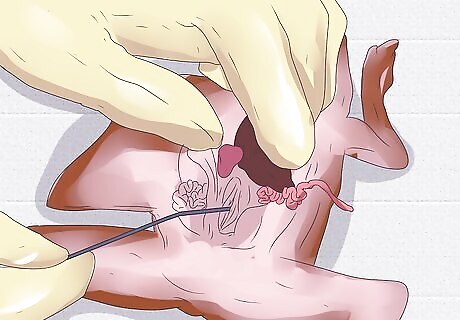
Find the kidneys. In frogs, the genital and excretory systems are linked. The kidneys are like flat bean-shaped organs, which can be found basically where they are in humans, towards the lower back, near the spine of the frog. Also like in human anatomy, they should be relatively dark, sometimes highlighted by yellow fat bodies, which are attached at the top. You probably won't remove any organs from the frog at this point in the process. You should have removed everything necessary to locate and identify all the organs in the frog, making removal unnecessary.
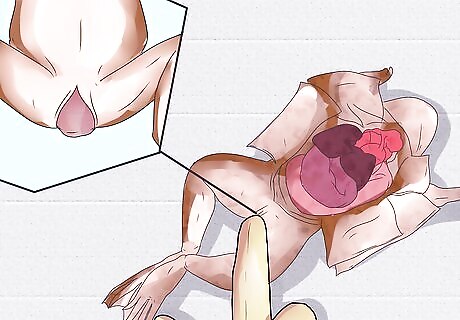
Find the genitals. Confusingly, the genitals of frogs can look awfully similar, due to a phenomenon known as "vestigial oviducts," on male frogs. The best way to tell the difference is to look for testes. If you don't see them, you've got a female. If you've got a male frog, the testes should be at the top of the kidneys. They should be pale and round. If you've got a female frog, find the oviducts. There should be a curly structure outside the kidney, where female frogs produce eggs.
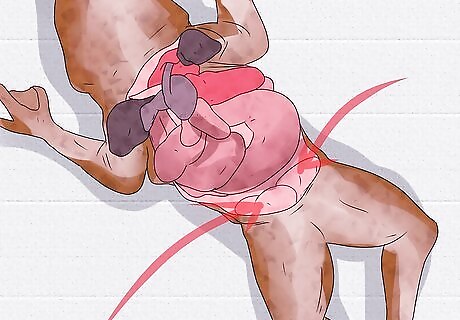
Identify the bladder. The bladder is an empty-looking sac in the lowest cavern of the body, which stores urine and expels it from the frog's body via the cloaca, the small hole where you started your incision. Frogs expel all waste and sperm through this little hole.
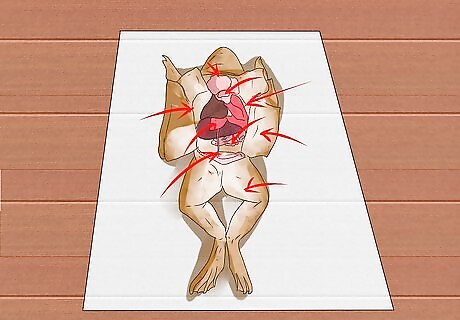
Identify all the organs on your lab report. Typically, you would be presented with a diagram of a frog's organs, which you'll need to label. Different labs may also have different specific assignments or quizzes to complete as part of the project. Before you get rid of your frog, complete any necessary paperwork.
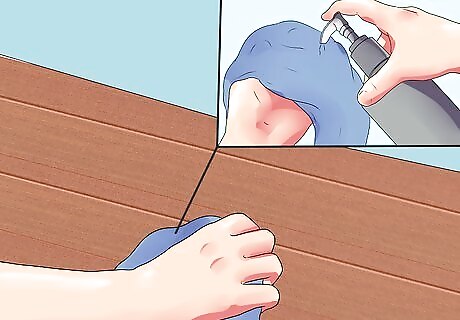
Clean up your space. Discard your dissected frog as soon as you're done with your paperwork. In the lab, there should be a designated disposal area and a place to clean up your dissection tray. Wash it thoroughly with soap and water, throw away your gloves, and wash your hands thoroughly. It may take some work to get the smell of the preservative off of your hands, so you may want to return to them after a couple hours for another scrubbing.


Comments
0 comment