views
NOTE: The version of NX used for this tutorial is Siemens NX 7.5.
Center Point and Diameter Method
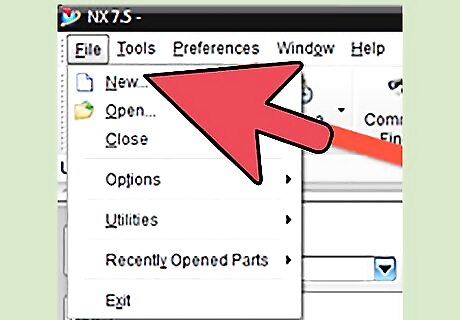
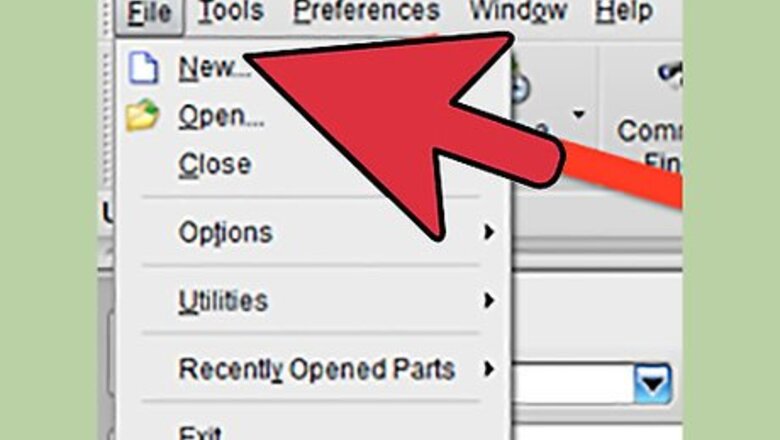
Open NX. The screen will say "Welcome to NX" at the top. To begin modeling, click on "File" at the top left corner, then click "New" from the drop-down menu.
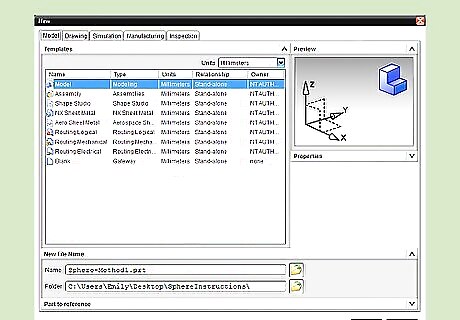
Create a new part. When the New window opens, make sure the "Model" tab is selected at the top and that the "Model" row is highlighted in blue in the Templates box. Select your units (millimeters will be used for this tutorial), name your part, and select a folder in which you want to save the file. Click "OK".
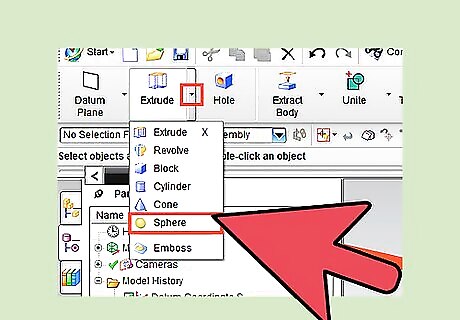
Create a sphere. In the top, left corner, there will be a button labeled "Extrude". Click the small arrow to the right of the Extrude button to open the drop-down menu. Click on "Sphere". This will open a small window on the left side of your screen.
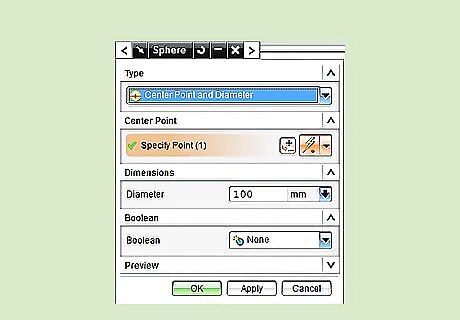
Input sphere specifications. Within the "Sphere" window, select "Center Point and Diameter" under the Type drop-down menu. Here you would input the center point and diameter of your sphere, but for this tutorial, keep the center point at the origin (this is the default setting so you don't need to click anything) and input 100 for the diameter. Click "OK".
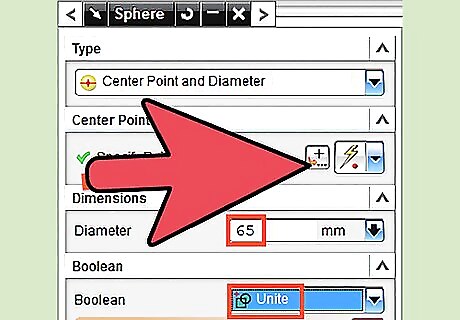
Create another sphere. First recall the Sphere command as you did in step 2. Again, choose "Center Point and Diameter" as the Type. Next to "Specify Point", click on the grey button with the plus sign. This will open a window titled "Point".
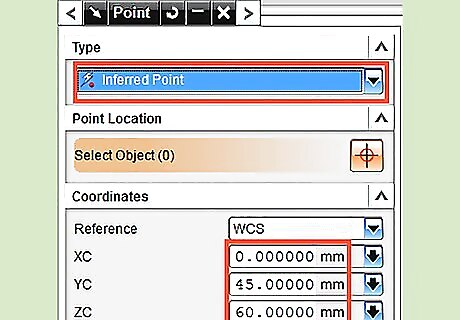
Select the origin and diameter. XC, YC, and ZC represent the 3-Dimensional center point for your second sphere. For this tutorial, select "inferred point" as the Type and input 0, 45, and 60 for XC, YC, and ZC respectively (see image above). Click "OK". Input 65 as the Diameter and select "Unite" under the Boolean drop-down menu (see image in step 5). Click "OK".
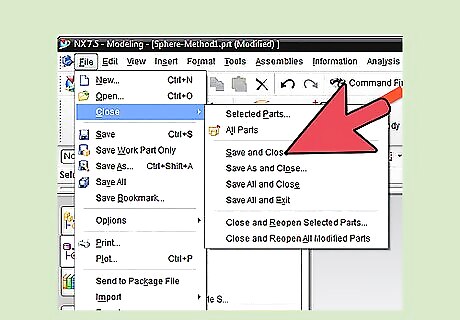
Save and Close. Under the "File" drop-down menu (see step 1), place your cursor over "Close". When the sub-menu opens, click on "Save and Close". This will return you to the initial welcome menu.
Arc Method
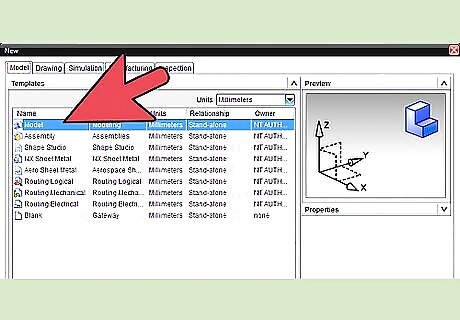
Create a new part. Click on "File" in the top, left corner, then click "New" from the drop-down menu. When the New window opens, make sure the "Model" tab is selected at the top and that the "Model" row is highlighted in blue in the Templates box. Name your part and select the folder in which you would like to save the file. Click "OK".
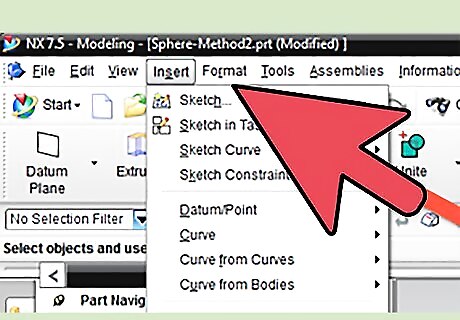
Create a sketch. At the top of the page, click on "Insert" then "Sketch". This will open a window on the left of your screen labeled "Create Sketch".
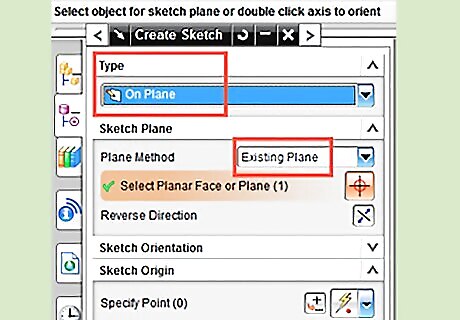
Within the Create Sketch window, make sure the Type is set to "On Plane". Under Sketch Plane, choose "Existing Plane" from the Plane Method drop-down menu. Click on the xy-plane from the 3-Dimensional axis in the center of your screen. The plane will highlight in orange when it is properly selected. DO NOT CLICK "OK". While the Create Sketch window is still open, there will be a toolbar at the bottom of your screen. Click on the Circle icon in this toolbar.
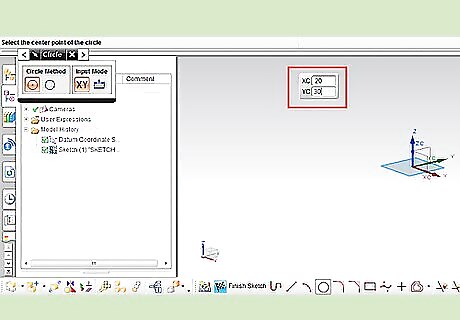
Sketch a circle. A small XC and YC input box will now be next to your cursor. These will be the coordinates of your sphere's center. While the XC number is highlighted in blue, type "20" then hit Enter on your keyboard. When the YC number is highlighted, type "30" and hit Enter.
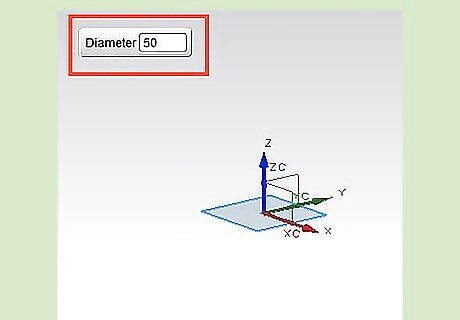
Next, a Diameter input will appear in place of the XC, YC box. Type in "50" and hit Enter. Now hit Esc ONCE on your keyboard to exit the circle.
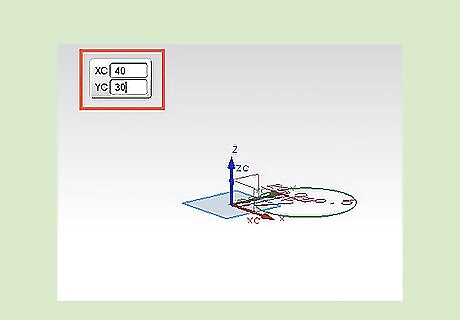
Sketch a second circle. At this point, the circle command should still be active and the XC, YC box should reappear. If it doesn't, repeat steps 2 and 3 with the following specifications. Type "40" as your next XC and "30" as your YC value. Hit Enter.
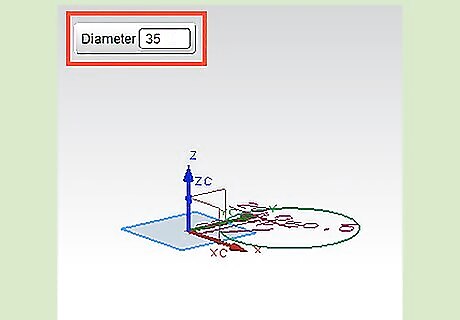
Type "35" for your diameter. Hit Enter. Now hit Esc twice to exit the sketch command completely.
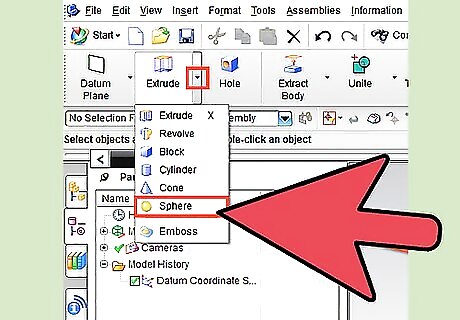
Extrude sphere. In the top, left corner there is a button labeled "Extrude". Click on the small arrow to the right of the Extrude button to open the drop-down menu. Click on "Sphere". This will open a small window on the left side of your screen.
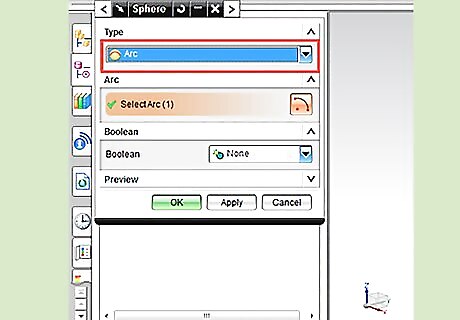
Extrude sphere. Under Type, click on "Arc" from the drop-down menu. In order to select an arc, click on the sketch of your first circle in the center of your screen. Click "OK".
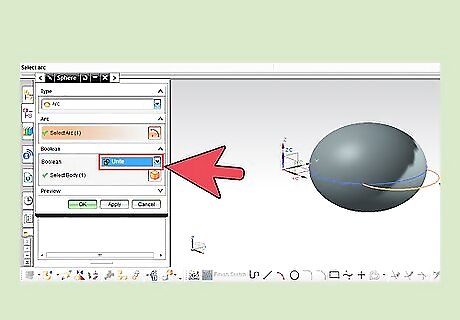
Unite multiple spheres. Repeat steps 5 and 6, clicking on the second sketch. This time, select "Unite" under the Boolean drop-down menu. Click "OK".
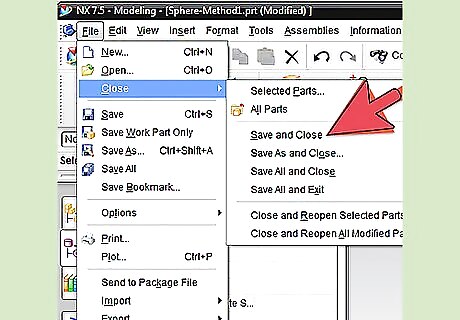
Save and Close. Under the "File" drop-down menu (see step 1), place your cursor over "Close". When the sub-menu opens, click on "Save and Close". This will return you to the initial welcome menu.


Comments
0 comment