views
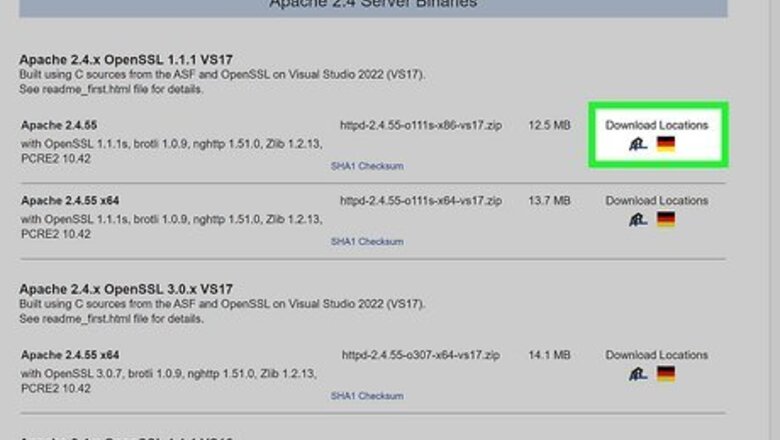
- You can download Apache with OpenSSL from https://www.apachehaus.com/cgi-bin/download.plx.
- To install, copy the Apache24 folder to the root of your C drive, then run C:\Apache24\bin\httpd -k install at the command prompt.
- Once installed, you can start the Apache service and edit the httpd.conf file for your website.
Installing
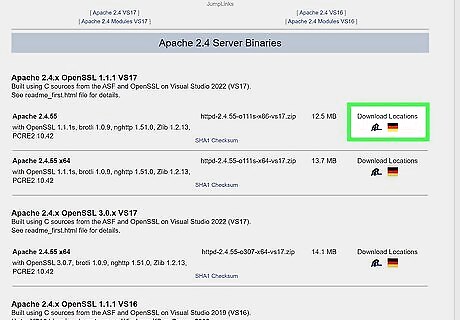
Download the latest Apache binaries from Apache Haus. The official Apache website (https://www.apache.org/) only offers source code to download. You can use a compiled version of Apache with OpenSSL support to avoid dealing with source code. Go to https://www.apachehaus.com/cgi-bin/download.plx. Click the Download link for the latest version of Apache with OpenSSL. Save the ZIP file to your computer.
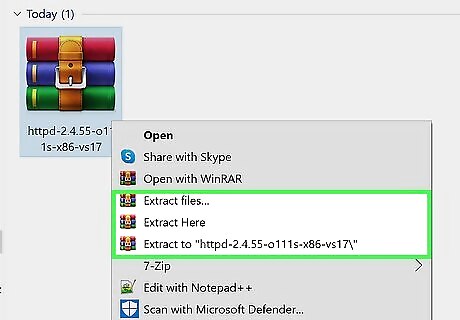
Extract the files. Unzip the file you downloaded from Apache Haus. This extracts a folder that begins with "httpd-2.4.55" to the current folder. Inside the extracted folder, you'll find a subfolder called "Apache24," which contains the complete directory structure for your Apache installation.
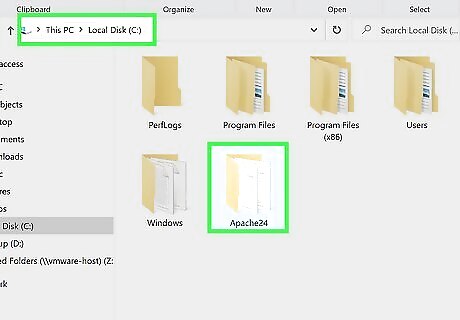
Copy the "Apache24" folder to the root of your C drive. In File Explorer, right-click the Apache24 folder and select Copy (or press Ctrl + C). Then, click This PC in the left panel, right-click the C drive, then select Paste. You'll want to make sure Apache is in the root of your C drive to avoid errors. The installation directory should be C:\Apache24.
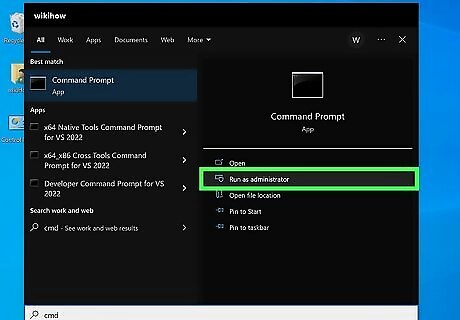
Open Command Prompt as an administrator. To do this, type cmd into the Windows Search bar, right-click Command Prompt, and then select Run as administrator.
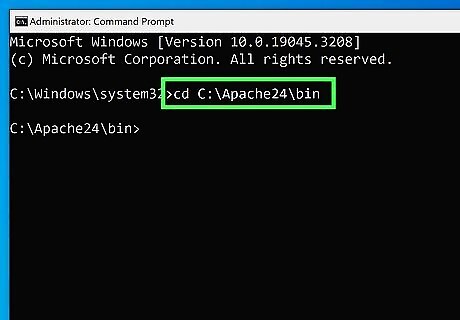
Enter the binary directory. To do this: Type cd and press the spacebar. Type C:\Apache24\bin. Press Enter.
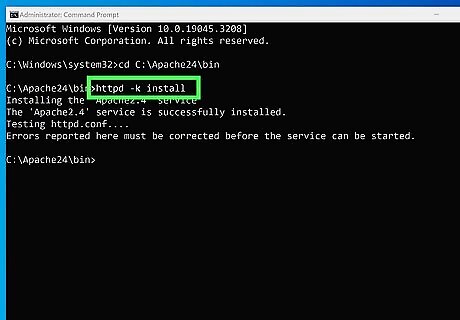
Type httpd -k install and press ↵ Enter. After a moment, you should see a pop-up message saying that Windows firewall has blocked some features of the app.
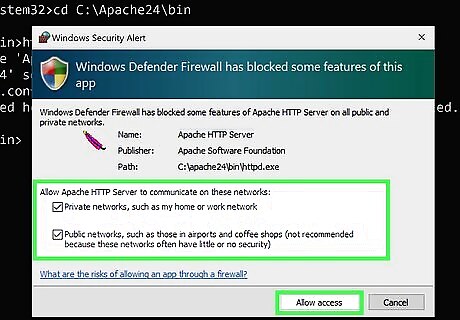
Allow Apache through the firewall. Check the boxes next to "Private" and "Public" networks, then click Allow access to continue. Once allowed, Apache will be installed. You will see errors in the command prompt window once Apache is installed. This is just because the webserver isn’t configured for your website yet.
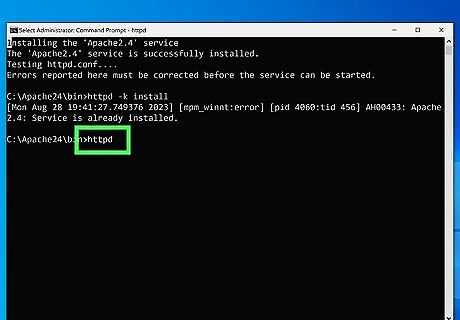
Start the Apache web service. You have two options: To start Apache from Command Prompt, type httpd and press Enter. To stop Apache, use httpd -k shutdown. To restart Apache, use httpd -k restart. Alternatively, you can use the Services panel. Type services.msc into the Windows search bar and press Enter. Then, right-click Apache2.4 and select Start. To stop Apache, right-click Apache2.4 and select Stop. To restart, select Restart. If you want Apache to launch automatically at reboot, right-click Apache2.4, select Properties, and set "Startup type" to Automatic.
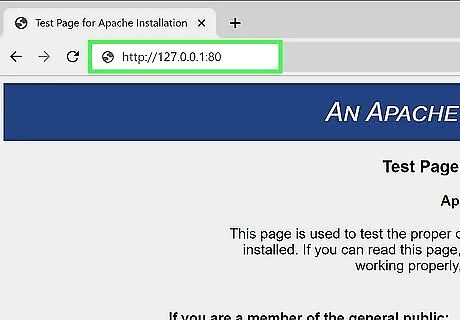
Test the installation. In your web browser, go to http://127.0.0.1:80 to ensure Apache is up and running.
Configuring
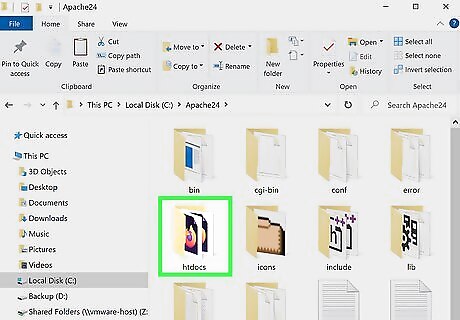
Place your website files in the htdocs folder. By default, Apache uses the path C:\Apache24\htdocs as the source for your website files. Before your website goes live, make sure your HTML files are in that folder. There's a sample index.html in that folder already—the test site you saw when you went to http://127.0.0.1:80. Overwriting that file with your own index.html will automatically replace the homepage with your own.
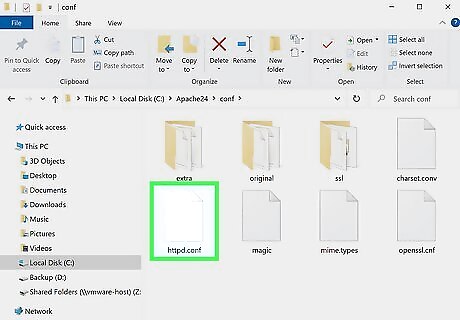
Open your httpd configuration file for editing. To configure Apache for your website, you'll need to edit the file called httpd.conf, which is in C:\Apache24\conf. Go to C:\Apache24\conf in File Explorer. Right-click httpd.conf. Select Open with > Notepad.
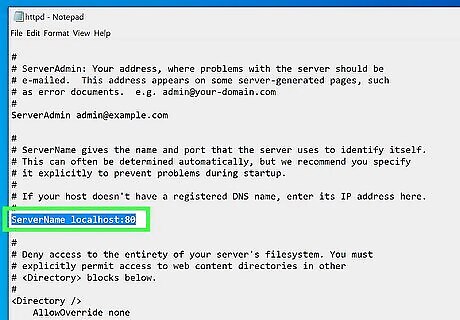
Enter your IP address or hostname next to "ServerName." While Apache may be able to determine this information automatically, it's best to specify which hostname or IP address people will be using to access your website. Scroll to the "ServerName" field. You can find it quickly by pressing Ctrl + F and searching for "ServerName." If you've registered a domain name that's pointing to your computer's IP address, you'll want to enter that next to ServerName before the ":80." For example: ServerName www.wikihow.com:80. If you're going to run Apache on a different port, replace "80" with your preferred port number. If you don't have a registered hostname, enter your computer's IP address instead. Keep in mind that you'll need to use your public IP address if you want people outside of your network to be able to access your self-hosted website. If you don't have a static IP address, you'll need to update httpd.conf every time your IP address changes. Because of this, you should only host a website on your computer if you have a static IP address.
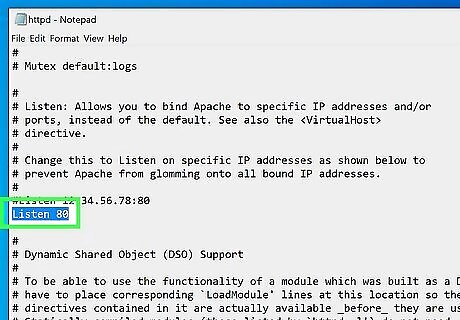
Change the listening port (optional). If you want to allow people outside of your network to access your website, you may find that your ISP blocks traffic to port 80 (the default HTTP port) by default. To get around this, you can run Apache on a different port, such as port 8080. In this case, visitors to your site must add :8080 to the end of the URL to reach your website. Press Ctrl + F and search for "Listen." Below "Listen 80," add a new line that says Listen 8080 (or your preferred port. If you don't want your website to be accessible on port 80, you can comment on the "Listen 80" line by adding a hash (#) before it or deleting it entirely. If you designate another port, make sure you allow it through your firewall.
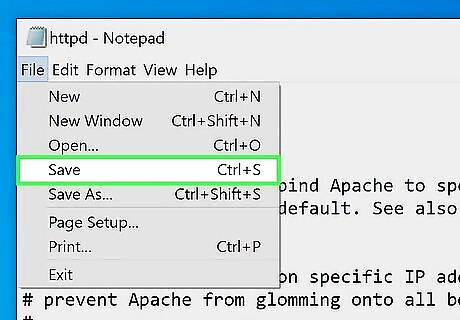
Save your changes and restart Apache. Click the File menu and select Save to save your changes. Any time you make changes to httpd.conf, you'll need to restart Apache. There are two ways to do this: Command Prompt: Type httpd -k restart and press Enter. Services.msc: Right-click the Apache2.4 service and select Restart.
Setting Up SSL
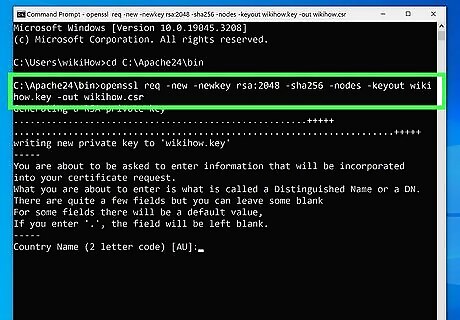
Request an SSL certificate. If you want visitors to your website to be able to connect securely with SSL (https), you'll need to install an SSL certificate. The first thing you'll need to do is use the built-in OpenSSL tool to create a certificate request, which you can then submit to a certificate authority like DigiCert or Comodo. Open Command Prompt, type cd C:\Apache24\bin, and press Enter. Type or paste this command and press Enter, replacing "server.key" and "server.csr" with the name of your server (e.g., wikihow.key and wikihow.csr: openssl req -new -newkey rsa:2048 –sha256 -nodes -keyout server.key -out server.csr. When prompted for the "Common name" or FQDN, enter your full hostname (e.g., myserver.wikihow.com). When prompted to enter a challenge phrase, leave it blank. Follow the prompts to enter information for your certificate, including your 2-letter country code, other region info, and your email address. This creates two new files in the bin folder—server.csr and server.key (with your server's name replacing server).
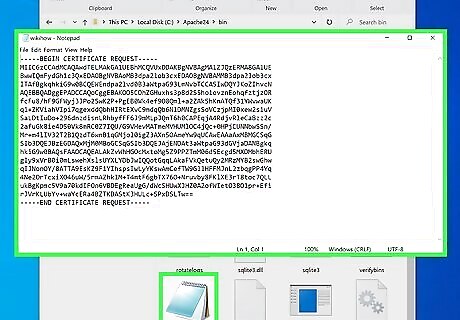
Submit your certificate request to a certificate authority (CA). Each authority has a different submission process, but you'll usually need to make an account and paste in your request key. Right-click the server.csr file and select Open with > Notepad. Copy everything inside the file by selecting it and pressing Ctrl + C. Go to your preferred SSL certificate authority's submission page and paste the copied text to submit your request. When your certificate is ready, you'll receive two files via email, both ending with .crt. Copy the file called server.key to C:\Apache24\conf.
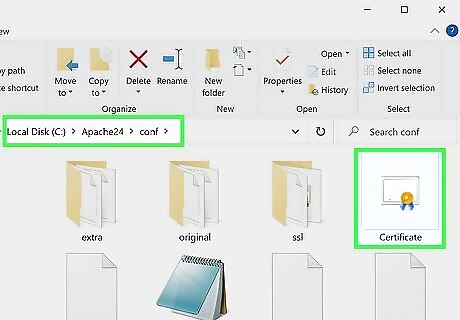
Copy your certificate files to the Apache24\conf folder. Once you receive the certificate files from your certificate authority, both ending with .crt, copy or unzip them to C:\Apache24\conf.
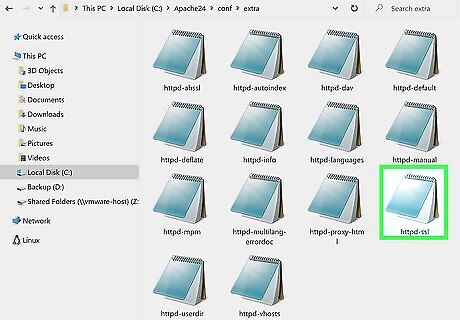
Open the SSL configuration file for editing. To do this, navigate to C:\Apache24\conf\extra, right-click httpd-ssl.conf, and select Open with > Notepad.
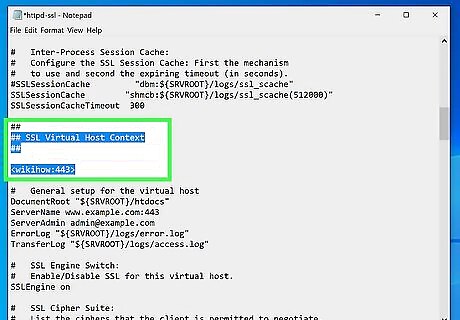
Update the virtual host information. Scroll to the "SSL Virtual Host Context" section of the file, where you'll see a "General setup for the virtual host" configuration. Replace the value of ServerName with the hostname for your website, leaving :443 intact. Also, replace the ServerAdmin value with your IP address.
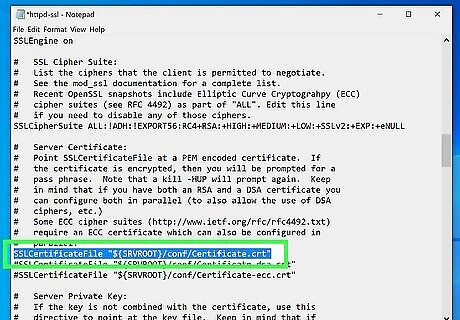
Replace the sample file names with your certificate file names. Replace the value of "SSLCertificateFile" with the name of the .crt file sent by the CA (the one that begins with your domain name). For example, SSLCertificateFile "${SRVROOT}/conf/server.crt" Replace the "SSLCetificateKeyFile" value with the name of the .key file you generated earlier. You'll also need to add another directive for SSLCertificateChainFile if not present for the other .crt file sent by the CA. For example, SSLCertificateChainFile "${SRVROOT}/conf/cabundle.crt. Save the file.
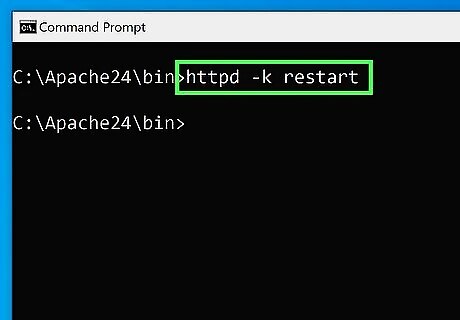
Restart Apache. Once Apache restarts, your certificate will be installed. You should now be able to access your site by typing https://, followed by your hostname. If needed, make sure you've opened port 443 in your firewall to allow HTTPS connections.




Comments
0 comment