views
- Put the bow tie around your neck so one side is slightly longer. Cross the long side over the short side, and pull it through the neck loop.
- Fold the short side at its widest point to make a bow shape. Hold it horizontally where your tie overlaps.
- Drape the long side over the front of the short side. Fold the long side into a bow shape at its widest point.
- Pull the folded end of the long side through the tie’s loop. Pull the folded ends on each side of the tie to tighten it.
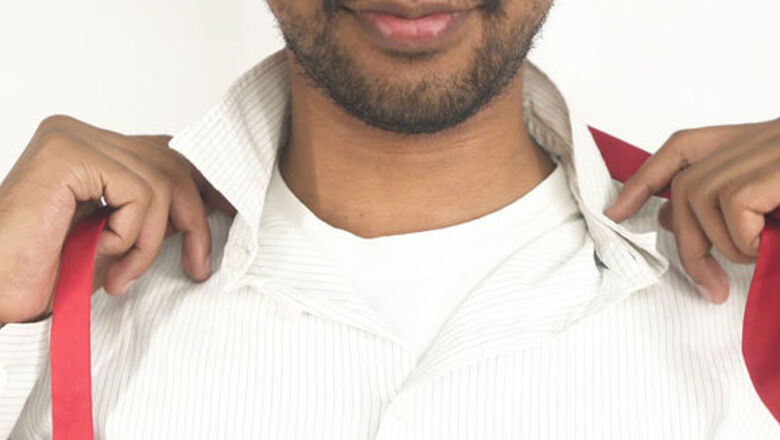
Drape the tie around your neck so one side is longer.
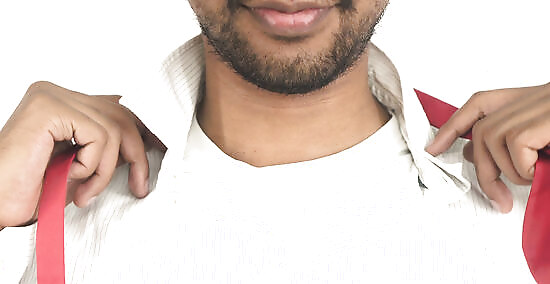
Put the longer side of the tie on the same side as your dominant hand. Wear a button-down collared shirt with your bow tie for a classic look. Lift your collar, and put the bow tie around your neck so that the pattern is face-up. Position your tie so one end hangs roughly 1 ⁄2–2 inches (3.8–5.1 cm) lower than the other end. From now on, the longer side is called “side A” and the short side is “side B.” Measure your neck to find out what size bow tie you need. Many bow ties have adjustable sliders or buttons that let you change the length to fit around your neck.
Cross the tie’s long side (side A) over the short side (side B).
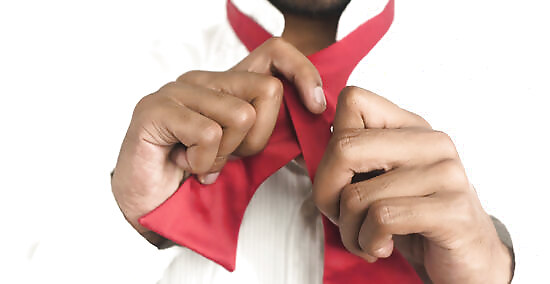
Loosely overlap your tie right below your Adam’s apple. Pull side A over so the strap, which is the narrowest part, is just above the “leaf”, which is rounded, bulged section near the end, of side B. Leave 1 or 2 finger-widths between your skin and the tie where it overlaps.
Pull side A up through the neck loop.

Set side A on your shoulder after so it's out of the way for now. Push the end of side A through the bottom of the neck loop and pull it through. Pull side A tight until your tie is a finger-width away from your neck.
Fold side B over at its widest point.
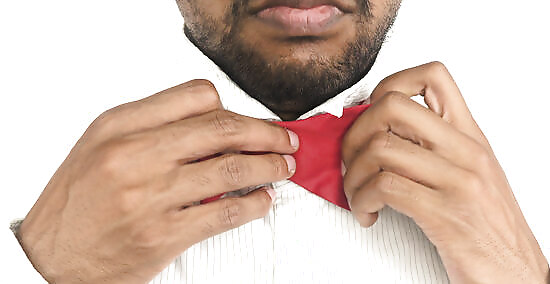
The fold creates the first loop of your bow tie. Pinch where your tie overlaps, and bring side B toward your non-dominant arm. Then, lift up the shorter end and fold it over on itself at the widest part to make the bow shape. Turn that section of your tie so it’s horizontal and right below your Adam’s apple. Keep your tie pinched so it stays tight against your neck.
Bring side A over the middle of the bow.
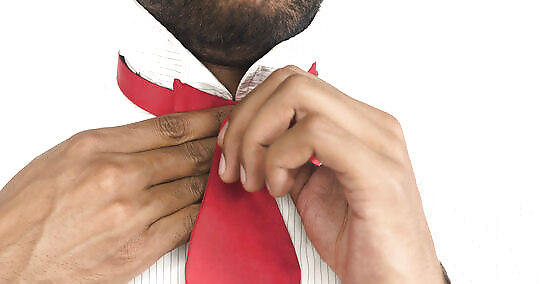
The tie strap forms the center of your bow tie’s knot. Take the longer end off your shoulder and drape it over the skinniest part of the bow shape you just made. Make sure the patterned side faces out and lies flat on the bow.
Fold side A into a bow shape.
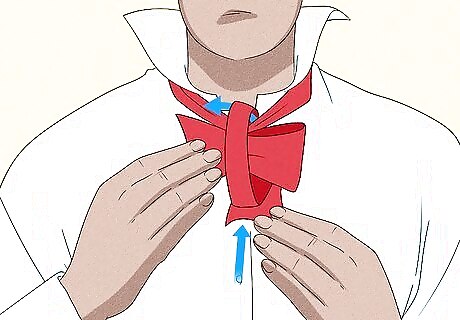
Repeat the same fold you did for side B for the bow’s other half. Pinch side A right above where the strap starts to widen out and fold it back toward your chest. Then, fold your tie down at the widest point to create the bow shape.
Pass side A through the loop behind side B.
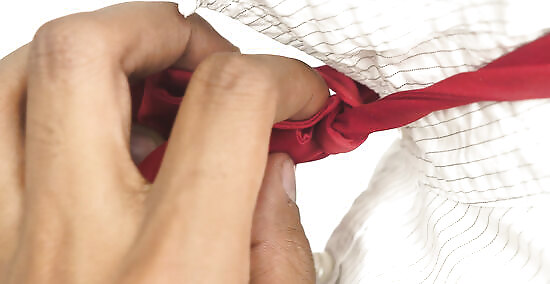
Each side of the bow will have a folded and flat part. Pinch the ends of side B together to expose the loop in your tie. Gently push the folded section of side A into the loop and pull it through. Smooth out the tie so it sits flat and aligns with the bow shape in front of it.
Pull the folded parts of the bow.
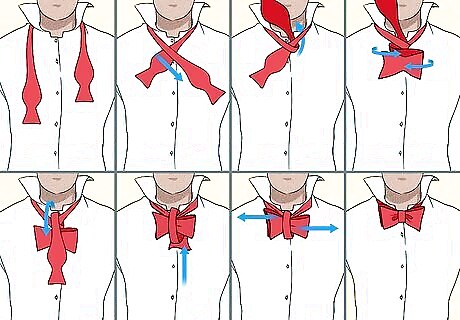
You’re all done tying your bow tie after a quick tightening. Gently pull on the loops on each side of the tie until the knot is secure. If you need to even out the sides of your tie, then pull on the flat ends to make your adjustments. After that, just lower your shirt’s collar and finish getting dressed! Check your tie periodically while you’re wearing it to ensure it’s still straight and tight.




Comments
0 comment