
Create a Screenplay With a Template

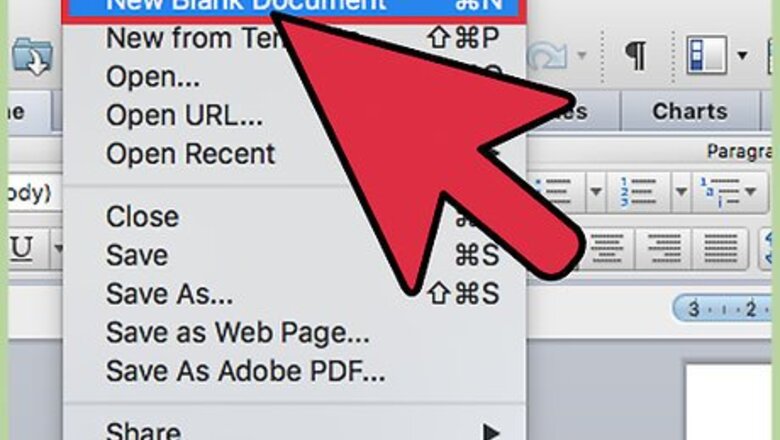
Open a new document. With MS Word running, select File from the menu bar in the top left corner of the screen. Then, choose New. This will give you a choice as to which style and layout you want the document to be created in.

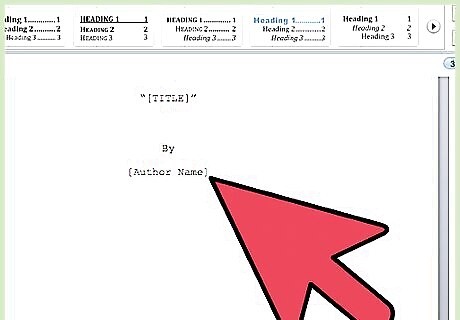
Locate a screenplay template. In the search bar, type the word “screenplay.” Currently, Microsoft offers one premade screenplay template for MS Word 2013/2016. Double click on it after the search is completed. This will launch the screenplay-formatted document. In MS Word 2010, the steps are essentially the same. Open a new document, then select templates, and search Microsoft Office Online. Choose one of the two available, then download it.
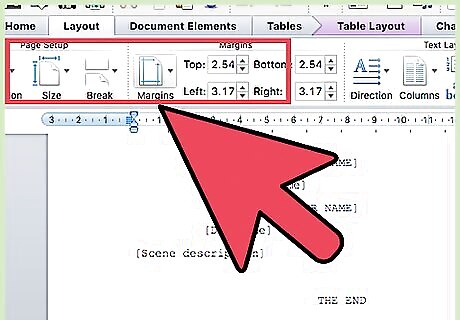
Adjust the screenplay template as desired. There are no hard and fast rules governing the style in which screenplays are produced, though there are general guidelines, vocabulary, and common features. Check with the specific studio you’re writing for to find out how to customize your specific document. Think about how to adjust margins, font size, fonts, and line spacing.

Create your own template. If you’ve already written or have a screenplay saved on your hard drive, open it in MS Word. In Word 2013/2016, click File > Save As > Computer. Type a name for your template in the file name box. Then, in the drop-down “save as type” menu just below the file name box, select Word Template. If the document contains macros, select Word Macro-Enable Template. Click save. If you want to change the location where your template will be saved, click File > Options > Save and type the folder path you want to use in the default personal templates location box.
Using Style and Formatting
Consider using style and formatting patterns to format a screenplay. If you’re unhappy with the template layout provided by Word, you can modify the style and formatting of your document in order to create new formatting patterns. These patterns could be used again if you save them, or you can create a new template based on a document which uses these style and formatting rules. You could think of formatting as creating your own template.

Select a line of text. The text might be a character name, a piece of dialogue, or some stage directions. Select the line of text by clicking the left button on your mouse with your cursor at the left edge of the line of text. Alternately, you could highlight the text by clicking the left button of your mouse to the right or left of the line of text you want to adjust. Finally, you could highlight text by bringing up a blinking cursor within the text you’ve written and holding down the shift key and an arrow key to highlight the text you want to format. To highlight text to the left of the place your cursor is, hold the shift key and the left directional button. To highlight text to the right of the place your cursor is, hold the shift key and the right directional arrow. If you have multiple lines of text, you can select them at one time and apply the formatting changes you desire to all highlighted lines.

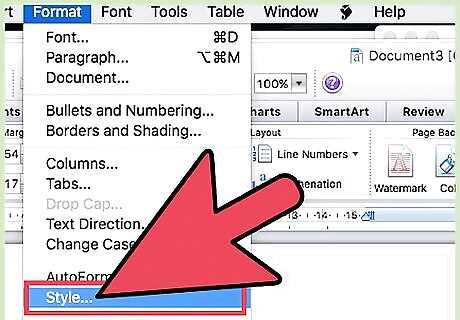
Open the Styles and Formatting pane. With your text highlighted, click on the word “Format” on the menu bar. The drop down menu will display several options. Click on the words “Styles and Formatting.” This will open the Styles and Formatting pane. Alternately, you can open the Styles and Formatting pane by clicking the Styles and Formatting button on the toolbar. Just click the Styles and Formatting button located next to the script character drop-down menu to open the pane. The button is found at the far left edge of the toolbar. It contains two letter “A”s, each of a different color, with one positioned above and to the left of the other.
Select text with similar formatting. Right click on the still-highlighted text you selected initially. A drop-down menu will open with a number of options. The bottom-most option reads “Select Text with Similar Formatting.” Click on this option with the left button of your mouse. All text with formatting similar to that which you highlighted originally will become highlighted. So, for instance, if you have all character names in a certain font and size centered exactly above a line of text, you can highlight a single instance of any character’s name, then use the “Select text with similar formatting” option to adjust all character names in your screenplay at once.

Select the format you want. After you’ve highlighted all the text you want to assign a given style, choose a style from the pane on the right. The Styles and Formatting pane should still be open on the right of the screen. Choose the style format you want to change the highlighted text to by left-clicking on it.

Create a new style. If your highlighted text does not conform to an extant style, you can assign the formatting and style within the highlighted text a name by clicking the button near the top of the pane which reads “New Style.” You can then assign a name, align the text to left or right, choose your font, and make other adjustments as you see fit.
Creating a Macro for Setting Up Scenes (Word 2013/2016)
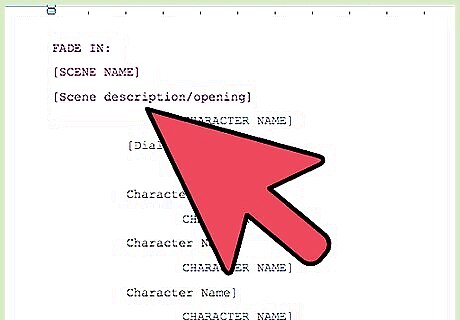
Think about why you want to set up a scene. Typically in a screenplay, the master scene heading (also known as a slug line) is the series of words which broadly identify the content which follows. For instance, scene headings might read “INT. OFFICE - DAY” (interior office during the day). This helps orient the screenplay’s reader to the scene. Scene headings should, as in the aforementioned example, be in all caps, two lines down from the last line of dialogue or description in the previous scene.
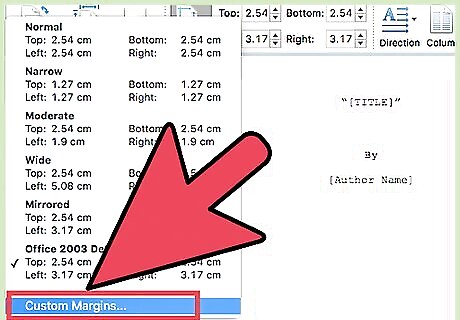
Prepare to record the macro. A macro is a sequence of saved commands which can be executed immediately by assigning them to a single keystroke. To prepare your macro, set your margins. Format page margins by clicking on the Layout tab, then Margins, then Custom Margins. The top, bottom and right margins should be set at 1". The left margin should be set to 1.5". Set font to Courier New, 12 point. These choices are standard in screenplays. If you’d like to work with a different layout, set your margins accordingly. In Word 2007, prepare to record the macro by setting your margins. Format page margins by clicking on the Page Layout tab, then set the margins and font to the designations listed above. Then open the Developer tab. Display the Developer tab by opening the office button (the top left button), Word Options (at the bottom), under Popular check Show Developer tab in the Ribbon.
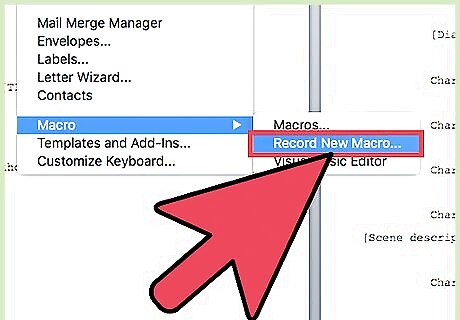
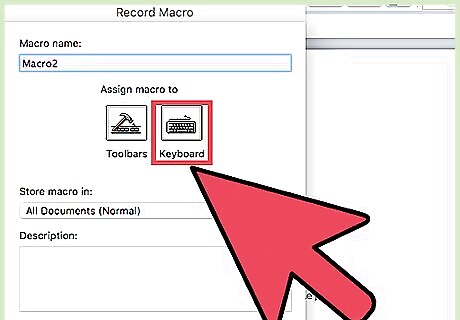
Click View > Macros > Record Macro. Type a name for the macro. Since this macro is for setting up scenes, assigning the name “Scene heading” to this macro is a logical choice. Ensure you’ve selected “All documents” at the bottom of the drop-down menu reading “Store macro in.” In Word 2007, click Record Macro. This button is located on the left side of the developer tab. Store the macro in Document 1 (instead of Normal, so that you can save it as a distinct screenplay template). Name the macro 'Scene' or 'Heading'. Click the keyboard icon to assign the macro to a keyboard shortcut. You can then press the keyboard button you wish to assign to the macro. For example, perhaps you want to bind F2 to your macro. In the “Press New Shortcut Key” box, press F2 to bind it. Click Assign, then Close.

Click the keyboard icon. Then assign the macro to F2 (or whatever button you want to assign it to) using the “Press New Shortcut Key” clickable box. Click “Assign” or press Enter, then click “Close.”

Look for a tape recorder icon next to your mouse. Press Enter on your keyboard twice to skip two lines. Go back into Page Layout tab (Layout tab in Word 2007)and change both indentations back to 0. Open the Home tab. Click on the bottom right corner of the Font section to open the dialog box. Then in the Effects section, check All Caps and click OK.
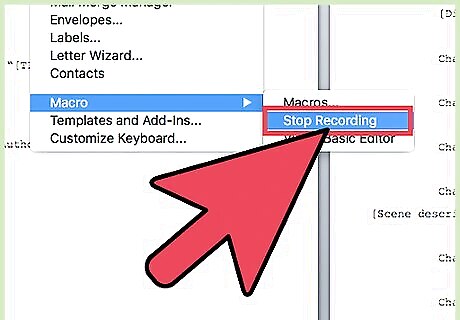
Finish the macro. Click the View tab again. Click Macros > Stop Recording. F2 (your shortcut key) will now skip two lines down the page and capitalize text, preparing you to enter a scene heading. In Word 2007, go back to the Developer tab. Click Stop Recording. F2 (your shortcut key) will now skip two lines down and capitalize the text.
Create a Macro for Description (Word 2013/2016)
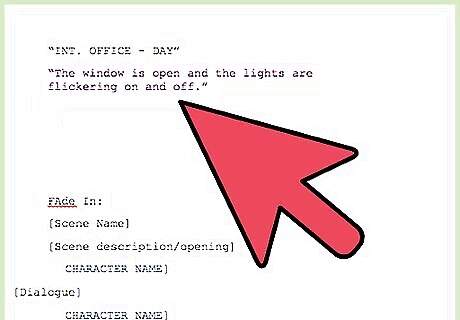
Think about why you want to create a macro for description. Description in a screenplay offers more info than does the simple scene heading. It might offer details about the type of lighting, weather conditions, or other descriptions of the physical location of the scene and its characters. Description is located two lines below the scene heading in a standard sentence format, with the first letter capitalized and a period at the end. For instance, below a scene heading like “INT. OFFICE - DAY” we might read descriptive info such as “The window is open and the lights are flickering on and off.”

Open the Layout tab (Page Layout tab in Word 2007) and set your margins. In the bottom right corner of the Paragraph section, click the little icon that opens the dialog box. Set 1’’ indents before text and 1.5’’ after text under the Indentation section. In Word 2007, display the Developer tab. Click the Office button at the top left, then go to Word Options (at the bottom), then under Popular, check “Show Developer tab in the Ribbon.”

Click View > Macros > Record Macro. Type a name for the macro. Since this macro is for description, assigning the name “Description” to this macro is a logical choice. Ensure you’ve selected “All documents” at the bottom of the drop-down menu reading “Store macro in.”
Click the keyboard icon and assign the macro to F3 (or whatever button you want to assign it to) using the “Press New Shortcut Key” clickable box. Click “Assign” or press Enter, then click “Close.” In Word 2007, click Record Macro on the left side of the ribbon. Store the macro in the same place you stored the other macro you created, and name it “Description.” Click the keyboard icon and assign the macro to F3.
Look for a tape recorder icon next to your mouse. Hit Enter twice on your keyboard to skip a couple lines, then go to the Layout tab (Page Layout tab in Word 2007) and move both indentations to 0. Next, click on the Home tab. In the bottom right corner of the Font section, select the little icon which opens the dialog box to open it. Look under the Effects section, then deselect All Caps. Click OK. In word 2007, after deselecting All Caps, return to the Developer tab and press Stop Recording before continuing with the rest of the above directions.

Click the View tab again. Click Macros > Stop Recording. F3 will now skip two lines down the page and be lowercase. If you do not bind the macro to the F3 key, F3 will not be useful as a hotkey to setup descriptive passages in your screenplay. In Word 2007, return to the Developer tab and press Stop Recording instead of clicking Macros > Stop Recording.
Create a Macro for Dialogue (Word 2013/2016)
Create a macro for character names. Characters and their dialogue or actions typically follow the introduction and descriptive info which sets a scene. They should be centered in all caps on the page with dialogue following on the line below. To create a macro which will prepare you to input character names after writing scene description, repeat the same steps used to create a macro for description in MS Word 2013/2016, but: a) after changing the indentation back to 0 during recording, press the space bar 22 times, then select the All Caps and b) name the macro 'Character' and assign it to F4. Be sure that the first thing done during recording is to skip down two lines. After pressing Stop Recording, F4 will skip two lines down the page (thus bringing the cursor to the correct character name position) and capitalize. To create a dialogue macro for Word 2007, follow the directions for the description macro in Word 2007 but input the parameters outlined in the sub-steps above.

Open the Layout tab (Page Layout tab in Word 2007) to set your margins. In the bottom right corner of the Paragraph section, there’s a little icon. Click it and a dialog box will open. Set 1’’ indents before text and 1.5’’ after text under the Indentation section. In Word 2007, display the Developer tab. At the top left of the Word window, there’s a multicolored button known as the Office button. Click it and go to Word Options (at the bottom). Under Popular, check “Show Developer tab in the Ribbon.”

Click View > Macros > Record Macro. Type a name for the macro. Since this macro is for dialogue, assigning the name “Dialogue” to this macro is a logical choice. Ensure you’ve selected “All documents” at the bottom of the drop-down menu reading “Store macro in.” Click the keyboard icon and assign the macro to F5. Click “Assign” or press Enter, then click “Close.” In Word 2007, click Record Macro. The button to record the macro is on the left side of the ribbon. Store the Macro in the same place you stored the other macro you created, and name it “Description.” Click the keyboard icon and assign the macro a button of your choice. For example, maybe you want to use F5. Click within the “Press New Shortcut Key” and then press the F5 button to assign this macro to F5.

Look for a tape recorder icon next to your mouse. Hit Enter once on your keyboard to skip a line, then go into the Page Layout tab and move both indentations to 0. Next, click on the Home tab. In the bottom right corner of the Font section, select the little icon which opens the dialog box to open it. Look under the Effects section, then select All Caps. Click OK. Click the View tab again. Click Macros > Stop Recording. F5 will now skip one line, utilize lowercase text, and prepare you to enter dialogue. In Word 2007, instead of clicking Macros > Stop Recording, press Stop Recording in the Developer tab.


Comments
0 comment