views
Operating Headlights
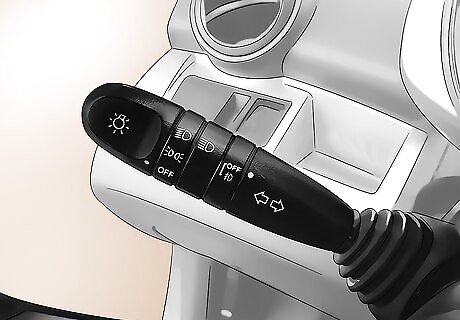
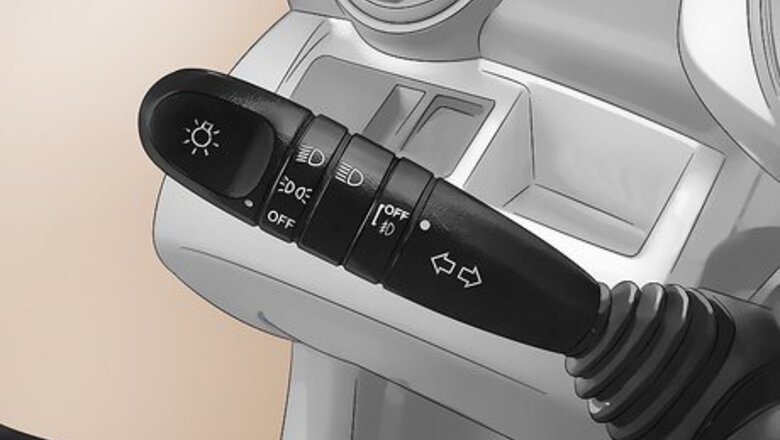
Locate the headlight controls. Headlight controls are not located in the same place in each vehicle, but there are a few spots that are commonly used. Look for either a control panel or a control arm near the steering wheel. Some manufacturers place a separate headlight control panel just beneath the dashboard, just to the driver's left side. These panels are especially common in larger vehicles with a greater amount of dashboard space. Look for a small panel with a dial on it. The standard headlight indicator symbols should be positioned at various intervals around the dial. Other manufacturers place the headlight controls on a control arm attached to the base of the steering wheel. The arm can be positioned to the left or right of the steering wheel, and a headlight control dial will be located toward the end of the arm. This headlight control dial will be marked with the standard headlight indicator symbols.
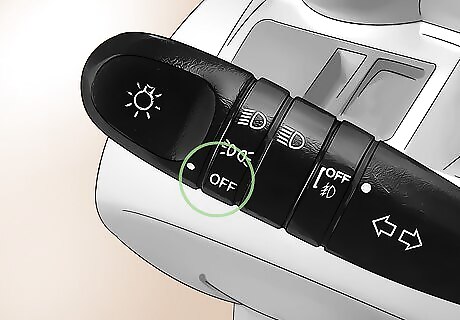
Look at the “off” position. By default, the headlight controls will be switched to an “off” position. Note which symbol marks that position and where it lies along the dial so that you can turn the headlights off when you are finished. The “off” position is usually located to the far left or underside of the dial. It is typically marked by an open or empty circle. Nowadays, many vehicles are equipped with “running lights” that automatically come on when your vehicle is on and your headlights are off. If your headlights appear to be off but you still see lights shining from the front of your vehicle, those lights are probably running lights. Always make sure that the headlights are off when you turn off your car. Keeping the headlights on while the vehicle is off can drain the automobile's battery, and the car will not turn on later if the battery is drained dry. If you forget and do completely drain the battery, you will need to jump start your car to get it going again.
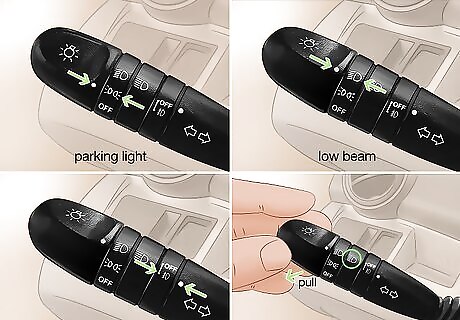
Turn the switch to the correct symbol. Grab the control dial between your thumb and index finger and rotate it until it reaches the appropriate setting. The different settings are indicated by separate symbols, and you should feel the dial “click” into place as it passes into each setting. The parking lights are the first setting on most cars. These lights are orange in color on the front and red on the rear of the vehicle. The "low beam" or "dipped beam" setting is usually the next setting. These headlamps provide forward and lateral light while minimizing glare, so they should be used on crowded roads when other vehicles are less than 65 yards (60 meters) ahead of you. The "fog lights" may also be positioned on this dial, but some car manufacturers place the fog light control on a separate button located directly next to the standard headlight controls. Fog lights use a wide, downward-pointing light to illuminate the road. They should be used during poor visibility conditions, like fog, rain, snow, and dust. The "main beam," "high beam," or "brights" are not found on the low beam control. This setting is usually on a stick on the steering column, sometimes the stick that controls your turn signal, and is always separate from the low beam control. The high beams can be turned on by pushing or pulling on the turn signal lever forwards or backwards. These lights are more intense and create a greater amount of road glare, so you should only use them when other cars are not present or nearby.
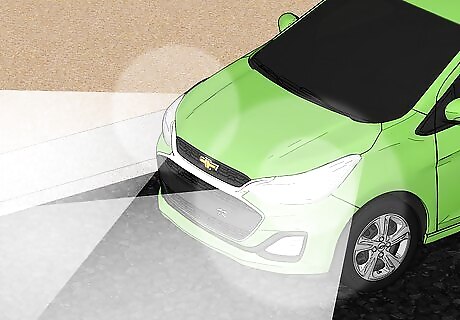
Consider checking the results. When in doubt, check the way your automobile headlights react when you turn the control dial to each position. If you have someone who can help you, ask that individual to stand outside and in front of your vehicle while it is parked. Roll your window down so that you can communicate with your helper, then rotate the headlight control dial to each position. Pause at each position and ask your helper to identify the setting. If you do not have someone to help you, park your vehicle in front of a garage, wall, or similar structure. Rotate the headlight control dial to each position, pausing long enough after each setting to look at how the light shines on the surface. You should be able to determine which setting is which based on how bright the lights reflect.
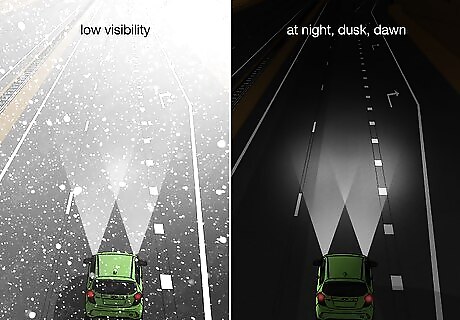
Know when to use your headlights. You should use your headlights whenever visibility is low. If you are unable to see 500 to 1000 feet (150 to 305 meters) ahead of you, your headlights must go on. Always use your headlights at night. Use the low beams when other vehicles are nearby and your high beams in other conditions. Use your headlights at dawn and dusk, too. Even though some sunlight is present, deep shadows from buildings and other structures can make it difficult to see other vehicles. You should at least use your low beams during these hours of the day. Use your fog lights during bad weather such as rain, snow, fog, or dust storms. Do not use your high beams since the reflection and glare they produce in these conditions can actually make it harder for other drivers to see clearly.
Headlight Symbols
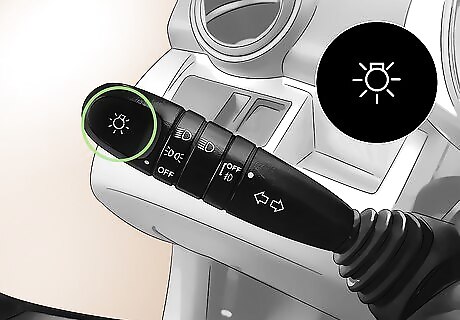
Look for the basic headlight indicator symbol. Most headlight controls will be marked by a standard headlamp indicator symbol. Look for this symbol on the side of the control dial. The standard headlamp indicator symbol looks like a sun or upside-down light bulb. On many headlight control dials, there will also be an enclosed circle next to this indicator symbol. The circle marks the side of the dial actually controlling the headlight settings. Align this enclosed circle with the headlight setting you wish to select.
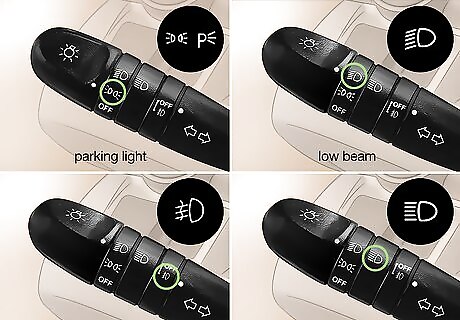
Identify the indicator symbol for each setting. Each headlight setting should be labeled by a separate symbol, and these symbols are almost always the same from vehicle to vehicle. If your vehicle is equipped with parking lamps, these lights should be indicated by a symbol that looks like the letter "p" with several lines extending out from the rounded front. The "low beam" symbol looks like a rounded triangle or capital letter "D." Downward-slanted lines extend out from the flat side of the shape. The "fog light" symbol utilizes the same shape and has downward slanting lines like the "low beam" symbol. One wavy line should pass directly through the center of these slanted lines, though. The "high beam" symbol also looks like a rounded triangle or capital "D," but the lines extending out from the flat side are perfectly horizontal.
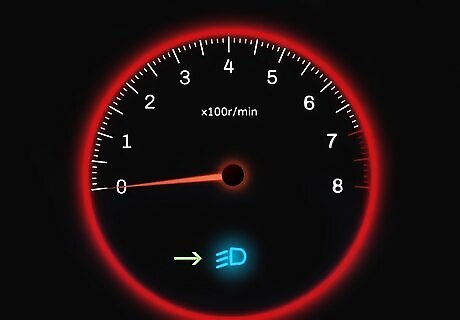
Watch for warning symbols on the dashboard. Automobiles with electronic/digital dashboards may display a warning light when certain car lights are not operating correctly. When one of these warning lights flashes, you should have the corresponding headlight changed or otherwise fixed. When your headlights are malfunctioning, your vehicle may display the standard headlight indicator symbol with an exclamation mark (!) or "x" across it. Alternatively, it may display the low beam indicator with an exclamation mark over it.




Comments
0 comment