
- To make a cardboard pistol, use scissors and a glue gun to cut out cardboard pieces and glue them together.
- Then, make “bullets” by sharpening crayons and shooting them via the rubber band on the gun.
- To make a wooden shotgun, whittle a shotgun shape out of wood and attach metal tubes to the front.
- Then, insert matches into the metal tubes and shoot them with a spring from a clothespin.
Cardboard Pistol
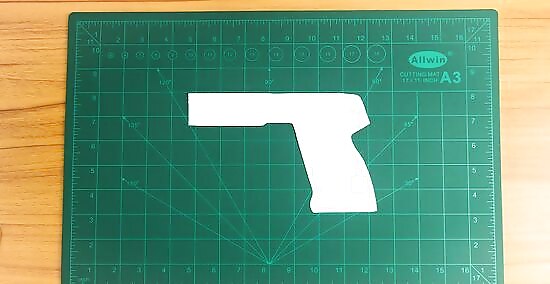
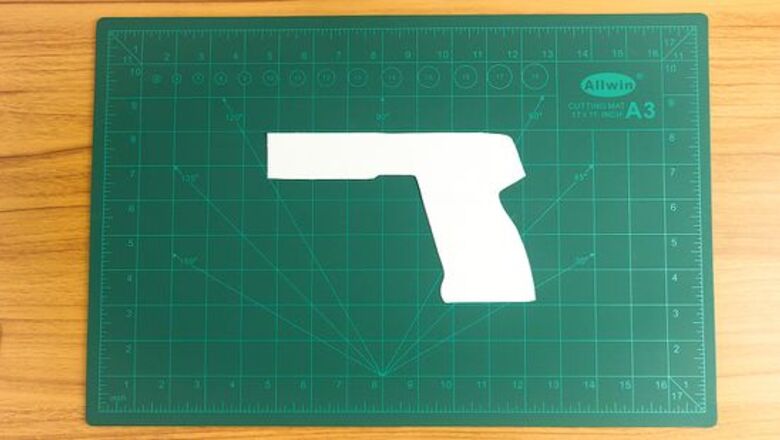
Draw an outline of the gun onto paper, then cut it out. Get a piece of paper out and grab a ruler and a pencil. Draw a gun barrel that’s about 6 inches (15 cm) long, then add a grip, or a handle, that’s 5 to 6 in (13 to 15 cm) long near the back of the barrel. When you’re finished, use scissors to cut out the gun shape.
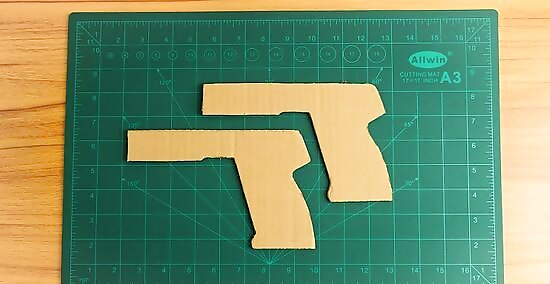
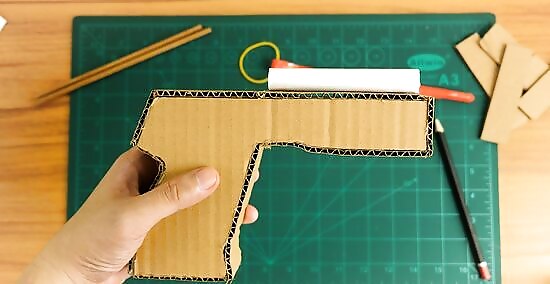
Trace the shape onto cardboard and cut out 2 pieces. Get a stiff, flat piece of cardboard and trace your gun shape onto it in 2 separate places. Then, use scissors to cut out the pieces, which will become the front and back of your gun.
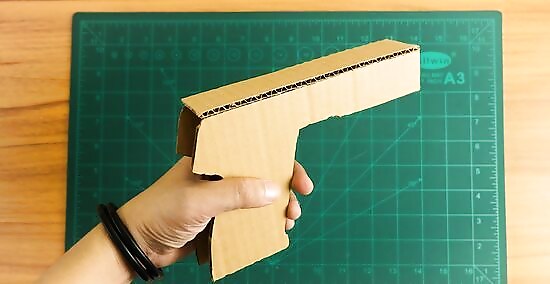
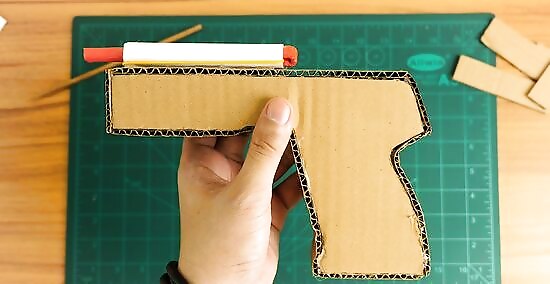
Glue the pieces together with a strip of cardboard at the top. Cut out a long, rectangular piece of cardboard that’s about 3 in (7.6 cm) thick. Attach it to 1 piece of your cardboard gun at the very top with a hot glue gun. Then, add the second gun shape to the other side of the cardboard strip, and cut any excess off the back. This cardboard strip is the top of the barrel of the gun. When you’re done gluing this part, your gun will look 3D.

Add cardboard to the handle of the gun. Now it’s time to fill in the missing pieces of your pistol. Cut out 3 small strips of cardboard that are about 3 inches (7.6 cm) long and 2 in (5.1 cm) wide. Paste 2 of them on either side of the grip, then add 1 to the very top of the barrel. If there is any excess cardboard hanging off the gun, cut it off with scissors. When you’re done, you’ll be holding an almost complete 3D gun.
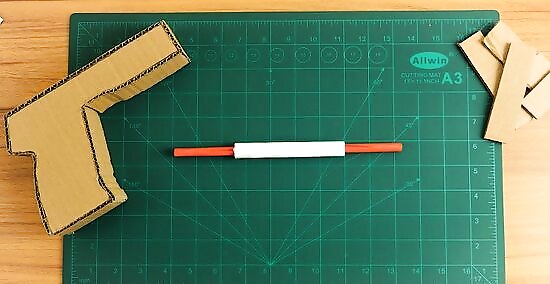
Roll up 2 thin sheets of paper. Cut a normal-sized sheet of paper in half. With one of the halves, roll it tightly around a straw, then secure the middle with tape and pull it off the straw so it’s hollow in the middle. With the other half, roll it up tightly with nothing inside so it isn’t hollow, then secure the middle with tape. These small rolled up paper strips will become part of the barrel of your gun, and they’ll shoot out the “bullets.”
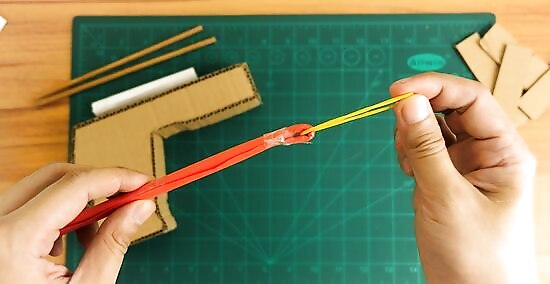
Fold the skinny sheet of paper and tape a rubber band to the end. Grab the sheet of paper that isn’t hollow inside. Bend 1 end down about ⁄2 in (1.3 cm), then slide a rubber band onto the hook you just made. Tape the paper hook down to secure the rubber band.
Glue the hollow sheet of paper to the top of your gun. Use a glue gun to attach the hollow piece of paper to the top of your gun near the front of the barrel. This is where the bullets will come out.
Slide the other piece of paper into the hollow piece of paper. Grab the other sheet of paper that you rolled up and slide it through the back of the hollow piece of paper, keeping the rubber band pointed at the back of the gun. Slide the paper through about halfway, then pull the rubber band over the front of the paper.

Poke a skewer through the front and out the back of the gun. Use scissors to cut a small hole in the back of your gun on the very back of the barrel. Then, poke a skewer through the front of the gun, where the trigger would be. Stick the back end of the skewer out of the hole you cut into the barrel. The front part of the skewer is going to act like your trigger. If the tip of the skewer is too hard to reach with your finger while holding the grip of your gun, cut the skewer down.
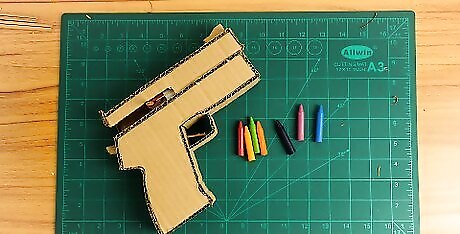
Sharpen crayons to use as bullets. Grab a handful of crayons and break them in half so they’re small. Use a pencil sharpener to make them sharp and “bullet-like.” You can also use skinny pieces of chalk.
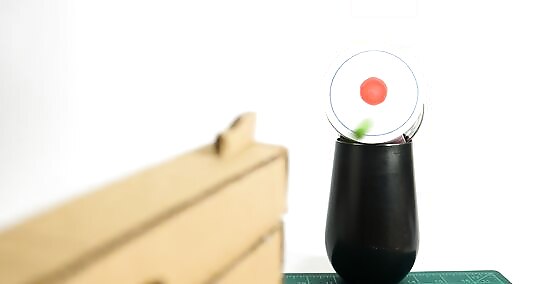
Load your gun with bullets and pull back the paper to cock your gun. Grab the non-hollow piece of paper and pull it back toward the back of the barrel. Use the hooked end of the piece of paper to cock it backwards, then hook the end over the back of the barrel. Then, slide a crayon into the hollow sheet of paper at the front of the gun. When you press the “trigger,” or the wooden skewer, the crayon will shoot out like a bullet! Be careful with your new toy gun, and don’t shoot it at anyone. Even though it’s not a real gun, shooting crayons at someone can still hurt.
Wooden Shotgun

Draw a shotgun shape onto a small piece of wood. Look for a piece of scrap wood that’s about 1 in (2.5 cm) thick and 4 to 5 in (10 to 13 cm) long. Use a pencil to trace a shotgun shape onto the side of the wood for the base of your gun. Making a gun out of wood requires some wood carving skills. If you aren’t comfortable carving a block of wood, stick to the cardboard gun method above.
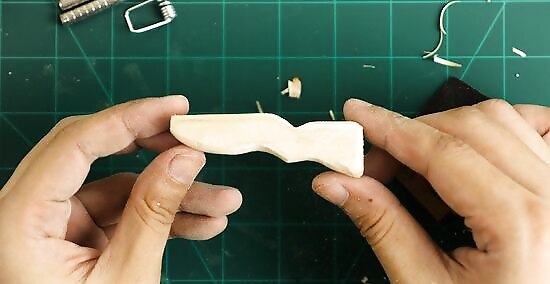
Carve the body of the shotgun with a knife. Use a knife to whittle the shotgun shape out of wood. Gently slide the knife forward and cut away from your hands to avoid slicing into your fingers. Follow the curves of the gun, and keep the center about 1 in (2.5 cm) thick. Use caution with whittling, as it can be dangerous. If you’re a kid, ask your parent’s permission before using a knife. After you’re done whittling, you can use a piece of sandpaper to smooth down any rough edges.
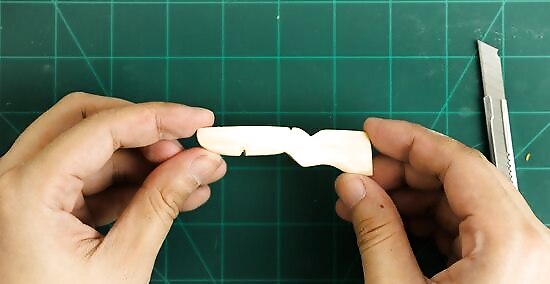
Cut 2 notches into the barrel of the gun. With your knife, cut a small notch on the top of the gun, about ⁄2 in (1.3 cm) from the back of the barrel. Then, flip the gun over and add a small notch on the bottom of the gun in the center of the barrel (halfway between the front and back).
Attach the spring from a clothespin to the gun. Break apart a clothespin and remove the spring inside. Then, point the bottom part of the spring downward toward the floor and push the spring over your gun. Settle the spring into the 2 notches that you just made. The end result will be a miniature shotgun with a spring on the bottom. The majority of the spring will be facing downward off the bottom of the gun.
Glue 2 metal tubes to the front of your gun. It’s time to finish the double barrel of your shotgun! Use hot glue to glue down 2 small metal tubes to the front of your gun to create a double barrel. Have them hang off the front of the gun a little bit so they can shoot. Most people use 2 pieces of a telescope magnet for this step.
Load 2 matches into the shotgun as bullets. Slide a match into both of the metal tubes from the front, and make sure they stick slightly out of the back of the tubes. Then, pull back the spring on the top of the gun to cock it. When you’re ready, pull the trigger on the bottom of the gun to propel the spring forward and shoot the matches out. Be careful where you point your gun, and never shoot anyone else with it. Even though they’re just matches, shooting someone with them could hurt them.


Comments
0 comment