
- To use a shield, just crouch (or right-click in Java Edition).
- You can craft a shield from 6 wooden planks and an iron bar using a crafting table.
- You can repair or enchant a shield with an anvil. You can decorate a shield by combining it with a banner using a crafting table.
Using a Shield

Equip the shield. To equip a shield, open your inventory. Drag the shield into the icon that resembles a shield on the lower-right side of your avatar. This places the shield in your off-hand. Alternatively, you can place it in your inventory hot bar and equip it with your main hand.

Block incoming attacks. If you are playing Minecraft: Java Edition, right-click and hold to block. If you are using Bedrock Edition, crouch to block. You can do so by pressing Shift on PC, or R3 on game consoles. Shields will block all front-facing attacks. Shields also prevent knockback damage and deflect arrows, causing them to ricochet back at enemies. Shields can be used to block the following attacks: Melee attacks Non-magical projectiles (arrows, tridents, snowballs, fireballs) Explosions Guardian/Elder Guardian lasers.

Understand the limitations of shields. Shields do have some limitations. They are as follows: Your movement speed is slowed significantly while blocking with a shield. Shields will take damage from all attacks over 3 (1 and a half hearts) equivalent to the attack. Shields do not block arrows from crossbows with a piercing enhancement. Shields do not block damage from enhancements, such as magic, fire, or poisoning. Shields do not block damage from TNT ignited by yourself or from a redstone mechanism. Axes have a chance of disabling your shield for 5 seconds (100% chance if the attacker is sprinting).
Crafting a Shield
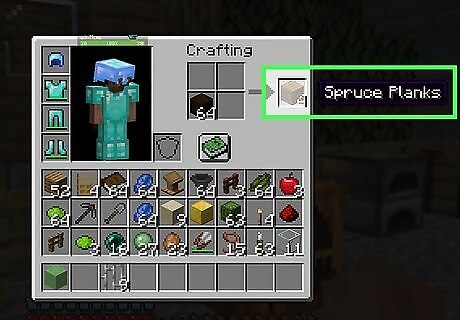
Craft 6 wooden planks. Wooden planks can be crafted from wood gathered from trees. You need 6 wooden plank blocks to craft a shield. You can use any type of wood.

Smelt an iron bar. Iron bars can be smelted from iron ore using a furnace. Iron ore can be found underground and in caves. You need a stone pickaxe or stronger to mine iron ore.

Select a crafting table. Crafting tables are used to craft most items in the game. You need 4 wooden plank blocks from your inventory to craft a crafting table. Place a crafting table in the game and right-click (or press the left trigger button) to open the crafting table.
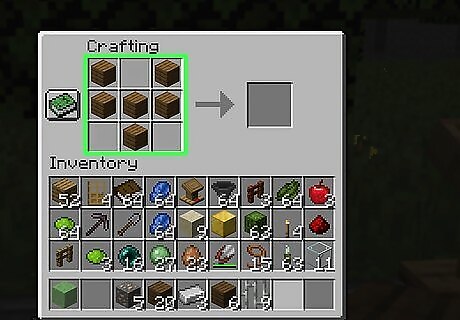
Arrange 6 wooden block planks in a "Y" shape. Place two wooden plank blocks in the upper-right and upper-left corners of the crafting grid. Place three wooden plank blocks across the entire middle row. Place one wooden plank block in the bottom-middle square of the crafting grid.

Place an iron bar in the crafting grid. Place the iron bar in the upper-middle square of the crafting grid.
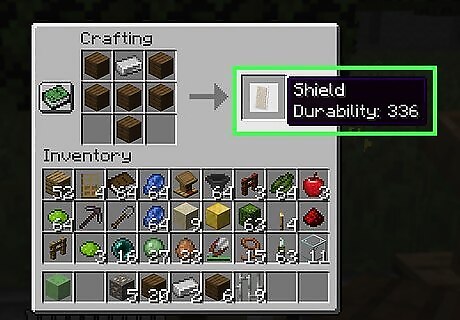
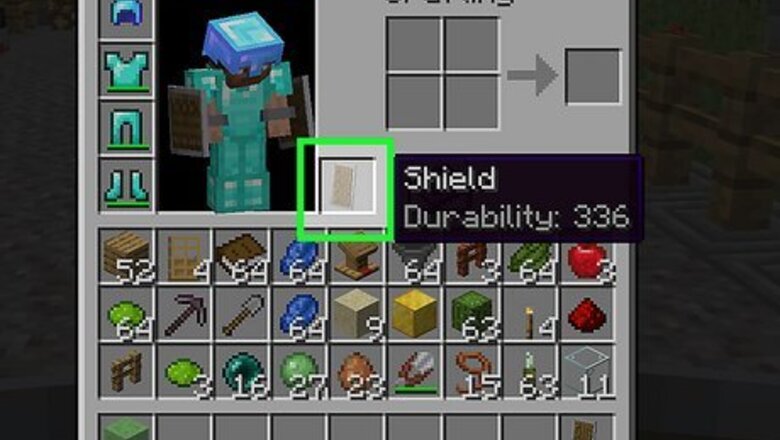
Drag the shield into your inventory. You have now crafted a shield.
Decorating a Shield
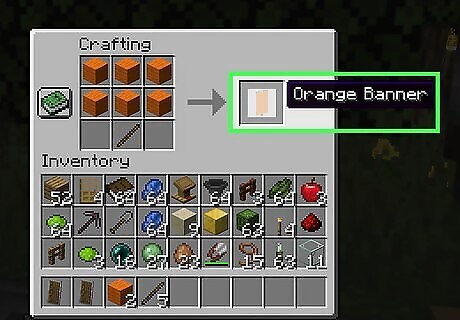
Craft a banner. You can decorate a shied using a banner. Banners can be crafted from 1 stick and 6 blocks of wool using a crafting table. You can craft different color banners using dyed wool blocks. You can dye wool by combining it with dye using a crafting table. You can use different colored wool blocks to craft patterns of different colors. On Minecraft: Java Edition, you need a loom to add a pattern to a banner. On Minecraft: Bedrock Edition, you can add patterns using a loom or a crafting table.
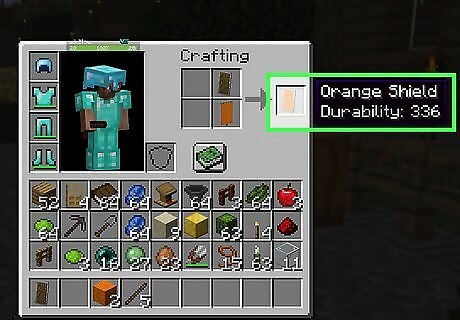
Combine the banner with the shield. You don't need a crafting table to do this. You can just open your inventory and put the shield in the crafting grid along with your banner. Then, drag the shield with the banner pattern on the front into your inventory. You now have a decorated shield.
Repairing and Enchanting a Shield
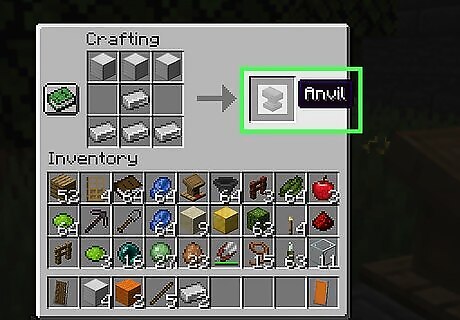
Craft an anvil. An anvil can be crafted from 3 iron blocks (crafted from 9 iron bars) and 4 iron bars using a crafting table. Place the three iron blocks in the top row of the crafting grid, one iron bar in the center square, and three iron bars in the bottom row. Drag the anvil into your inventory.

Select an anvil. To do so, place the anvil into your game. Right-click (or press the left trigger) to open the anvil.
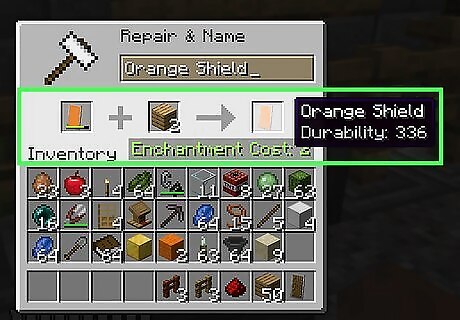
Repair a damaged shield. To repair a damaged shield, combine it with wooden plank blocks using an anvil. Place the damaged shield in the first space in the anvil menu. The place some wooden plank blocks into the second square space. Drag the repaired shield into your inventory. Repairing a shield costs experience levels. Optionally, you can type a name for your shield at the top of the anvil menu and give your shield a name.
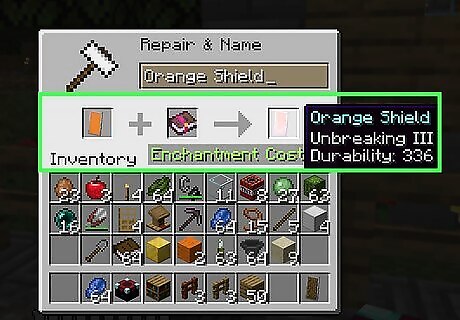
Enchant your shield. You can also use an anvil to enchant your shield using enchantment books (crafted from a book using an enchantment table.). To do so, select an anvil and place the shield in the first square space. Then, place an enchantment book into the other square space. Drag the enchanted shield into your inventory. You can put multiple enchantments to your shield. It costs experience levels to enchant your shield. The following enchantments can be placed on a shield: Unbreakable: This enchantment increases your shield's durability and makes it harder to break. Mending: This enchantment allows you to repair your shield using experience levels. Curse of Vanishing: This enchantment places a curse on your shield that causes it to disappear when you die.


Comments
0 comment