views
Preparing Her Hair
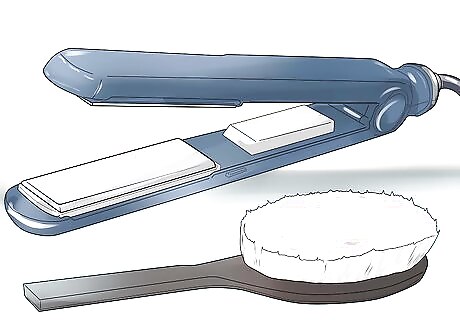
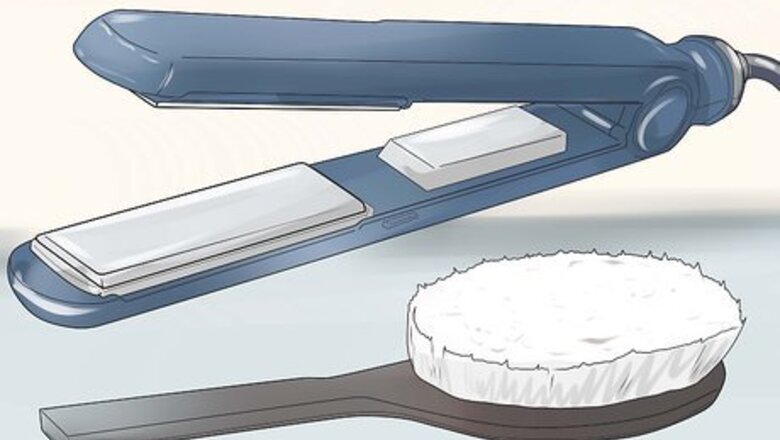
Gather any necessary equipment. Before you style your little girl's hair, it's a good idea to have the necessary equipment and accessories ready and easily at hand. This might include things like a hairbrush, a comb, some leave-in conditioner, hairspray, barrettes, elastics, hair ties, hair bands, bows, ribbons and any other accessories. You may also need things like a flat iron, curling tongs or hair dryer.
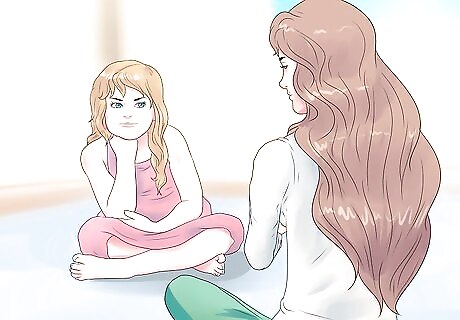
Get her to sit down in front of you. Little girls don't always enjoy having their hair done and their impatient wiggling can make it difficult to do their hair right. Therefore, it is a good idea to have her sit in front of you -- on either a high stool or a cushion on the floor (if you're also sitting) -- and give her something to look at while you're working, such as a cartoon, a book or a Nintendo. Hopefully she'll be so engrossed in whatever she's doing that she'll sit still and forget to complain when you pull her hair!
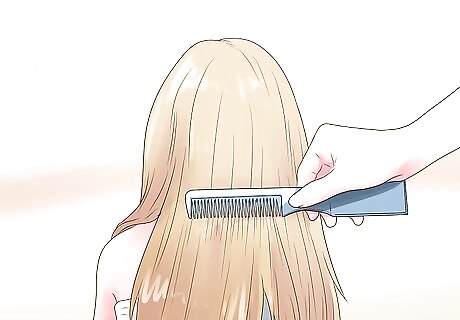
Brush out any tangles. Before you attempt to do anything with her hair, you will need to thoroughly brush it out to remove any knots and tangles and make the hair look as smooth as possible. This will make her hair much easier to style and will prevent any lumps or bumps from forming. The best way to detangle hair is to spritz it with some leave-in conditioner and work from the bottom up, i.e. from the tips towards the roots. This causes the least pain and minimizes the damage to hair.
Leaving Her Hair Down
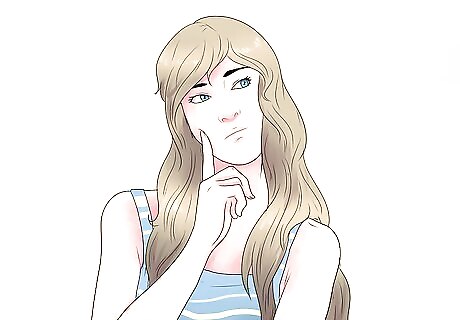
Crimp, curl or straighten her hair. Even if you're not doing elaborate braids or involved up-dos, it's nice to put at least a bit of effort into making your little girl's hair look nice. You can do this quickly and easily using styling tools like flat irons, curling tongs and crimping irons. Flat iron: If your little girl tends to have curly, wavy or frizzy hair, straightening it with a flat iron can totally transform her appearance (for special occasions). In addition, it is often a good idea to straighten her hair before you attempt certain up-styles or braids, as sleek, straightened hair can be easier to work with. Make sure to use a generous amount of heat protection spray before you start and remember to work in small section. You can find more detailed instructions on flat ironing hair. Curl: Little girls look so pretty with curls in their hair. You can go for tight, ringlet-y curls, soft pretty waves or just a simple flick if the ends, all with the help of a curling iron. You can find more information on how to use one here. If you prefer not to use heat, you can try scrunching her hair with a little mousse or making rag roller curlers. Crimp: A third option is to crimp her hair -- this is more interesting than plain, straight hair and a little funkier than curled hair. You can buy a crimping iron online or at beauty supply stores quite cheaply. The process itself is very easy -- you simply clamp the iron over a section of hair and hold it for 10-20 seconds before releasing. If you don't want to use heat, you can achieve a similar crimped effect by putting mini braids in her hair while it's wet (8 to 12 total), then taking them out once it's dry.
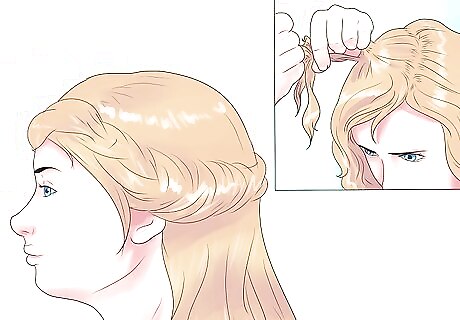
Twist the front sections of hair back. A cute and easy way to add a bit of interest to your little girl's hair is to twist back the front sections and secure them with a cute barrette or alligator clip. To do this style, part her hair down the middle or slightly off center -- whichever you prefer. Then take a small front section of hair from one side and twist it towards her head. Secure with a barrette, then repeat on opposite side. And you're done! You could also try doing double twist backs, where you twist two sections of hair on each side of her head. A variation on this is to twist both pieces towards her head, then wrap both of the twisted sections around each other, in the opposite direction. This creates a pretty effect. Instead of twisting, you could make a simple braid on either side of her face, then pull them back and secure with a barrette.
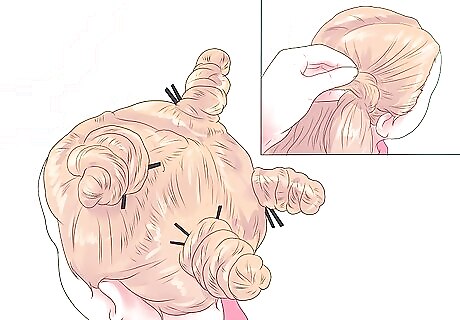
Try bantu knot curls. Bantu knot curls are a fun way of curling your little girls hair. These curls are looser and more natural-looking than curls made with a curling iron or hair curlers. Starting with damp hair, divide the hair into even, precise sections. The number of sections will depend on how thick your little girl's hair is and how tight you want the curls to be -- the smaller the sections, the curlier hair will be. Work a significant amount of styling gel, mousse or pomade into each section of hair, then start twisting from the roots. Keep twisting until you reach the tips, then give the hair an extra few turns -- it should start to coil in on itself. Once the hair had started to coil, wrap the rest of the twisted hair around itself and pin to the scalp using some bobby pins. The hair should form a little knot or funnel-shape. Repeat this process until there is a bantu knot in each individual section of hair. If you do it neatly enough, the bantu knots can make a cute hairstyle on their own! But if you want curls, leave the knots in until your hair is completely dry (you have to allow the hair to dry naturally, you can't use a hairdryer for this). When the hair is dry, remove the bobby pins and gently untwist the knots. Apply a little light pomade or leave-in conditioner to your hands and finger-comb the curls, gently working them into the desired style. Do not use a hairbrush or her hair will look frizzy instead of curly.
Putting Her Hair Up
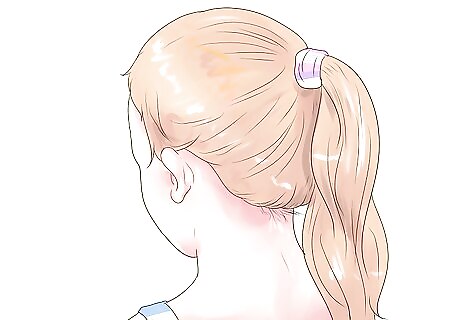
Do a classic ponytail. A classic ponytail is a quick, easy hairstyle for little girls. However, ponytails can be a little boring, so here are some tips on how to jazz them up: Cover the hair tie: Cover up the hair tie by taking a strand of hair from underneath the ponytail and wrapping it around the hair tie. Secure with a couple of bobby pins. Do a quiff: Before you put her hair into a ponytail, separate a section from above her forehead (where her bangs would be). Put the hair into a sleek ponytail, leaving this front section free. Lift the front section and start teasing it at the back, until you have a lot of volume. Then twist the ends and pin them on top of the head with some bobby pins. She now has a cute quiff hairstyle. Add accessories: Rather than do anything with the ponytail itself, you should think about adding some accessories like ribbons, hair bows and fake or fresh flowers to the hairstyle. You can make adorable homemade hair bows for fraction of the store price using just a little ribbon and hot glue.
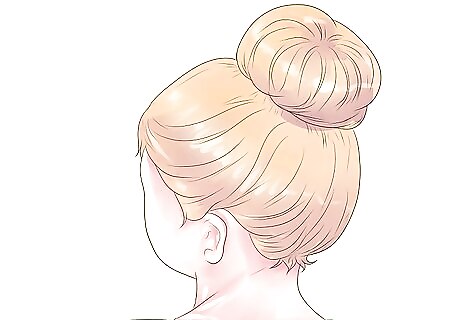
Do a ballerina bun. A ballerina bun is a pretty, elegant hairstyle which looks great for parties and events but will also keep your little girl's hair out of her face if she's dancing, skating or playing sports. To make a ballerina bun, first curl all of her hair underneath. You can do this very quickly by curling large chunks of hair at a time and just focusing on the ends. Then make a high ponytail on the crown of her head and secure with an elastic. Use a comb to tease the hair (backcomb) to give it volume. Twist the backcombed hair and wrap it around the base of the ponytail to form a bun on top of the head. Use bobby pins to secure the base of the bun to her head. Spritz the bun with some hairspray to smooth any fly-aways. Alternatively, you can use a doughnut-shaped bun foundation (available in beauty supply stores) to make a perfect bun. Simply slip the ponytail through the center of the ring, then spread the hair evenly around the bun foundation and secure with an elastic. Tuck in any loose ends and secure with bobby pins. Spritz with hairspray to smooth any fly-aways.
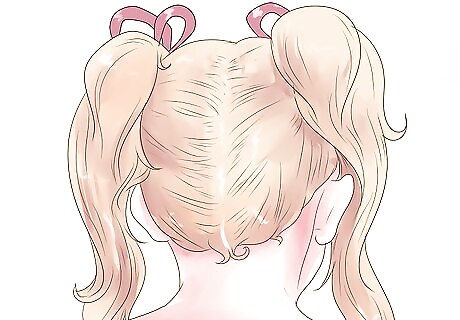
Do pigtails. Pigtails are the quintessential hairstyle for little girls. They are very simple and as easy to do on short-haired toddlers as on little girls with hair to their waist! Split hair straight down the middle and divide the hair into two equal sections. Now decide what kind of look you want to achieve with the pigtails. The first thing to think about it placement -- do you want high pigtails on top of her head? Low pigtails with her hair streaming over her shoulders? Do you want them at the back of her head (where they can't be seen from the front) or at the sides (where they can clearly be seen)? Then you need to think about what style you want. Do you want to braid them, fishtail them, leave them loose or curl them? You can also dress up the pigtails by adding some pretty ribbons or bows.
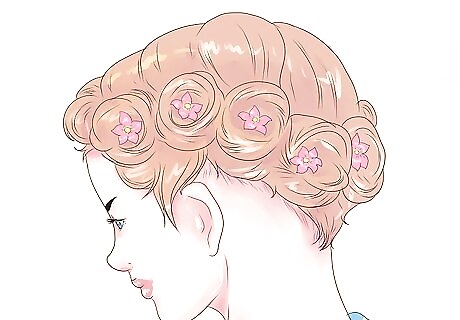
Do a pin curl crown. This upstyle makes a very pretty hairdo for special occasions and events -- it would look perfect on a little flower girl! Brush out the hair and make an off-center parting on whichever side of her head you prefer. Make another parting from one ear to the other. Scoop up all of the hair in front of one ear and make a low ponytail with a small elastic. Do the same on the other side. Divide the remaining hair into a number of low ponytails, all around the head. The exact number of ponytails will depend on how much hair your little girl has -- but it will usually be somewhere between four and eight. Starting on one side of her head, take the first ponytail and spritz it with water or hair spray until it's sleek and easy to manage. Wrap the hair around your first two fingers a couple of times, ensuring that the ends point towards the back. Remove your fingers from the center and use some bobby pins to pin the curl flat against her head, directly above the next ponytail. You are essential making a pincurl. Do the same thing with all of the ponytails around her head. Don't worry if the bobby pins are a little obvious, you'll be covering most of them up later. When you get to the last pincurl, pin it backwards towards the previous pincurl rather than pinning it forwards. You may need to readjust the spacing a little bit to make it fit. When all of the pin curls are in place, spray each one individually with hairspray. Then, take a flower pin or bow and place it in the center of each pin curl. This adds extra flair and helps to cover up the bobby pins. You could even use fresh flowers if you like!
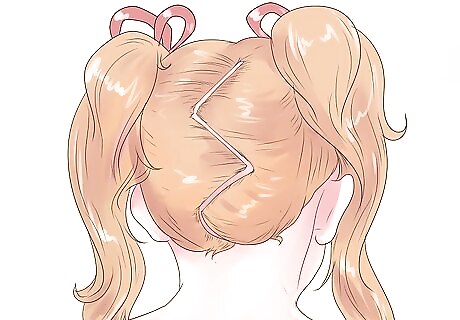
Do zig-zag ponytails. This hairstyle makes a funky alternative to regular ponytail pigtails. It looks cool but also keeps the hair out of her face! Divide the hair into six sections at the back of the head: two at the top, two in the middle and two at the bottom. Use colored hair ties to put the top two sections of hair into ponytail pigtails. Cross the two pigtails over each other and join the hair from the pigtails with the two middle sections of hair. Make another two ponytail pigtails with this hair, using more colored hair ties. Cross the middle pigtails over one another then join the hair with the two bottom sections of hair. Make two final ponytail pigtails with colored hair ties. Use a comb to make the partitions between the sections as straight and neat as possible. The more even and symmetrical the hair is, the better it will look.
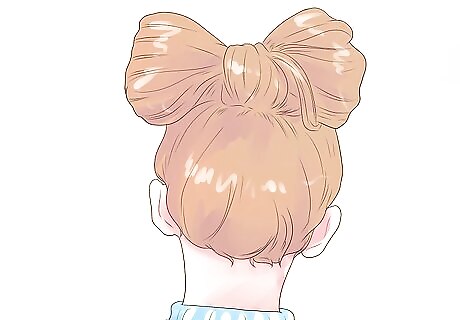
Do a bow-shaped bun. A bow-shaped bun is an adorable Lady Gaga-inspired hairstyle perfect for crazy hair days or playing dress-up. Start tying your little girl's hair into a high ponytail. After the last twist, don't pull the ponytail all the way through the hair tie. Pull the hair about halfway through so there is a loop of hair sticking above the ponytail. The ends of the hair should be spilling out underneath. Use your fingers to evenly divide the loop of hair at the top of the ponytail into two parts. These two parts will form the loops of the bow. Grab the loose hair underneath and brush it and spritz it with water or hair gel to get it sleek and smooth. Pull it up between the two loops of hair to form the center of the bow. Divide this center piece in half. Take one half and wrap it underneath one side of the bow, securing with bobby pins when you reach the back. Tuck any remaining loose hair into the center of the bow loop, then secure the bottom of the loop with a bobby pin. Do the same with the other half of hair on the other side of the bow. Use your fingers to fluff out both sides of the bow and make the loops look nice and full. Use some hair spray to flatten any flyaway hairs and help the bow hold its shape.
Getting Creative with Braids
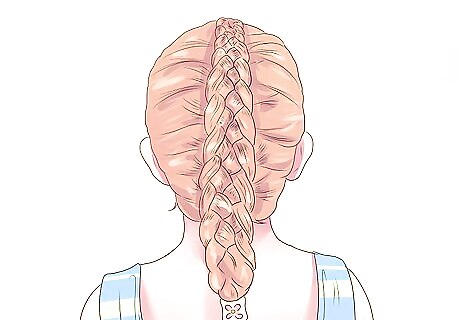
Do a French braid. A French braid is a classic hairstyle which is very quick and easy once you get the hang of it. It is perfect for school mornings as it looks pretty but will also keep your little girl's hair looking neat and tidy throughout the day. Take a section of hair from the top center of her head, just above the forehead. Divide it into three evenly-sized strands, just as you would with a normal braid. Hold two sections in your right hand and one section in your left hand. Cross the section in your left hand into the center of the other two, then cross the outside section in your right hand into the center of the other two -- just as you would with a normal braid. Continue braiding in this fashion, but before you cross over each strand grab a new piece of hair from the loose hair on same side of your head and join it with the strand that's crossing over. The smaller the strands, the more intricate your French braids will be. Keep incorporating new hair until all of the hair has been picked up, then finish with a normal braid and tie with an elastic. Variation: Make a neat center parting them braid the hair on either side of the parting to create pigtail French braids.
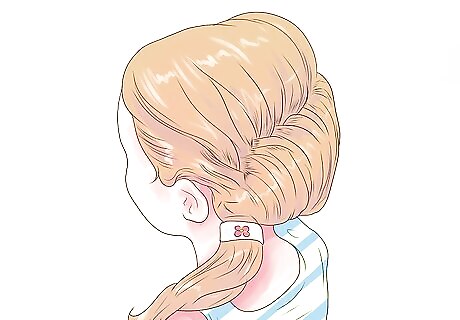
Do a side fishtail braid. The fishtail braid is easier to master than the French braid, but still looks intricate and beautiful. Sweep your little girl's hair to the side of her head and tie a low ponytail with a small elastic. Divide the hair in two. Take a thin strand of hair from the outside of the left section. Bring it over the left section and under the right section, combining it with the hair in the right section. Next take a thin strand of hair from the outside of the right section. Bring it over the right section and under the left section, combining it with the hair in the left section. Continue doing this for as long as possible. When you reach the thin hair at the bottom of the ponytail, you may need to switch to a normal braid. You can make the strands as small or as large as you like -- using thinner strands will take longer, but will result in a more intricate-looking braid. Try to keep the strands of hair as evenly sized as possible, as this will make the finished braid look neater. Tie the end with a small elastic. You can leave the braid as it is, or you can carefully cut the elastic at the top of the hair for a looser braid. Variation: Once you've mastered the fishtail technique, you can try doing a French fishtail braid. This starts out like a regular French braid, but turns into a fishtail braid once all of the hair has been picked up.
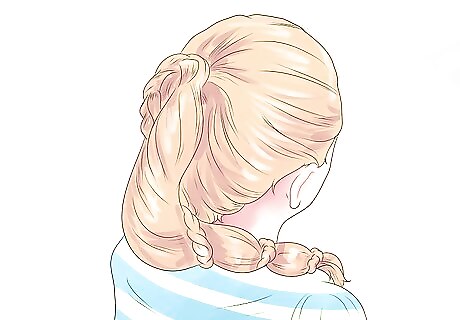
Do a Rapunzel twist ponytail. This simple hairstyle looks adorable on little girls with very long hair -- it will make them feel like beautiful princesses! Pull hair into a high, tight ponytail on the back of the head. Divide the hair into two halves. Do a basic braid in one half, securing with a small elastic. Twist the other half, then wrap the braided hair around the twisted hair. secure at the end with a small elastic. Variation: Wrap a bow around the top of the ponytail for added princess-factor!
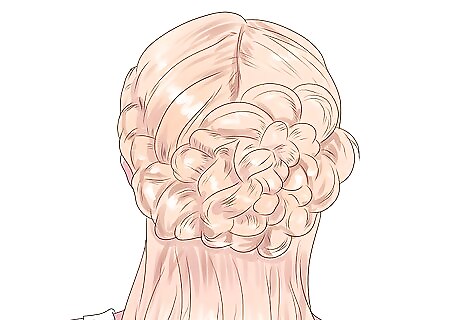
Do braided flowers. This cute hairstyle involves twisting a braid around itself to make a flower shape. The braided flower makes a nice alternative to hair bows and plastic flowers. Pull hair into a nice tight ponytail, either at the back or side of the head. Separate a section of hair from the top of the ponytail and do a basic braid all the way to the end, securing with a small elastic. Start twisting the braid around itself, making sure to keep the braid flat so the pattern is visible. After each rotation, discretely secure the braid with a bobby bin. When you get to the unbraided section at the end, twist the air and tuck it beneath the finished flower, securing with a bobby pin. Variation: Leave the hair loose, then do three of these braided flowers in a row along the back of her head or in a cluster above one of her ears.
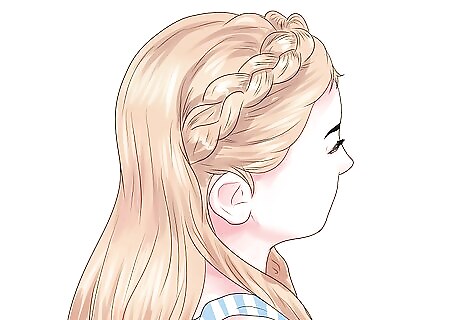
Do a braided headband. This is a pretty hairstyle you can do on little girls with long hair. It looks like a braided headband going across the top of her head. Part hair down the middle then make a second parting from ear to ear, so the hair is split into four sections. Take a small section of hair from behind the ear on the right side of her head. Do a basic braid all the way down to the end, then secure with a small elastic. Pull the braid over the top of the head and secure with a couple of bobby pins behind the left ear (or slightly higher, if necessary). Make sure it is secured nice and tight, so the braid doesn't slide off the top of her head. Take the loose front section of hair on the right side of her head and twist it inwards (towards her head). Pull it to the back of her head so it covers the starting point of the braid. Clip to temporarily secure. Do the same on the left side of her head to cover the end of the braid and the bobby pins. Remove the clip and tie the two twisted sections together with a small elastic. Cover the elastic with a pretty hair bow or flower clip. Variation: You can also make a double braided headband by doing a second braid starting on the left side of her head and pulling it towards the right.








Comments
0 comment