
views
Organising the Materials
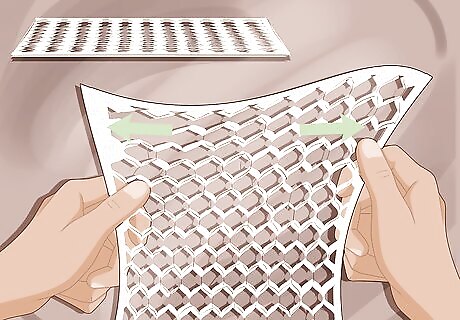
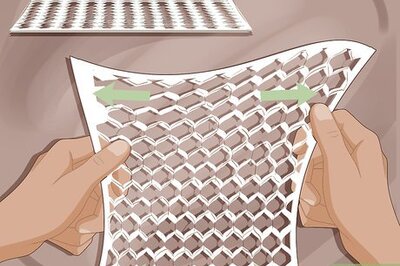
Stretch the mesh. Place one hand on each end of the mesh. Grip the mesh and then pull your hands apart to stretch it. Rotate your hands around the mesh until all the mesh has been well stretched. You will need to stretch the mesh for at least 30 seconds. Purchase 1 piece of lacrosse mesh from a sports store. Mesh varies in price depending on which brand you buy. For best results, buy the same brand of mesh as your stick.
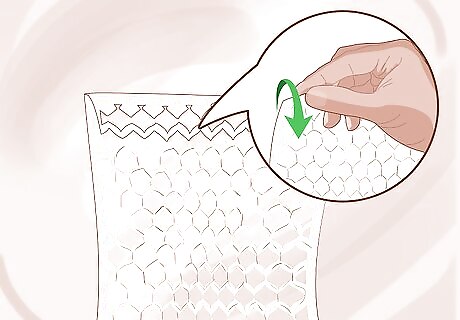
Fold over the top row of mesh. Hold the top row of mesh and fold it over the second row. Sit the strings directly on top of the strings on the second row so that you have clear holes to be able thread string through. If the top row of mesh is damaged, fold over the top two rows.
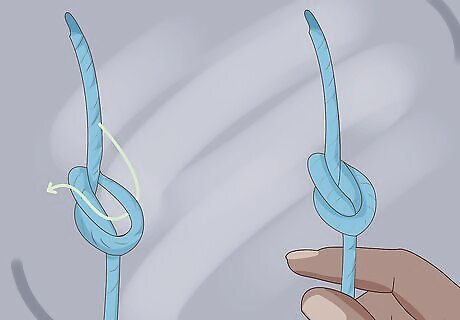
Knot one end of each piece of string. Pick up one end of the string and tie a double-knot as close to the end of the string as possible. This knot is important as it will keep the rest of the strings firm. Repeat this on each of the strings. A double knot is same as the knot used when tying your shoes, but it is repeated on top of the original knot. You can use another strong knot if you prefer.
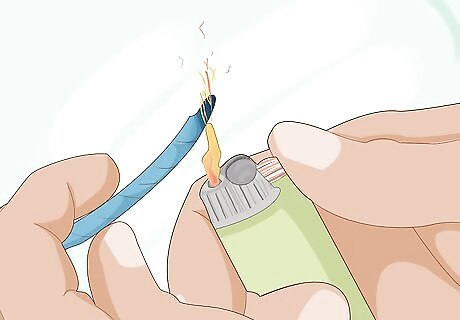
Harden the tips of the strings using a lighter. Find the opposite end of the string to the knot and hold it in your non-dominant hand. Use a lighter to slightly burn off the fringe of the string. While the string is still hot, lick your finger and then press down the tip of the string with your fingers. This creates a pointy tip that is easier to push through the small holes. Don’t hold the lighter over the string for more than a few seconds. Wait a few seconds before touching the string so you don’t burn yourself. Repeat this process for each piece of string you will be using.
Threading a Top String
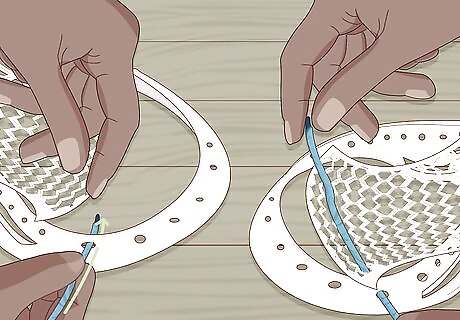
Thread the string through the second hole down on the left of the stick. Hold your stick so that the holes in the stick are facing towards you. Push the burnt end of the top string into the second hole from the left side. Pull the thread all the way through until the knot stops you pulling any further.
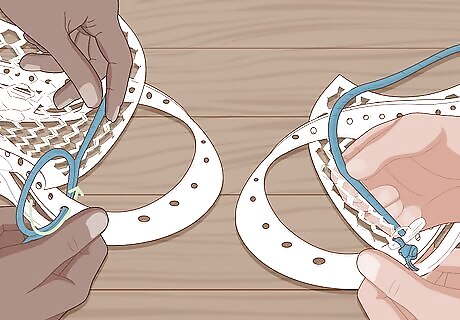
Pull the string up through the bottom of the mesh and back into the hole. Bring the string back towards you by pulling it through the mesh hole under the hole you just went through. Pull the string and then loop it back into the top hole. Pull the string until the knot is sitting firmly against the head. Try to pull the string to a consistent tightness when making each knot. This will make the stick more effective when you play.
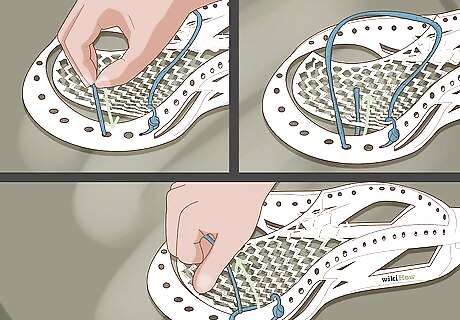
Go through the first hole on the left and into the mesh hole below. Push the string through the top of the top left hole and pull it back towards you through the mesh hole below. Pull the string towards the right as you pull the knot tight. This will secure the knot and pull it to the necessary spot.
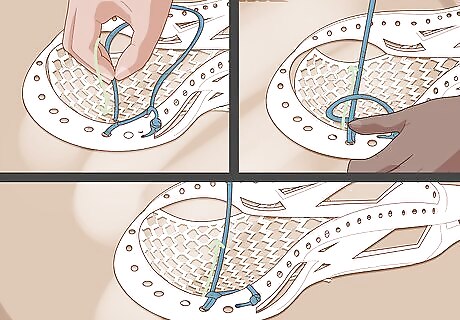
Thread through the next mesh hole and up through the same head hole. As you thread the string through the mesh hole you will create a loop. Pull the string through the loop as you thread the string through the next head hole towards you. Pull the string tight once you are happy with the position of the knot.
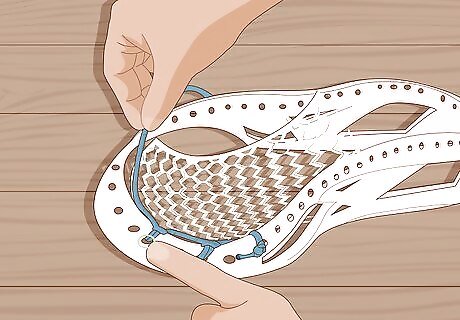
Pull the fourth mesh hole across to the 3rd hole from the left. Stretch the mesh towards the right of the stick. Pull the fourth mesh hole so that it sits directly underneath the 3rd hole in the top of the stick. This position will make it easier for you to string the rest of the top row.
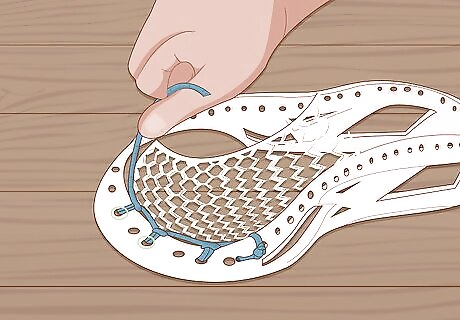
Go through the hole in the head and back through the mesh hole. Follow the steps you carried out when making the knot in the first hole to complete the second knot. Make knots in every second hole on the top of the head. Keep repeating the knots until you reach the right side of the head. Continue to pull the string tight to ensure a firm stringing. Align the strings so that the 5th diamond is in the middle of the head.
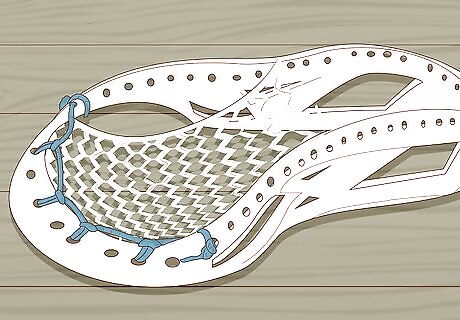
Go through the top side wall hole and back through the top hole. Pull the string through the last mesh hole and into the top hole of the sidewall. Take the top string and feed it back through the top hole and pull it through the loop you have created with your piece of string. Pull the string tight and knot it as close to the head as possible Form the knot by following the same instructions as the first double knot.
Lacing the Side of a Lacrosse Stick
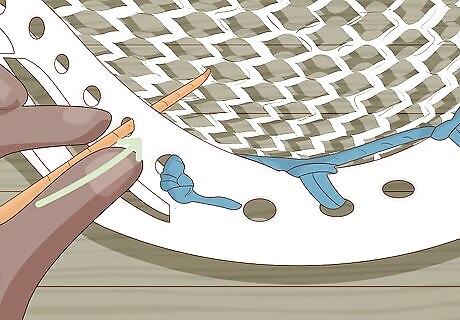
Poke the string through the third hole down on the left side of the head. Hold the burnt end of the side string and push it through the hole that is under where you began lacing your top string. Pull the string until the knot is snug against the head.
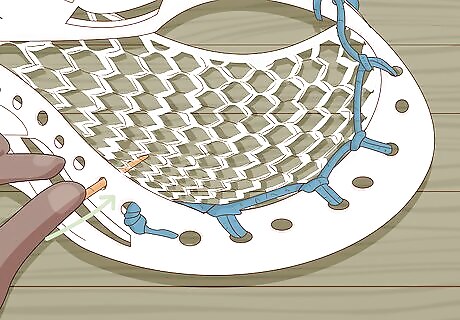
Pull the string through the next mesh hole and through the 3rd hole. Push the string back towards yourself through the first diamond in the side of the mesh closest to the left side of the stick. Push the string back through the third side hole on the left side of the stick. Pull the string firmly to pull the mesh onto the side of the head.
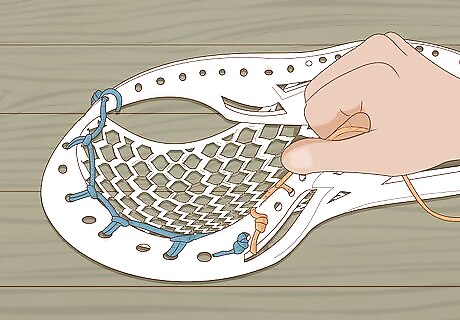
Feed the string through the mesh and into the 5th hole. Loosely thread the string through the bottom of the mesh. Leave a little slack on the string to create a loop. Pull the end of the string through the loop you created. Push the string through the top of the 5th hole on the side of the lacrosse head. Repeat this step in the next hole down (you don’t need to skip a hole). Pull the string tight so that the mesh diamond is pulled against the side of the head.
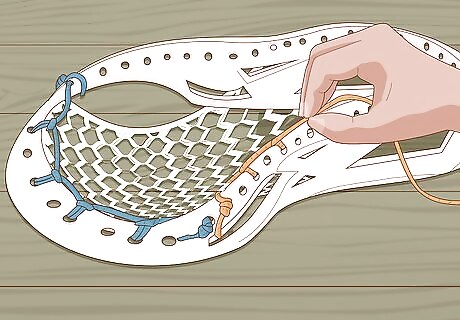
Skip a hole and repeat the step directly above, twice. This time when you are attaching the mesh to the holes, don’t skip a hole between the knots. Pull each knot firmly before moving to the next knot.
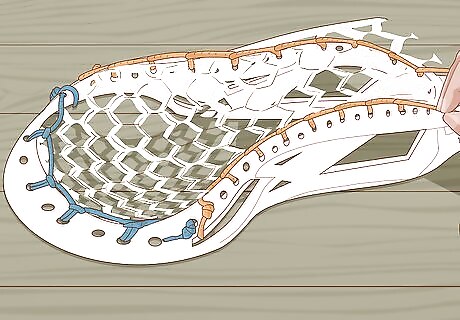
Thread the string through the mesh and into the side hole. Push your string down through the mesh and into the top of the next side hole. Repeat this step until you reach the bottom of the head. This attachment doesn’t need to be as tight as your other knots as it is forming the pocket of your stick.
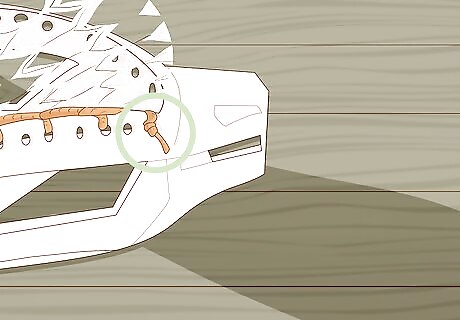
Secure the string with a double knot. Tie a double knot in the string as close to the head as possible. Cut off the excess string close to the knot.
Stringing the Bottom String of a Lacrosse Stick
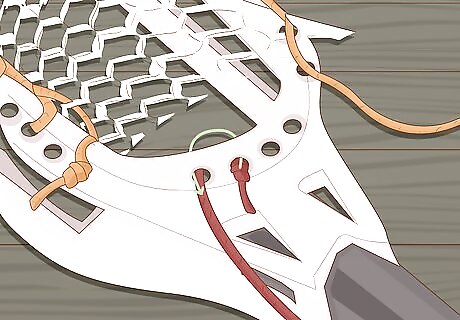
Knot one end of the string and place it through the bottom left hole. Tie a double knot in the opposite end of the string to the burn tip. Push the string up through the bottom left hole and pull it tight.
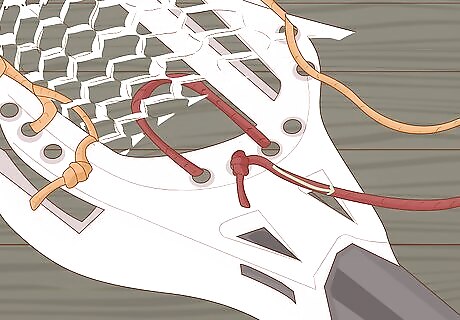
Weave the string through the horizontal length of the width. Weave the string under and then over the threads that make up the bottom row of mesh. Start on the left side and keep going until you reach the end of the mesh row. It is important that you weave between each strand of mesh. If you notice that you have missed a strand, pull the bottom string out and start again from where you missed a strand
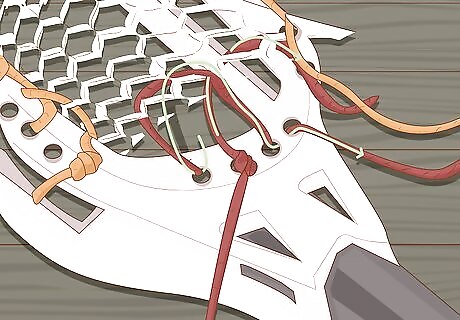
Push the string through the bottom right hole. Thread the string through the top of the bottom right hole of the stick. Pull it through until the rope is firm. This will pull the mesh into place.
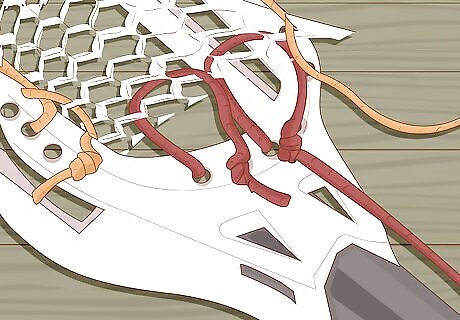
Experiment with the tightness of the string before knotting it. The tightness of the bottom string will affect the depth of your pocket. If you want a deeper pocket loosen the string slightly by pulling 1 centimetre (0.39 in) of rope back towards the mesh. If you want it tighter, pull the string 1 centimetre (0.39 in) away from the head. Once you are happy with the firmness of the strings tie a double knot in the string as close to the stick as possible. Cut off the end of the strings close to the knot.





Comments
0 comment