

Starting and Using System File Checker

Open the Start menu. Click the Start button.
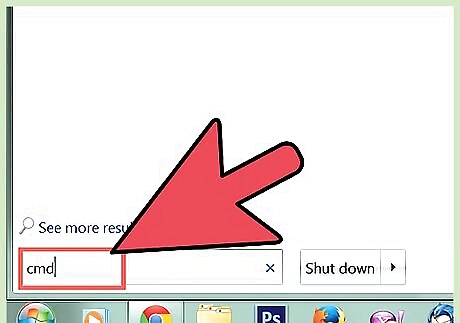
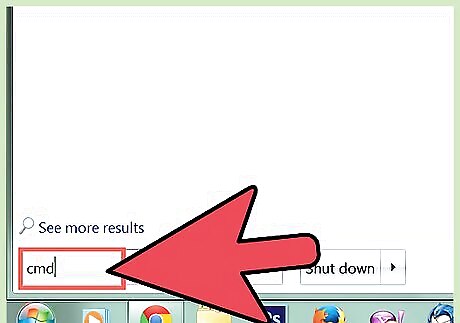
Search for Command Prompt. Type cmd.exe. Users of Windows XP must click All Programs then the Accessories subcategory.
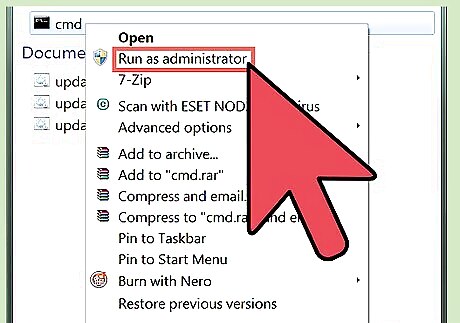
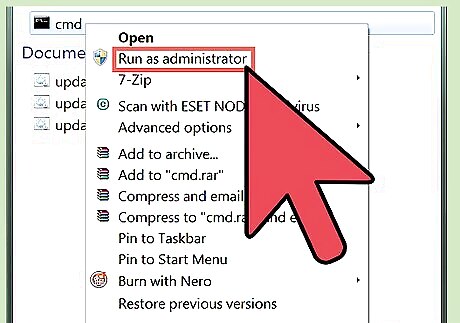
Start Command Prompt as an administrator. Right click cmd.exe to open the context menu and click Run as administrator. Users of Windows XP must hold the ⇧ Shift key while right clicking Command Prompt, click Run As to open a dialog window, select the The following user radio button, type Administrator as the user name and the password of the account (usually blank), and click OK. Click Yes on the User Account Control dialog if it appears.

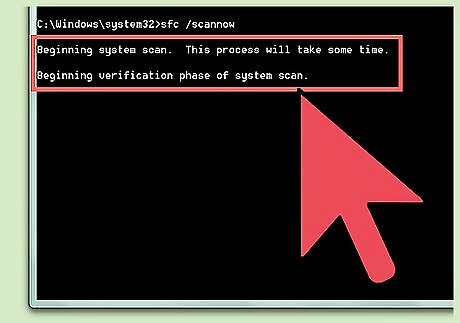
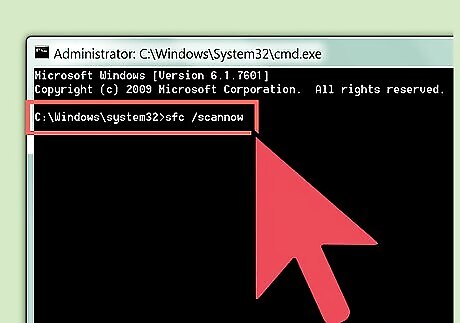
Start System File Checker. In Command Prompt, type sfc /scannow and press the ↵ Enter key on your keyboard.
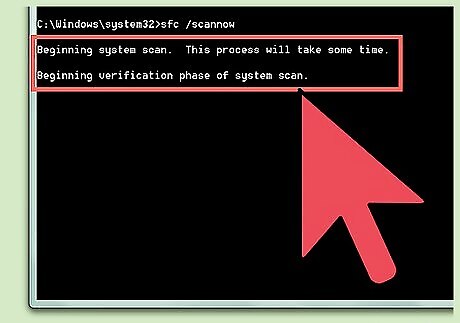
Wait until System File Checker finishes checking and fixing your system.
Starting and Using System File Checker Via Safe Mode
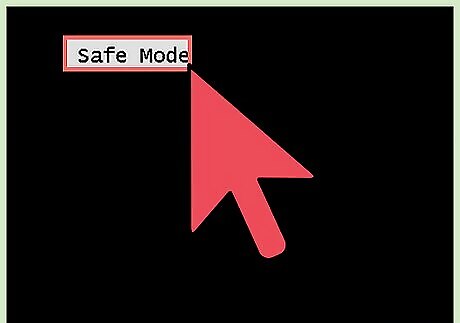
Start Windows in Safe Mode with Command Prompt.
Start System File Checker. In Command Prompt, type sfc /scannow and press the ↵ Enter key on your keyboard.
Wait until System File Checker finishes checking and fixing your system.
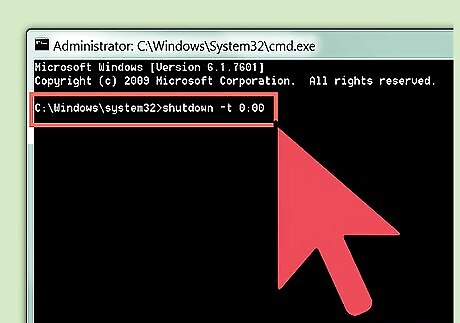
Shut down your computer by typing shutdown -t 0:00 into Command Prompt and pressing the ↵ Enter key on your keyboard.
If You Experience an Error While Trying to Start System File Checker

Open the Start menu. Click the Start button.
Search for Command Prompt. Type cmd.exe. Users of Windows XP must click All Programs then the Accessories subcategory.
Start Command Prompt as an administrator. Right click cmd.exe to open the context menu and click Run as administrator. Users of Windows XP must hold the ⇧ Shift key while right clicking Command Prompt, click Run As to open a dialog window, select the The following user radio button, type Administrator as the user name and the password of the account (usually blank), and click OK. Click Yes on the User Account Control dialog if it appears.
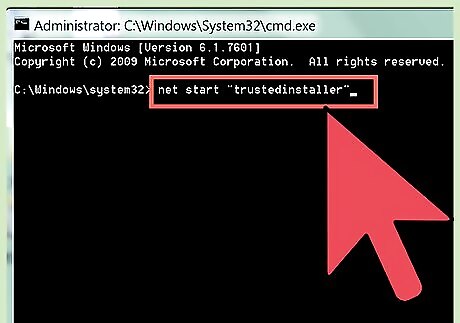
Start the Trusted Installer service. Type net start "trustedinstaller" into Command Prompt and press ↵ Enter.
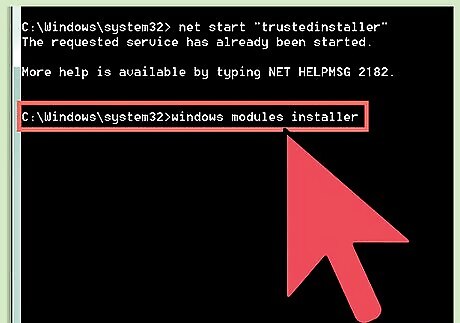
Start the Windows Modules Installer service. Type net start "windows modules installer" into Command Prompt and press ↵ Enter.

Follow the Steps of Part 1.


Comments
0 comment