
If so, then get a load of this cool quilting method! It's called "batting buddy", but you can do the same thing for free at home without purchasing the expensive templates that quilt shops want you to buy.
The idea is to sew each quilt square as if you were foundation piecing. The only difference is that you'll be sewing each piece directly to the back of your quilt through the batting. Follow these instructions to learn how.
Choose a simple block shape to sew. Diagonals work well, as do crazy quilt designs. Keep in mind that you'll be limited to straight sewn lines in your designs (as you would have in a foundation pieced block).
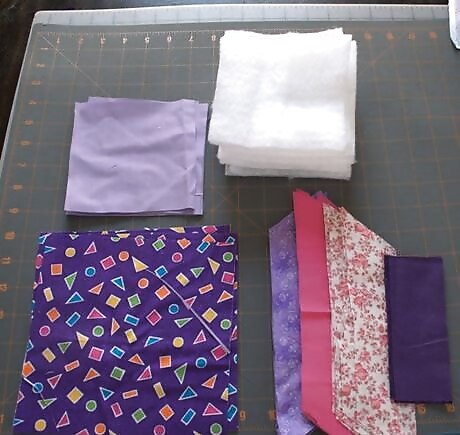
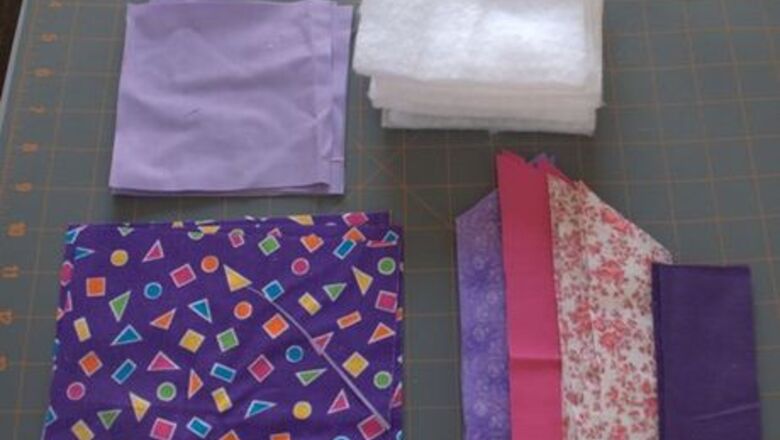
You'll need two sizes of squares, one an inch (2.5cm) bigger all around than the other. The beauty of this is that you can do all of your cutting with a rotary cutter using your regular cutting rulers if you like. The large squares will be used for the backing fabric. The small squares will be used for your batting and top pieces. The squares used in this example were 7 inches (17.78cm) and 5 inches (12.7cm) square respectively, making the larger square two inches (5cm) longer per side.
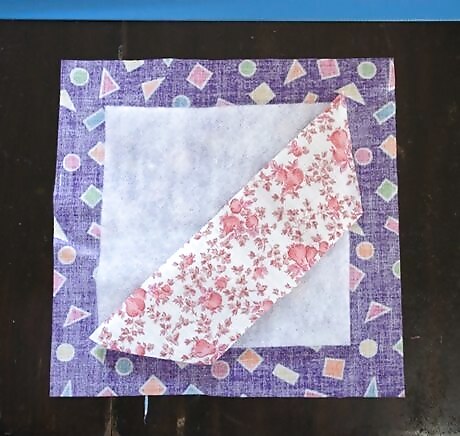
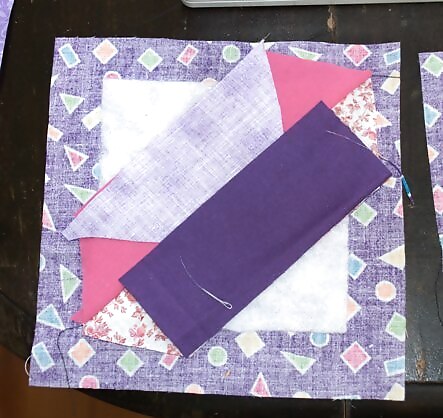
Center a batting square on the "wrong" side of your larger backing square. You're now ready to place the first block pieces on the top. Bb3_752.jpgPlace the first block piece on the batting, face up. If you want adjacent blocks to line up exactly, make a cardboard "starting point" template to line up your first block with. Bb4_67.jpgPlace the second block piece face down with the seam edges lined up with the first piece.
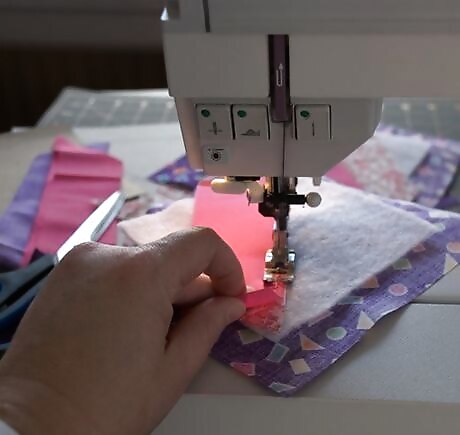
Sew the seam. Sew it through both block pieces, through the batting, and through the backing, like a giant sandwich.
Press the seam open and place the next block piece in the same manner, lining up the edges, sewing the seam, pressing open, until you reach the edges of the block. Stop each seam at the edge of the batting. Note: If you're using a poly batting, take care to press with a cool iron, as a hot iron will compress a poly batting. Cotton batting is best for this project.
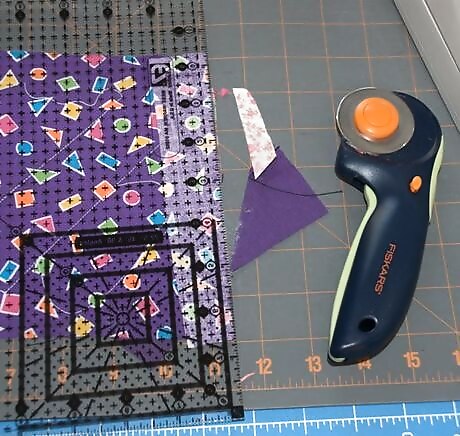
Turn the inch (2.5cm) wide, unquilted border section of the block sandwich under the block out of the way. Trim any fabric which protrudes past the batting edge. If you're careful, this can be done with your rotary cutter and a ruler as well.
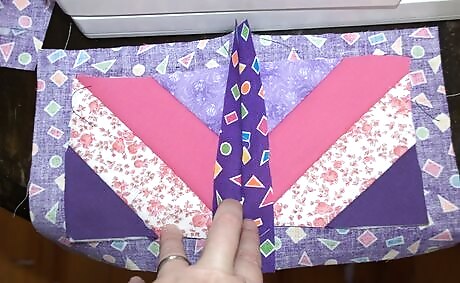
Repeat for all four sides. You have made one block. Create the rest, and then start to join them together as follows: Place two blocks backing side to backing side, with edges lined up. Feel carefully to ensure that the batting edges line up. Sew a seam down the inch (2.5cm) wide flap(s) just barely outside of the batting. Take care not to catch the batting into the seam, as this will make the finished seam bunch up. Bb8_97.jpgPress the seam open from both sides.Bb10_562.jpg Bb11_575.jpgFrom the front side, fold or roll the inch flaps under themselves and pin in place. Bb12_954.jpgTop stitch both of the folded edges down.
Sew rows of blocks together in this manner.
Sew the rows together, stitching the flap edges together, and then pressing them open and top stitching the entire row. The maximum length of fabric under the neck of your machine at any time will be 10-12 inches (25.4cm to 30.48cm); this is very manageable for a "regular" machine.
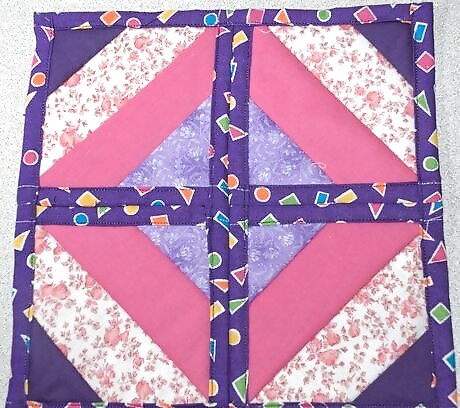
Roll the outside edges over and top stitch to finish the edge. Back 2.jpgThe back of the blocks will already be quilted. No need to go through the whole quilt frame and long arm rigmarole!


Comments
0 comment