
Making a Single Hanging Shelf
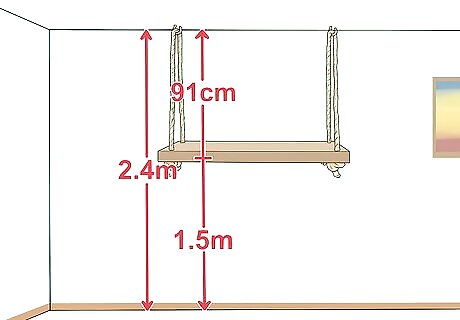
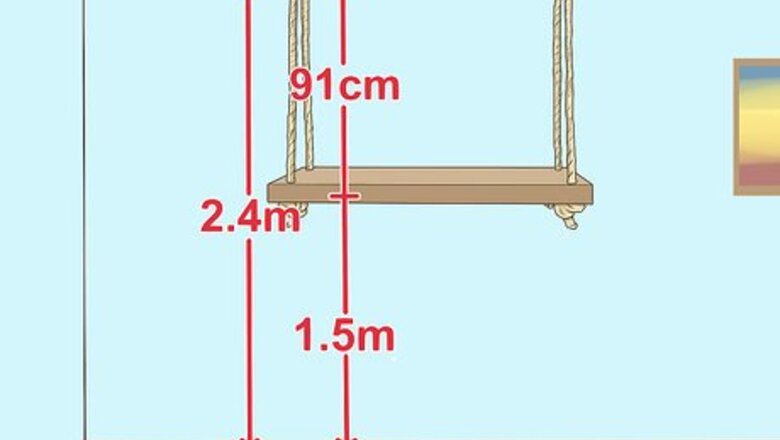
Measure the area where the shelf will hang. Take a measurement from the ceiling down to the place on the wall where you want the shelf to end. Multiply that number by two, so you can double each piece of rope. Add eighteen inches (45 cm) to that number for the knots you’ll make in the rope. For example, if your ceiling is eight feet (2.4 m) tall and you want your shelf to sit five feet (1.5 m) from the floor, you’re designating three feet (91 cm) of space between the ceiling and where the shelf ends. Double three feet (91 cm) and you get six feet (1.8 m); add eighteen inches (45 cm) to that number. Thus, you’ll want two pieces of rope that are 7½ feet (2.3 m) each.
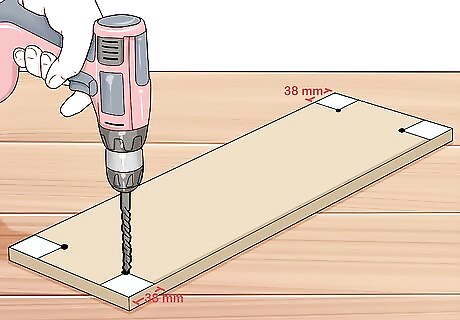
Drill four holes in your plank using a paper guide. Cut a piece of paper into a square with one and a half inches (38 mm) on each side. Place the paper on the end of each board and mark a dot at each corner of the paper to indicate where you’ll drill. You can buy a wood plank cut to size at a local home and building supply store, or cut your own.
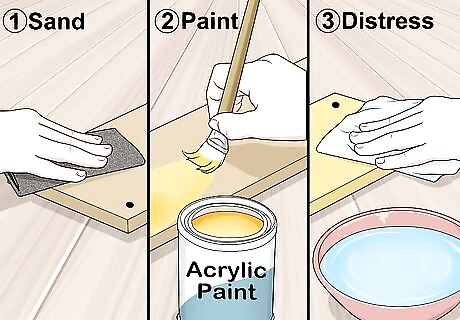
Sand, paint and distress your plank (if desired). For a rustic look, you can leave your plank as is. Alternately, sand your plank by starting with coarse sandpaper and working your way up to fine grade sandpaper, rubbing with (not against) the grain. Paint the plank with any medium compatible with wood. Distress it by using contrasting coats of paint, and wiping the top layer with a damp cloth when it’s almost dry. For example, you may want to paint the whole board with acrylic paint in a fun accent color, or paint just the edges of the board. Dilute the acrylic paint with water if you want the wood grain to show somewhat.
Attach screw eye hooks to the ceiling. Take note of the distance between the holes you drilled. Using that measurement, lightly mark those places on the ceiling with a pencil. Screw in screw eye hooks into the ceiling where you’ve made markings. If you’re inserting the hooks into drywall or sheet rock, use anchor bolt inserts as well.
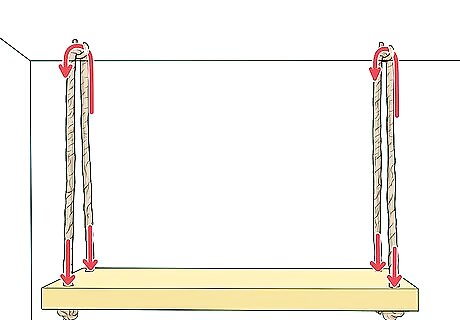
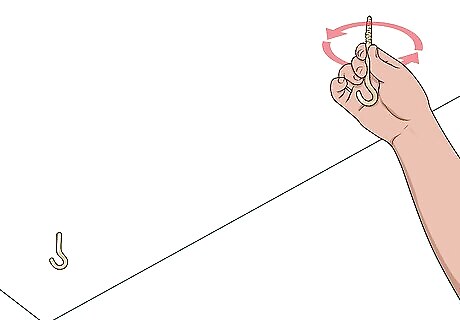
Secure the rope to the shelf and ceiling. Pull the rope through the hooks. Adjust the rope so that both sides hang equally. Run the rope through the four holes in your plank. tie an overhand knot in each of the four rope ends underneath the plank. If you want to prevent fraying, place tape around the rope ends before you pull them through the holes. The rope tails don’t have to be even, but if you want them that way you can use shears to even them up.
Making Multiple Shelves
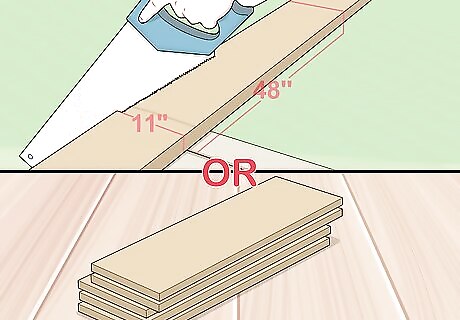
Cut or purchase equal-sized boards. You can buy wooden shelves cut to size at a local home and building supply store, or cut your own (just make sure they’re even). Use two to five boards, depending on how many shelves you want. For example, you may want five boards that are 11” (28 cm) deep and 48” (122 cm) long. You can sand and paint or stain the boards, if desired. For instance, you can use acrylic paint for the boards and the rope. Let it dry before installing. If you’re using thin plywood, you may want to clamp two pieces together for each shelf.
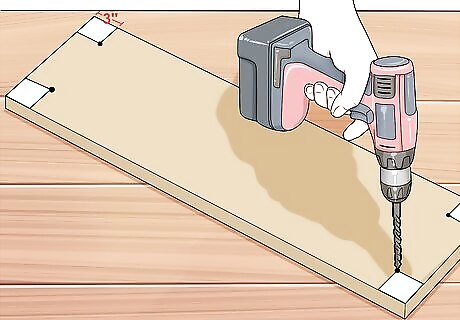
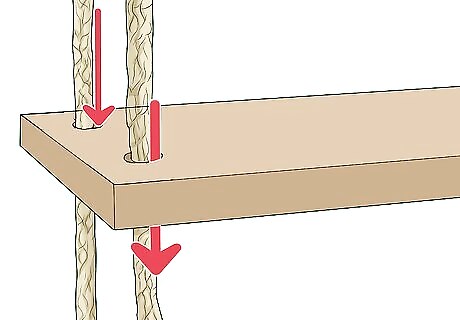
Drill four holes in each board, using a marked paper as a guide. Cut a piece of paper into a square three inches (8 cm) on each side. Place the paper on the end of each board and mark a dot at each corner of the paper to indicate where you’ll drill. Practice on scrap wood first, if desired. Use scrap wood underneath the shelves to protect your work surface. Use a drill bit that is larger than your rope.
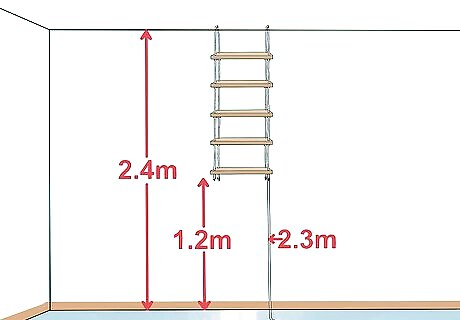
Measure where the rope will hang. You can hang your rope from ceiling up against the wall, or from the wall itself. Take a measurement from where the hanging hardware will go (such as the ceiling) to where you want the shelves to end (above the ground). Double that number. Then add eighteen inches (45 cm) for each knot. Each length of rope will have one knot under each shelf. For example, if your ceiling is eight feet (2.4 m) high and you want the shelves to end four feet (1.2 m) from the ground, the shelves will hang in a four-foot (1.2 m) area. Double the number four to get eight feet (2.4 m). If you have five shelves, you’ll need to add 7.5 feet (2.3 m) to each length of rope (18” x 5 = 90”, or 45 cm x 5 =2.3 m). Thus, you’ll want 15.5 feet (4.7 m) for each length of rope. Knots can take up a lot of room; it’s better to end up with excess rope than not enough. You can trim off any excess later.
Run the rope through the holes. Fold each length of rope in half so that the bent half will be where the rope hangs. Tie a knot below each hole, for each shelf. Make sure to leave the same amount of space between each shelf. Trim and fray the rope ends, if desired, to make tassels. Screw on cable locks if you want to hang heavy items on your shelves. If your rope is thin, you can twist it together to make larger strands as long as they fit in the holes.
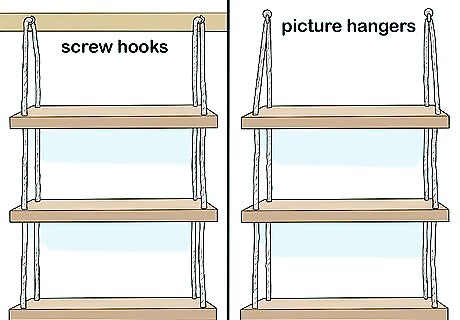
Hang the shelves from screw hooks or picture hangers. Knock on the wall or ceiling with your hand or use a stud finder to ensure the best place to hang your shelves. Measure between the width of your holes and mark those places on the wall or ceiling where you started your measurements. Attach screw hooks or picture hangers where you made your markings. Use two hooks, one for each length of rope. Check the weight limit on the type of hooks you use before you start decorating your shelves. If you knock on the ceiling or wall, it should sound solid, not hollow. This indicates there is a wood plank or stud to screw the hardware into, rather than drywall or insulation.


Comments
0 comment