
views
Learning Basic Editing Techniques

Film footage to gather some practice material. Film anything and everything, as long as there's lots of it. Don't worry about trying to tell a story, just film your surroundings, the local park, your street, your room, or even your pet. Most modern phones are able to shoot HD footage that is perfect for practicing your editing skills. If you don't have a camera handy, or just want to get started on editing, you can download video clips online to practice on.
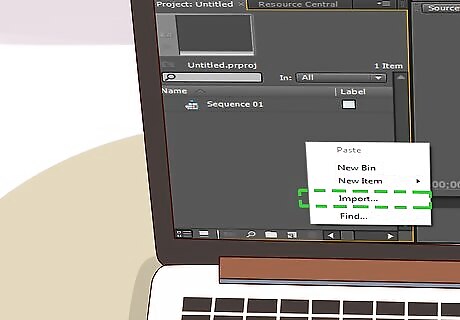
Import the footage into your software. Usually editing software will have what's called a 'bin', a specific place in the program to store all your raw footage. This will look like a list of folders or a large blank space on the left side of the main editing screen. If you can't find an import button some software will allow you to drag in the file from your computer into the software.
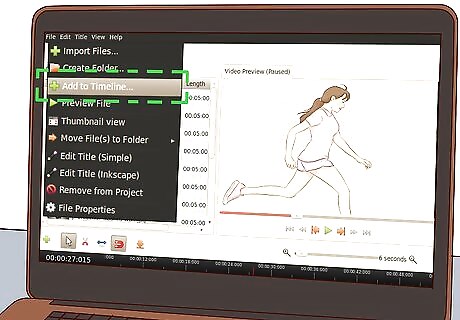
Add clips to the timeline. After you have imported footage into the bins, start dragging them onto the 'timeline'. The timeline appears as a long horizontal bar that takes up the bottom half of the editing screen. The timeline is where the majority of the work will be done. Here, you can order, rearrange, and manipulate the footage in a variety of ways.
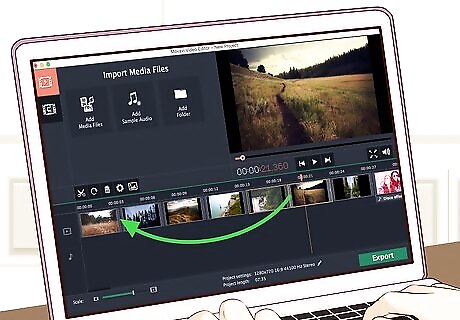
Rearrange the clips on the timeline. Although the footage shot may be random, try rearranging the clips into different orders to tell different stories. To do so, click and drag the long rectangular box (that represents the video clip) back and forth. The clips you place together can affect each other. The viewer of a video will always be thinking about the following clip in the context of the previous one. When you're watching a movie, TV show or video clip, the cut can become completely invisible if performed correctly.
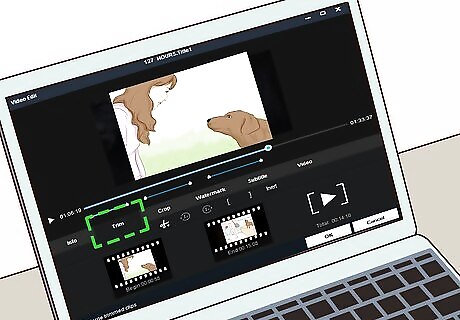
Trim the video clips to change the pace of the video. The name of the tool varies from program to program, but generally it's called the 'Trim' tool. You use this tool to trim the front or back of a clip to make it shorter or to extend it outwards. Click the very edge of a video clip in the timeline and drag it inwards and outwards. This will 'trim' the clip.

Implement transitions to make cuts more appealing. Depending on the tone of the video being made, a pre-made transition from one clip to another can give the video a breath of fresh air. Navigate to the 'Transitions' tab located in most editing software and drag a transition you like to the cut between two video clips. Although transitions are fun, always be thinking about who you're making the video for. Too many exaggerated transitions can detract from the quality of a video.
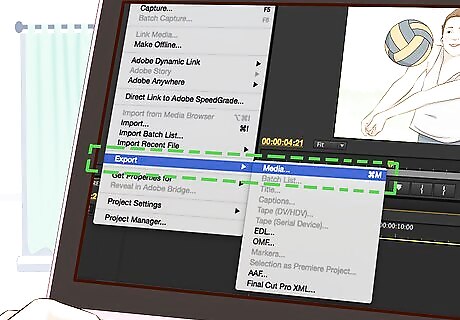
Export the video from the editing software to save your edits. Once you've finished trimming, rearranging and importing all the footage you like, it's now time to export the video. The software collects all the edits you made of the clips and 'encodes' them into a friendly format. Sometimes exporting can be intimidating due to the sheer amount of options available to you in the software. If in doubt, always export at 24 frames per second (fps) and at 1080p. This means that you'll be able to play the final video in the media player of your choice. The quality will usually look better after the video is exported.
Acquiring Advanced Editing Techniques
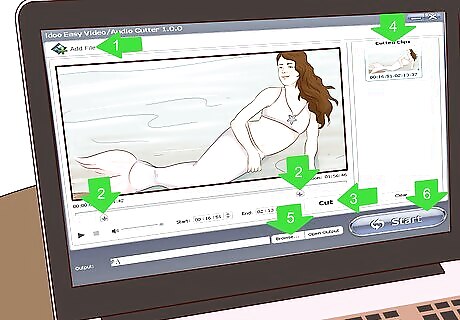
Learn how to cut clips. Sometimes you'll want to completely cut the end off a video clip, or segment a clip into two. This tool varies in name, but it's usually called a 'Cut' tool that is symbolized by a small razor blade. Click the tool and your cursor should change to a picture of a razor blade. Align your cursor with where you want to slice the clip in two and left click. You'll now be able to drag the clip apart. This technique derives from the days when editors had to literally slice a piece of film with a razor that they'd keep behind their ear.
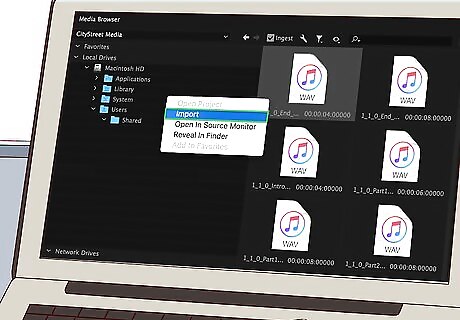
Add music to your video by importing it into a 'bin'. On the timeline the video clips take up a single horizontal bar. There will be another bar below the video clip that will be empty. This is reserved for music to go along with the video. If the bar below is already occupied, this means that the sound of the recorded video is already attached. To add your own music, import a music file just like you would a video file into a bin. Alternatively, you can simply drag a music file onto the timeline. If you want the video's audio to be silent so that your selected music can be heard you will need to separate the video clip from the audio clip. This is a different process for each piece of software, but usually if you right click a video clip an option should appear allowing you to separate them. Then, simply click the unwanted audio and press 'delete' on your keyboard.
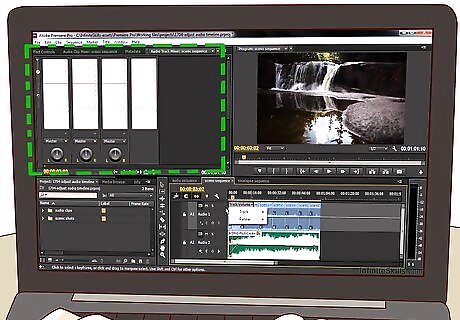
Adjust the mix to make for higher quality audio. 'Adjusting the mix' means adjusting the volume of different audio tracks so that they're not too loud or too quiet. The easiest way of doing this is by clicking the middle bar of the audio clip and dragging it up or down, making it louder and quieter respectively. The audio mix is often overlooked, but is integral to the overall quality. Some software like Final Cut Pro or Adobe Premiere will have dedicated sound mixing tabs at the top of the screen giving you in depth controls on audio volume.
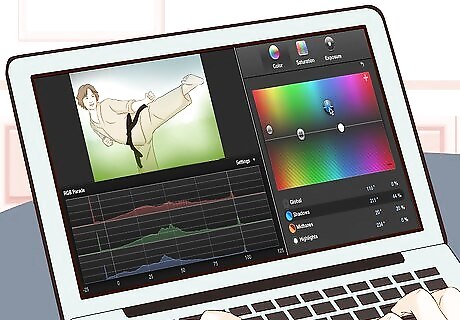
Try your hand at some color correction to make your video look professional. It's likely that if you are using your own video footage the video might be too bright, too dark, or tinted by an overriding color. This is usually due to the exposure of the camera, but this can be fixed in editing software. Most editing software will have a dedicated color correction tab where you can adjust the individual colors of an entire video clip to your liking.

Delete unnecessary footage. When you're trying to tell a story, sometimes a particular clip just won't fit. Don't be afraid to cut a clip if it isn't working. It's generally rare that the final product will use all of the footage you recorded.
Choosing Ideal Software
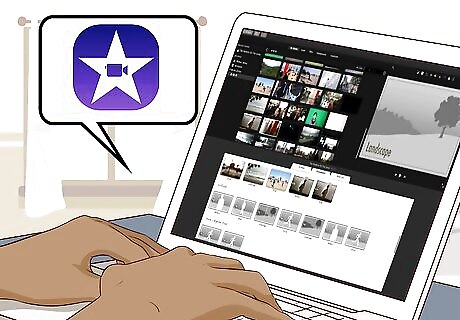
Work with Apple iMovie if you own an Apple device. Nowadays iMovie comes pre-loaded on most Apple desktops and laptops as well as being available from the App Store for mobile devices like the iPad or iPhone. iMovie was created to be as intuitive as possible for the amateur filmmaker looking to start out in their editing careers. There's no need to advance to more specialised programs to learn the basics, especially as they will cost money whereas iMovie may come free with your computer.
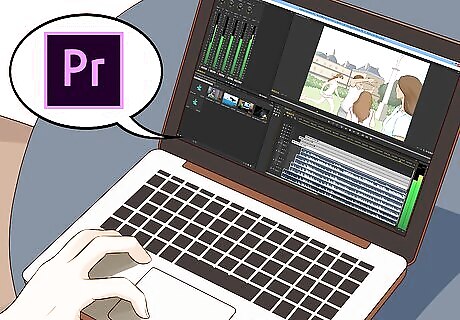
Use Adobe Premiere if you work on Windows. Windows has far more programs on it for basic video editing, however the cream of the crop is generally regarded to be Adobe Premiere. Premiere offers many parallels to other professional editing software and has come to attract a die-hard following. Premiere comes in at a cheaper price than its competitors, so if you have both a Windows and an Apple device available to you and are wondering which to go for, Premiere is the more cost effective choice.
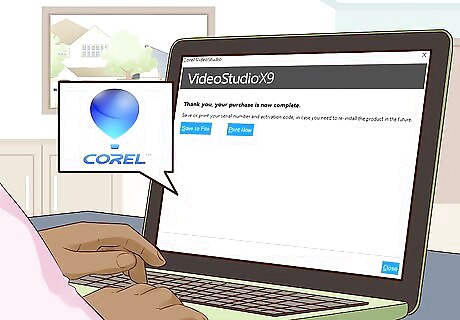
Purchase Corel Videostudio for a cheaper option. Below Premiere for Windows there are still many options for editing. One such software choice that is reviewed favorably is Corel Videostudio for its comparable features to Premiere and Final Cut that are more than sufficient for a fledgling editor. Corel Videostudio also boasts impressive up-to-date features such as editing of 360 VR video, a feature many editing programs lack.

Download Lightworks if you can't afford to spend. If you are strapped for cash and you're not sure whether it's worth investing in some of the higher tier programs and you just need to do some basic editing, Lightworks is for you. Offering more than enough basic features for Window Users it has taken the place of Windows Movie Maker which is now no longer available for download. If you want to cut your teeth on basic editing techniques there's nothing wrong with downloading one of these free programs first to get a feel for the process.




Comments
0 comment