views
Identifying the Problem
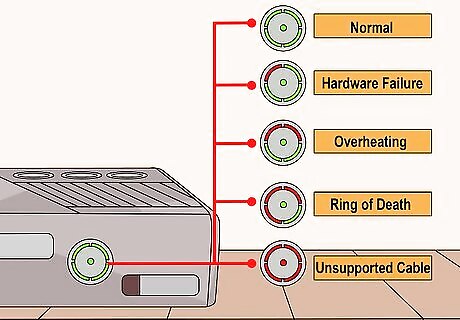
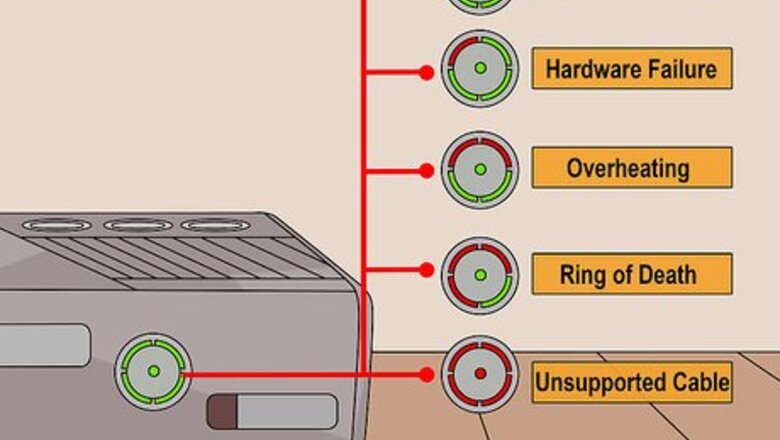
Check the lights on the front of the Xbox 360. The ring of lights around your Power button can indicate what kind of problem you are experiencing. This can help determine how to go about fixing it: Green lights - The system is operating normally. One red light - This indicates a general hardware failure, and is usually accompanied by a code on your TV screen (e.g. "E74"). See the next sections for some tips on getting this fixed. Two red lights - This indicates that the console is currently overheating. Turn the Xbox 360 off for a couple of hours and make sure that it is ventilated on all sides. Three red lights - This is the Red Ring of Death, and indicates a major hardware failure. This usually occurs because the motherboard has overheated and become warped, causing the chips to lose contact. You'll need to either open up your system and repair it yourself or send it in for professional repair. Four red lights - This indicates a faulty or unsupported A/V cable.
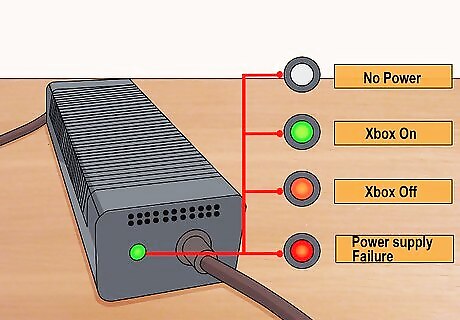
Check the light on your power supply. Your Xbox 360's power supply also has a light on the back. This light can help you determine if your power supply is failing: No light - The power supply is not receiving power from the wall. Green light - The power supply is working correctly and the Xbox is on. Orange light - The power supply is working correctly and the Xbox is off. Red light - The power supply is failing. The most common cause is an overheating power supply. Unplug it on both ends and let it sit for at least an hour.
Basic Fixes
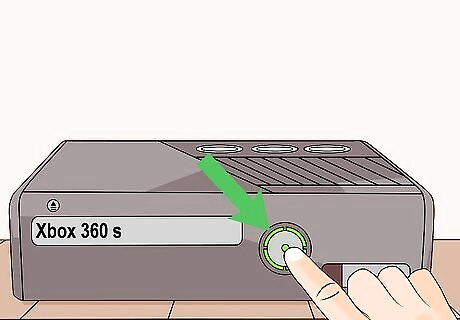
Use a bare finger to press the Power button (Xbox 360 S). The S model has a touch-sensitive button, and may not work with a gloved finger or if you use a fingernail. Press the button with your bare finger to turn the console on.
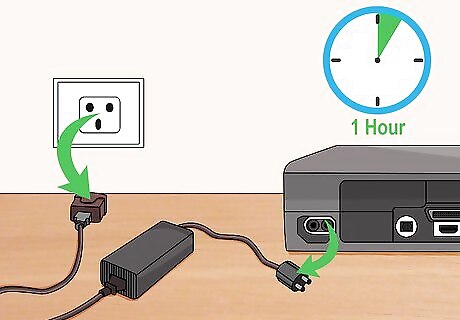
Let the power supply cool. An overheating power supply is one of the most common reasons that an Xbox 360 will not start. Many people tuck the power supply away, but this can lead to heat build-up. Make sure your power supply is well-ventilated and not blocked by other object. Unplug the power supply on both ends and let it sit for at least an hour to cool. Make sure the fan in the power supply is still functioning. You should be able to hear a faint whirring sound when the power supply is plugged in and turned on. If the fan has failed, you'll need to get a new power supply.
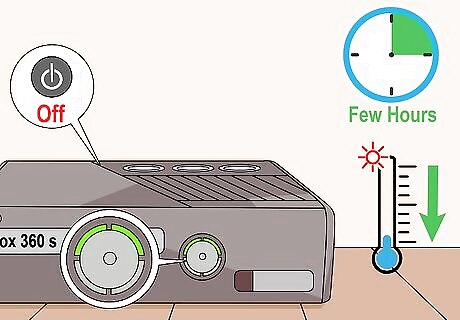
Let the console cool. If you get two red lights on your Xbox 360 Power button, your console is overheating. Turn it off for a few hours to let it cool down. Make sure that the Xbox 360 is placed in a well-ventilated area and that no other objects are directly next top it or stacked on top of it. There is a lot of anecdotal evidence that keeping your Xbox 360 horizontal will lead to better cooling.
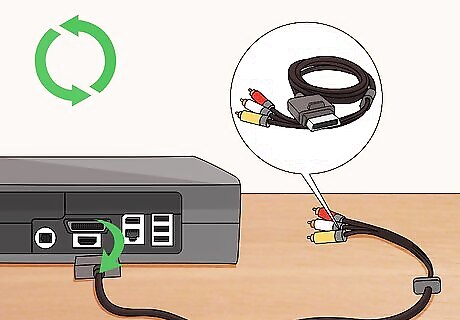
Try a different video cable. If your Xbox 360 is displaying four red lights, your video cable may be damaged or incompatible, or the connection isn't complete. Check that all of the plugs are connected properly. Try using a replacement official video cable to see if your problem is fixed.
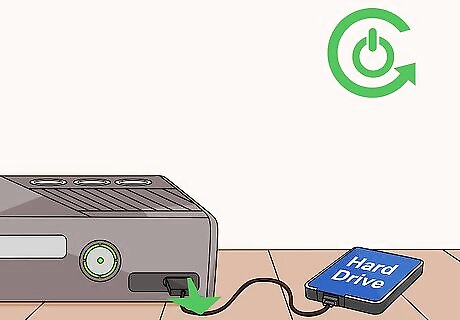
Disconnect any peripherals. Sometimes you can have too many things connected to your Xbox 360, causing it to draw too much power. This is especially common with modified consoles with unofficial hard drives or other peripherals. Disconnect everything you can and try to start the console again. This failure is commonly accompanied by error code E68 on your TV.
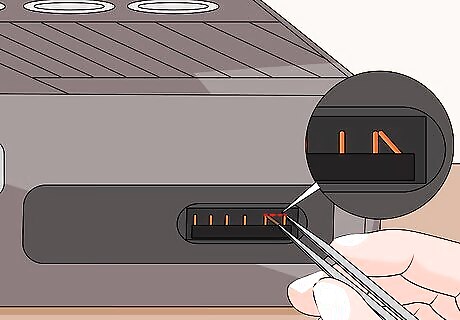
Look for bent pins in the USB ports. A common cause of failure for Xbox 360 consoles is bent pins in the USB ports causing a short circuit: Examine the USB ports on the Xbox 360, both in the front and in the back. If any of the pins inside are touching each other or the casing of the port, they are likely causing a short circuit. With the Xbox unplugged, use tweezers to gently bend the pins back to their original position. Avoid using the USB port in the future if possible so that the pins don't get bent again.
Fixing a Red Ring of Death
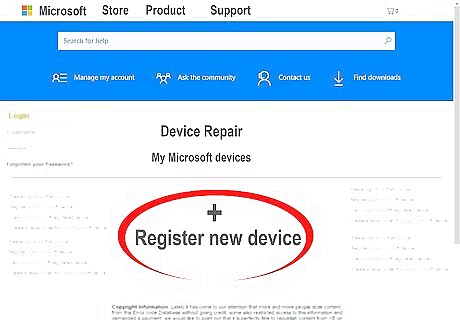
Get your console repaired by Microsoft if it is still under warranty. If your console is still covered by Microsoft's warranty, you should be able to get it repaired for free or for a discount. You may receive a replacement console if it is damaged beyond repair. Visit devicesupport.microsoft.com/en-US to register your devices, check their warranty status, and request service.
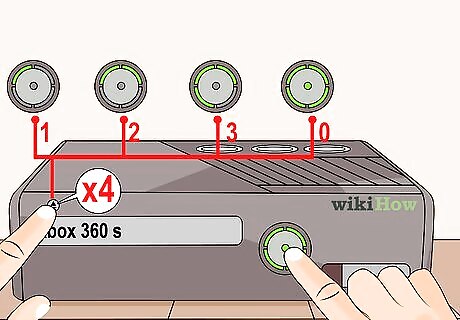
Get a secondary error code. The Red Ring of Death (three red lights around the Power button) can indicate a variety of different hardware problems. Most of the time, it will be because the console has overheated and the board has warped, causing chips to lose contact. You can use the secondary error code to determine the exact cause: While the console is on and the red lights are flashing, press and hold the Sync button on the front of the Xbox. While holding the Sync button, press and release the Eject button. Note the flashing lights that indicate the first digit. One light means the first digit is "1," two means "2," three means "3," and four means "0." Press the Eject button again to get the next digit. There are four digits total.
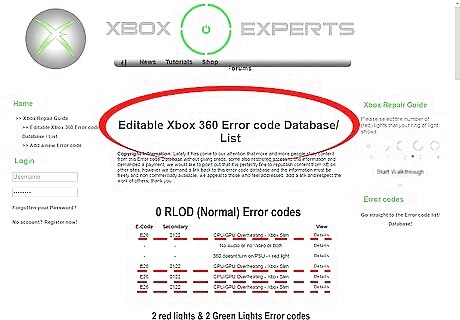
Determine what the code means. Once you have a secondary code, you can look it up to see what your hardware problem is. You can find the code meanings at https://support.xbox.com/en-US/help/errors/error-code-search-guide.
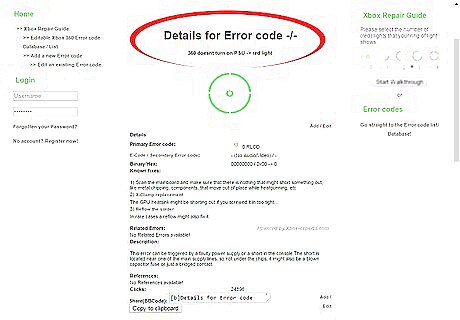
Click the "Details" link next to the code you get. This will list the known repairs that can fix the code, as well as point you to the proper parts and tools you'll need.
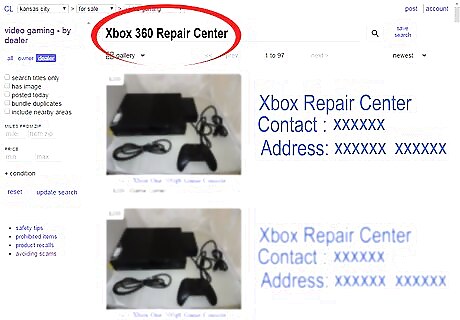
Consider "professional" repair. Even if your console is out of warranty, it may be easier to have it repaired at the local electronics shop or hobbyist's garage than to try it yourself. Check Craigslist and local ads for Xbox 360 repair services. This is especially important if your Xbox needs to be reflowed, as this requires special equipment to do right.
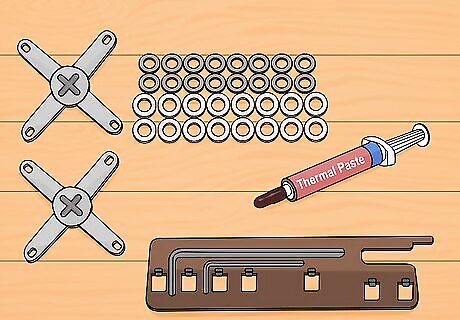
Order the proper repair kit. One of the most common replacement parts you'll need is an X-Clamp replacement. This is the piece that keeps the heatsink attached to the CPU, and getting a new one will keep things solidly in place. You'll also likely need new thermal paste to apply between the CPU and the heatsink. If you're replacing the clamps on the Xbox 360, you'll likely need a drill in order to install the larger replacement bolts.
Find a specific guide for the repair you are performing. There are too many variations to list here, so look for a repair guide that matches your error code. You may need extra tools like a heat gun to reflow the solder. Different repairs will vary wildly in difficulty and required materials.
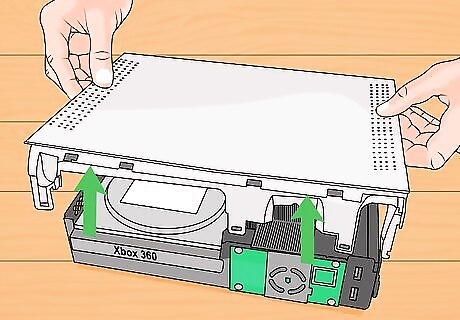
Open your Xbox 360. Most repairs will require you to open your Xbox 360. This is a fairly complicated process, and is made easier with a special tool that is included in most repair kits. See Open an Xbox 360 for detailed instructions.
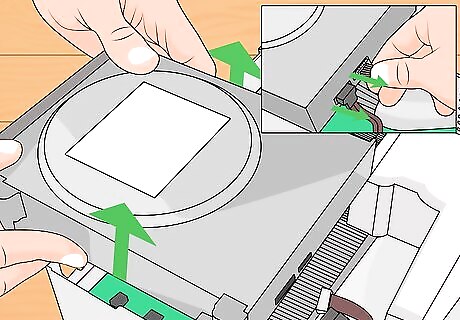
Disconnect and remove the DVD drive. You'll need to remove the DVD drive in order to get to the components underneath. Disconnect the two cables coming out of the back of the drive, then lift the drive up and out.
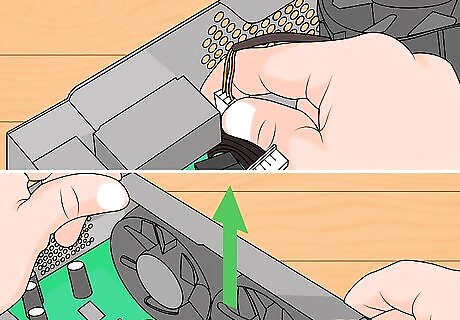
Remove the fan shroud and fans. The fan shroud unclick and can be set to the side. Remove the cable connecting the fans to the motherboard, then pry the fans out of their metal housing.
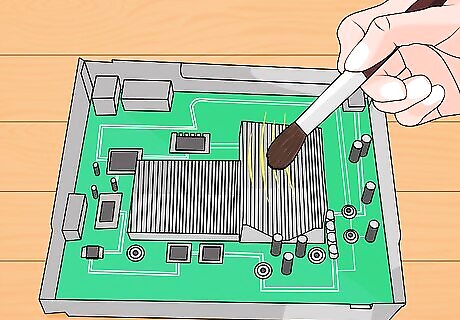
Clean out the dust. If your Xbox is overheating, cleaning out the dust inside can make a big difference. Use a clean paintbrush to get dust out of the heatsinks, and a can of compressed air to blow dust out of crevasses. Remove the fans and carefully remove the dust from each blade using your brush. Don't blow fans with compressed air, as this can make the fans spin faster than they are designed to.
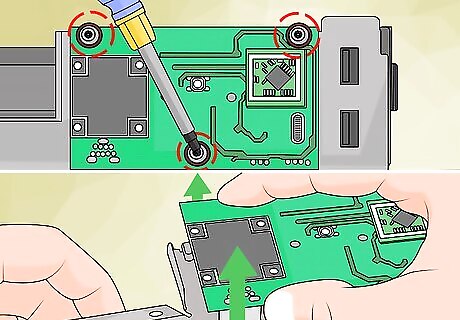
Remove the RF module from the front of the console. This is the small logic board that is mounted vertically along the front of the open console. You'll need to use a spudger or flathead to pry the shield off, and then a Torx screwdriver to remove the three screws.
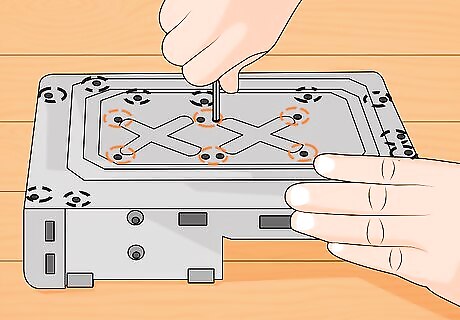
Flip the console over and remove the screws holding the motherboard. There are nine gold Torx T10 screws and eight black Torx T8 screws. Your RRoD fix-it kit will likely include replacements for the eight T8 screws.
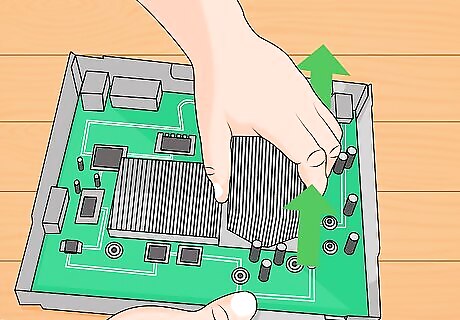
Carefully turn the console back over and remove the motherboard. You can lift the motherboard out from the front. Be careful to not let the motherboard fall out while turning the console over.
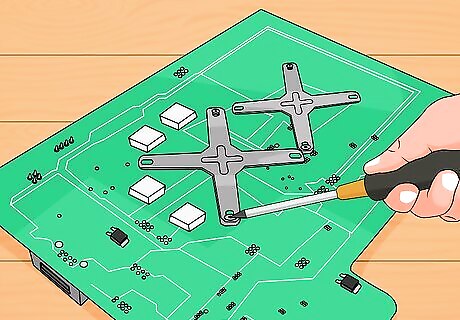
Pry the X clamps off the back of the motherboard. If your repair calls for X clamp replacement, or you want to apply new thermal paste to the CPU heatsink, you'll need to remove the X clamps from the back of the motherboard. Use a small flathead to pry the X clamp away from the retaining post until it pops out of the groove. Insert the flathead underneath the released clamp and then pry it completely off the post. Repeat for each corner of the clamp.
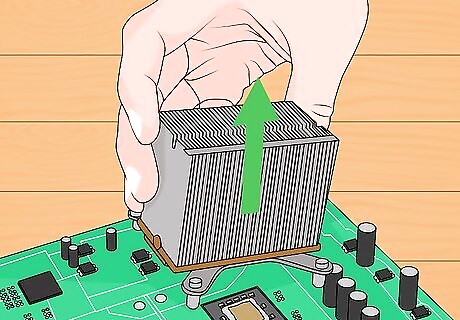
Pull the heatsink off of the CPU. You may have to apply a little force to break the seal of the old thermal paste.
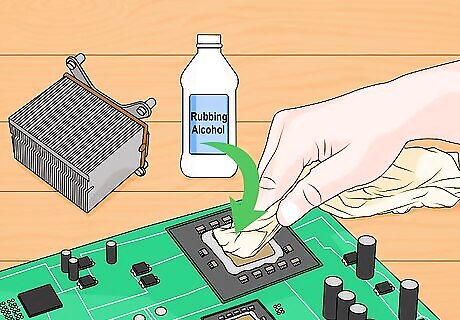
Clean off the old thermal paste using rubbing alcohol. Ensure that you've cleaned off both the CPU and the heatsink surface so that none of the old paste remains.
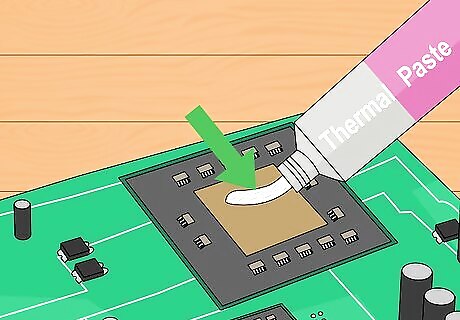
Apply new thermal paste. Apply a small drop of paste on the center of your Xbox 360 processor. The drop should be small, smaller than a pea. You don't need to spread it. If the drop is placed exactly in the center, it will spread automatically when the heatsink is installed.
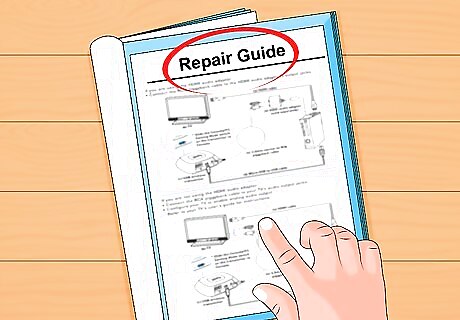
Follow any additional repair instructions. This covers the basics of cleaning the system, replacing the clamps, and applying new thermal paste. Refer to your repair guide to see what else you'll need to do to get your system fixed. This could include reflowing the solder that connects the chips to the motherboard, which is a complicated process.






Comments
0 comment