views
Crocheting the Head
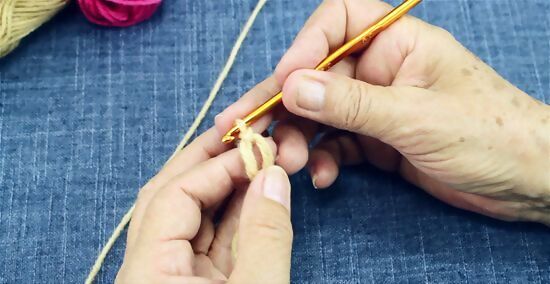
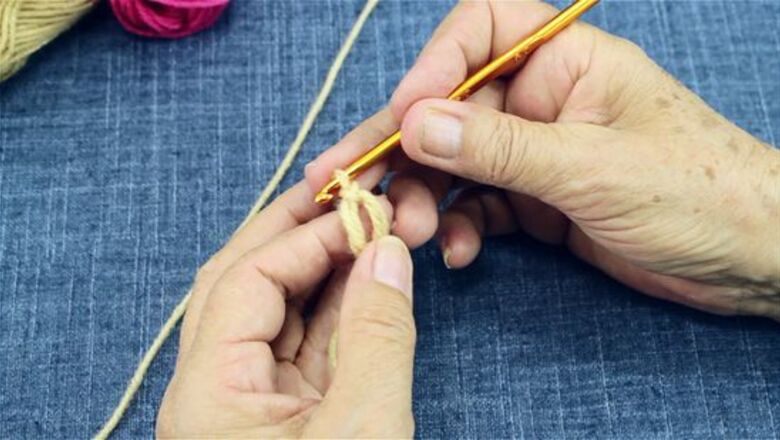
Make a magic circle. A magic circle or magic ring is a crochet technique that helps to start projects that need to be worked in the round. To start working your teddy bear’s head, wrap your working yarn around 2 of your fingers twice. Then, secure the circle with a slipstitch worked into the center of the circle.
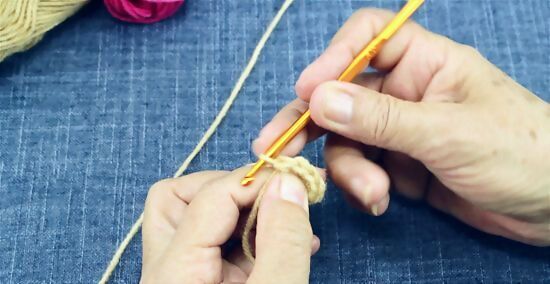
Single crochet into the magic circle 6 times. After you have secured your magic circle, begin working your first round of stitches. Insert your crochet hook into the center of the circle, and then yarn over and pull through the circle and 1 stitch. Then, yarn over again and pull through both remaining stitches on the hook. Repeat this 5 more times for a total of 6 single crochet stitches worked into the center of the circle.
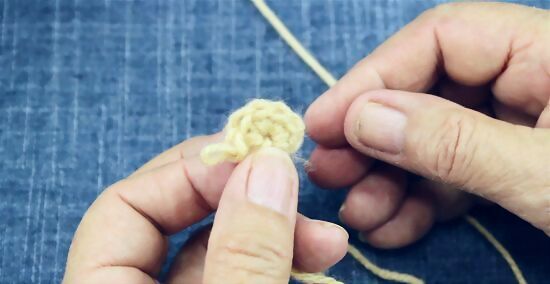
Tug the tail of your yarn to tighten the circle. After you finish the last stitch, tug on the tail of your yarn to close the ring. This will pull all of the single crochet stitches in your first round together so that they form a tight circle rather than a ring of stitches.
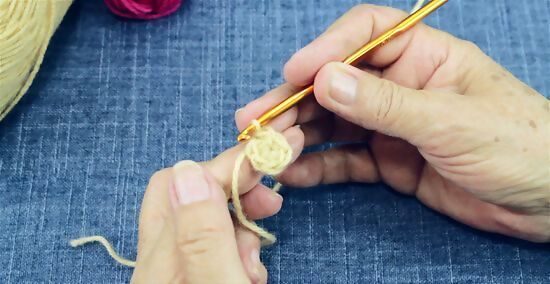
Close the round with a slipstitch worked into the first stitch in the round. You should close every round with a slipstitch that connects the first and last stitches in the round. This will ensure that you do not end up with gaps in between your stitches at the ends of the rounds.
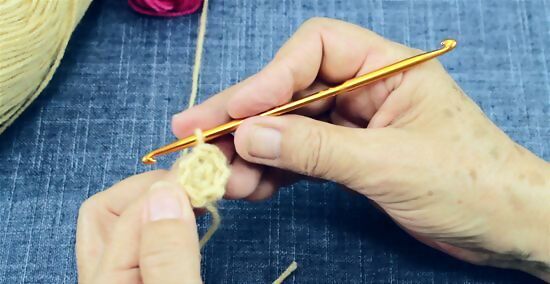
Chain 1 to begin your new round. You will need to chain 1 stitch at the beginning of every new round to ensure that there is enough slack to work on the next level of stitches. Loop the yarn over your hook, and then pull it through the other loop on the hook.
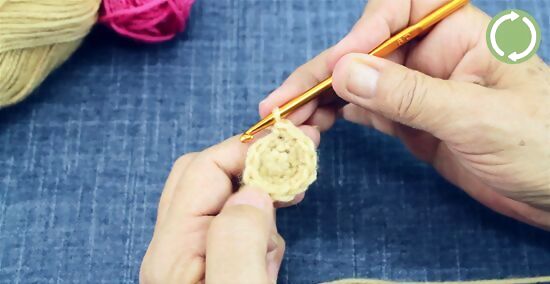
Work 2 single crochet stitches into each stitch in the second round. For round 2, single crochet 2 times into every stitch in the round. This will double your total number of stitches bringing the total from 6 stitches to 12 stitches.
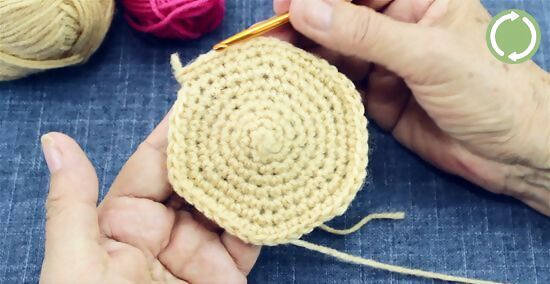
Work the next 6 rounds with increases. Next, you will need to work 6 rounds of increases to form the teddy bear’s head. Work the following increases: Round 3: Single crochet 2 times in first stitch and 1 time in next stitch. Repeat to the end of the round. You will have 18 stitches at the end of this round. Round 4: Single crochet 2 times in first stitch and 1 time in next 2 stitches. Repeat to the end of the round. You will have 24 stitches at the end of this round. Round 5: Single crochet 2 times in first stitch and 1 time in next 3 stitches. Repeat to the end of the round. You will have 30 stitches at the end of this round. Round 6: Single crochet 2 times in first stitch and 1 time in next 4 stitches. Repeat to the end of the round. You will have 36 stitches at the end of this round. Round 7: Single crochet 2 times in first stitch and 1 time in next 5 stitches. Repeat to the end of the round. You will have 42 stitches at the end of this round. Round 8: Single crochet 2 times in first stitch and 1 time in next 6 stitches. When you complete this round, you should have 48 stitches total.
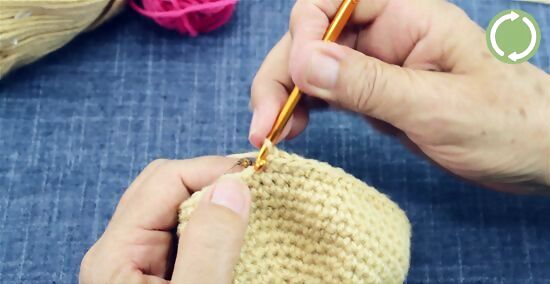
Single crochet 1 time into every stitch in the 9th through 14th rounds. Work 1 single crochet stitch into every stitch in your 9th round. Then, repeat this for the next 5 rounds. Work rounds 10 through 14 in the single crochet stitch as well.
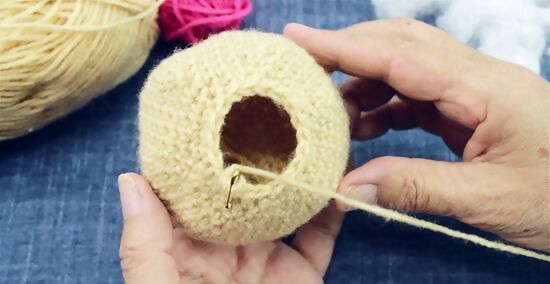
Work the next 5 rounds with decreases. After you finish round 14, you will need to begin decreasing the size of your teddy bear’s head. Work the following decreases: Round 15: Single crochet 2 together and single crochet into the next 6 stitches 1 time. Repeat this sequence to the end of the round. You will have 42 stitches at the end of this round. Round 16: Single crochet 2 together and single crochet into the next 5 stitches 1 time. Repeat this sequence to the end of the round. You will have 36 stitches at the end of this round. Round 17: Single crochet 2 together and single crochet into the next 4 stitches 1 time. Repeat this sequence to the end of the round. You will have 30 stitches at the end of this round. Round 18: Single crochet 2 together and single crochet into the next 3 stitches 1 time. Repeat this sequence to the end of the round. You will have 24 stitches at the end of this round. Round 19: Single crochet 2 together and single crochet into the next 2 stitches 1 time. Repeat this sequence to the end of the round. You will have 18 stitches at the end of this round.
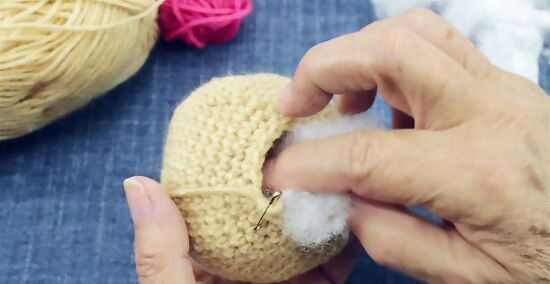
Stuff the head with polyfill stuffing. Before you continue working to create the body, make sure that you stuff the teddy bear’s head with enough polyfill stuffing to give it a distinct round shape. You may not be able to access the head as easily after continuing to work on the bear's body, so fill the head all the way with stuffing. Push the polyfill stuffing in through the opening at the bottom of the teddy bear’s head. Make sure that the last stitch you crocheted is secure on your hook while you are doing this or the stitches might unravel. You can simply wrap the yarn around the hook a few times and hold it in place with your thumb and forefinger while you stuff the head.
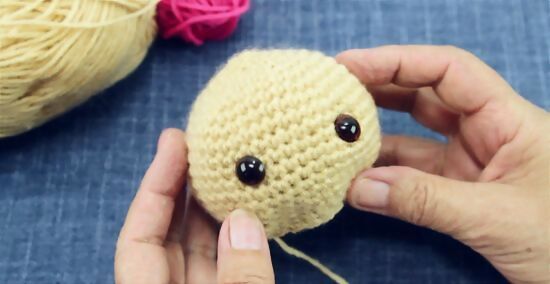
Sew the eyes onto the teddy bear’s face. The finishing touch for the teddy bear’s head is the eyes. You can use buttons for eyes, purchase some sew on eyes that are meant to be used for teddy bears, or weave some contrasting color yarn in the shape of eyes where you want the teddy bear’s eyes to be. Thread your yarn needle with a 12 inches (30 cm) piece of yarn and then sew the eyes into place. Try placing the eyes between rounds 12 and 13 and place them so that they are about 7 stitches away from each other.
Creating the Body
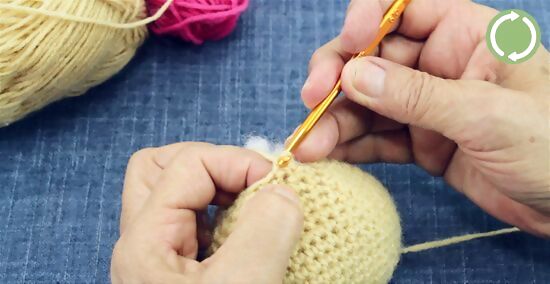
Single crochet the next round. The body is simply a continuation of the teddy bear’s head, so you can keep working from the point where you left off. Single crochet 1 time into every stitch for the 20th round.
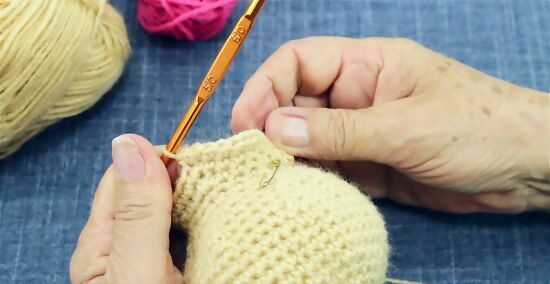
Work increase rounds again for the next 3 rounds. Begin widening the teddy bear’s body by increasing for the next 3 rounds. Work the following increases: Round 21: Single crochet 2 times in the first stitch and 1 time in the next 2 stitches. Repeat this sequence for the entire round. You should have 24 stitches when you finish the round. Round 22: Single crochet 2 times in first stitch and 1 time in next 3 stitches. Repeat this sequence for the entire round. You should have 30 stitches when you finish the round. Round 23: Single crochet 2 times in first stitch and 1 time in next 4 stitches. Repeat this sequence for the entire round. You should have 36 stitches when you finish the round.
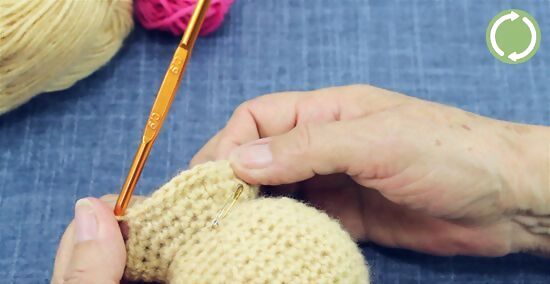
Single crochet rounds 24 through 26. After you finish the 3rd increase round, single crochet 1 time into every stitch in the round for the next 3 rounds. This will build up the length of the body without expanding it outwards.
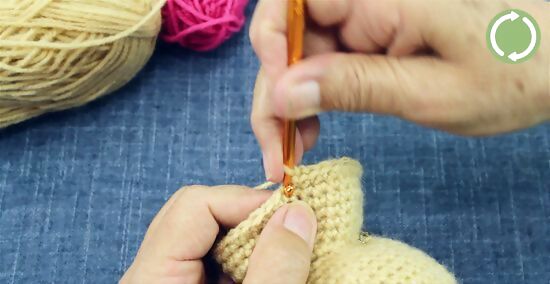
Single crochet 2 times in first stitch and 1 time into the next 8 stitches. Then, work another slight increase round. Single crochet twice into the first stitch in round 27 and then single crochet 1 time into the next 8 stitches. Repeat this sequence to the end of the round. You will have 40 stitches at the end of the round.
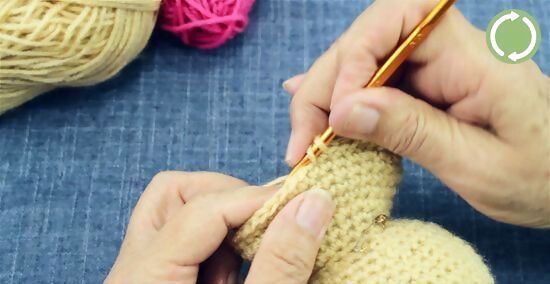
Work 1 single crochet stitch into each stitch in the next 2 rounds. Next, single crochet 1 time into every stitch in the next 2 rounds (rounds 28 through 29) to continue increasing the length of your teddy bear’s body.
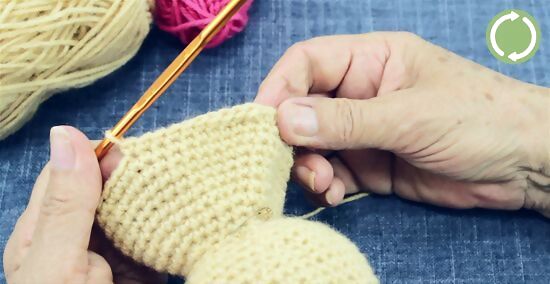
Single crochet 2 times in first stitch and 1 time into the next 9 stitches. Then, work another increase round for round 30, similar to the last one that you did. Single crochet twice into the first stitch, and then once into the next 9 stitches. Repeat this to the end of the round for a total of 44 stitches.
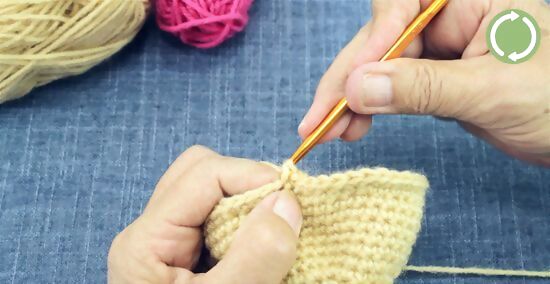
Single crochet once into each stitch in the next 2 rounds. Next, single crochet 2 rounds again (rounds 31 and 32). Work 1 single crochet stitch into every stitch in the next 2 rounds.
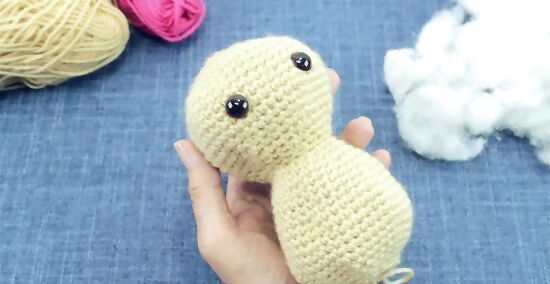
Decrease for the next 6 rounds. Your teddy bear’s body should be taking shape now, so the next step is to begin working gradual decreases to taper it off towards the bottom. Work the following decreases: Round 33: Single crochet 2 together and single crochet into the next 20 stitches 1 time. Repeat this sequence to the end of the round. Round 34: Single crochet 2 together and single crochet into the next 5 stitches 1 time. Repeat this sequence to the end of the round. Round 35: Single crochet 2 together and single crochet into the next 4 stitches 1 time. Repeat this sequence to the end of the round. Round 36: Single crochet 2 together and single crochet into the next 3 stitches 1 time. Repeat this sequence to the end of the round. Round 37: Single crochet 2 together and single crochet into the next 2 stitches 1 time. Repeat this sequence to the end of the round. Round 38: Single crochet 2 together and single crochet into the next stitch 1 time. Repeat this sequence to the end of the round.
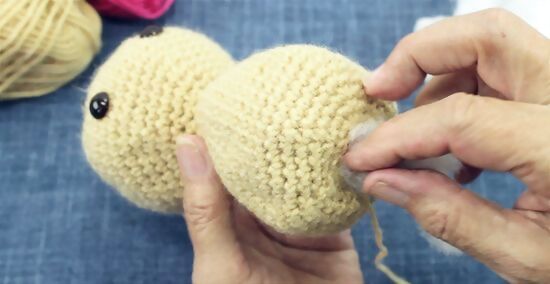
Stuff the body with polyfill stuffing. Stuff the teddy bear’s body with enough polyfill stuffing to create a full rounded body. Insert the stuffing through the opening in the bottom of the bear’s body and keep adding more stuffing until you are satisfied with the bear’s appearance.
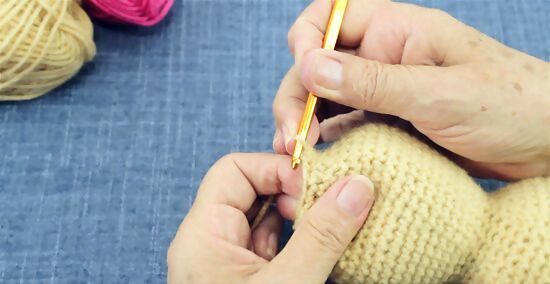
Single crochet 2 together. These frequent decreases will drastically taper the bottom of your teddy bear’s body, which is why it is important to fill it with stuffing before you do this. Repeat this to the end of round 39.
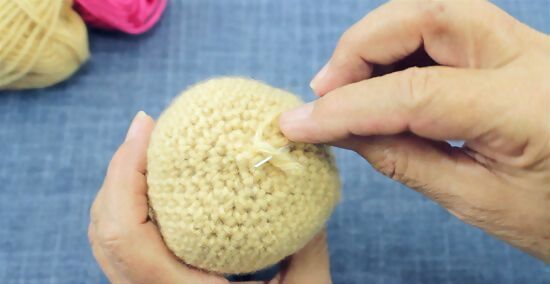
Tie off the last stitch and weave through the remaining stitches. When you finish the decrease round, tie off your final stitch and leave about 12 inches (30 cm) of yarn extending from the last stitch. Thread this yarn through your needle and then begin weaving the yarn through the stitches along the bottom of the bear. When you are finished, pull on the yarn to bring the stitches together. Tie a knot to secure the bottom of the bear and contain the filling. Cut away the excess yarn.
Making a Muzzle
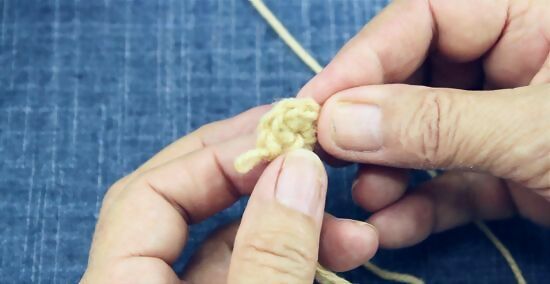
Make a magic circle and single crochet 6 times into it. Begin the muzzle the same way you started the bear’s head. Make a magic circle, secure it with a slipstitch, and then single crochet into the center 6 times. After the last stitch, tug on the tail to bring the stitches together, and then slipstitch to secure the round. This will complete round 1.
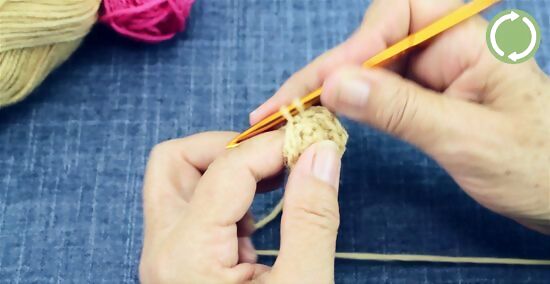
Work 2 single crochet stitches for every stitch in the round. For round 2, chain 1 to begin your round and then work 2 single crochet stitches into every stitch in this round. This will double the total number of stitches in the round, taking the total from 6 to 12.
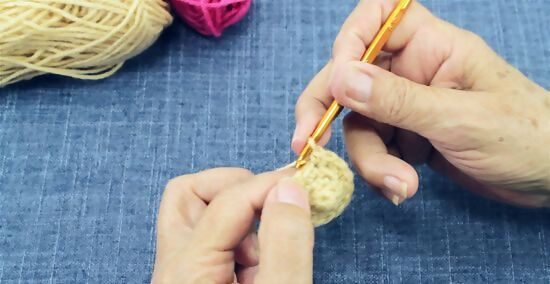
Increase for the next 2 rounds. The next 2 rounds will be increase rounds. Work the following increases: Round 3: Single crochet 2 times in the first stitch and 1 time in the next stitch. Repeat to the end of the round. You will have 18 stitches at the end. Round 4: Single crochet 2 times in the first stitch and 1 time in the next 2 stitches. Repeat to the end of the round. You will have 24 stitches at the end.
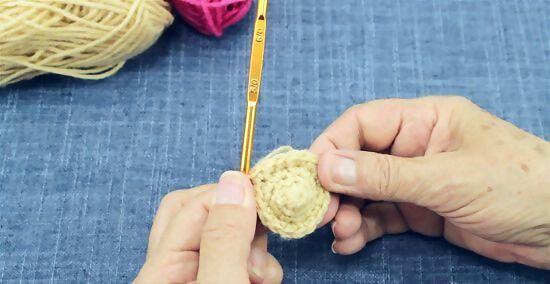
Single crochet into every stitch in the round. Your 5th round will just be a single crochet round. Work 1 single crochet stitch into every stitch in the round.
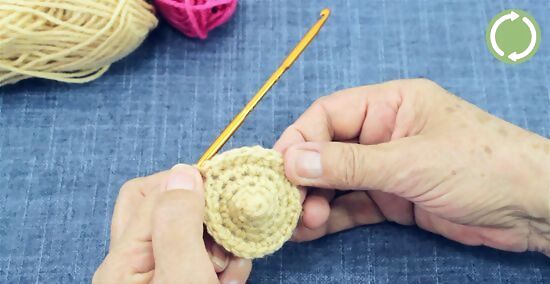
Single crochet 2 times into the first stitch and 1 time into the next 11 stitches. After you finish the round of single crochet stitches, you will work a very slight increase round. Single crochet twice into the first stitch and 1 time into the next 11 stitches. Repeat this sequence for the 6th round. You will have 26 stitches at the end of this round.
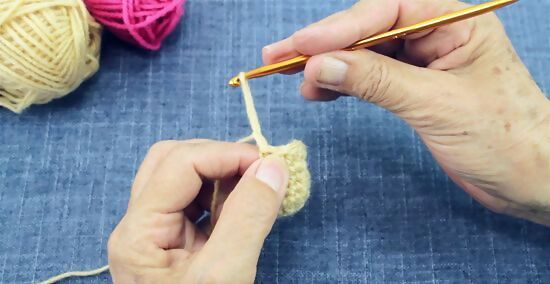
Fasten off the last stitch. Your muzzle is completed now, and all you have to do is fasten off the last stitch and leave some yarn for stitching the muzzle in place. Leave about 12 inches (30 cm) of yarn for sewing.
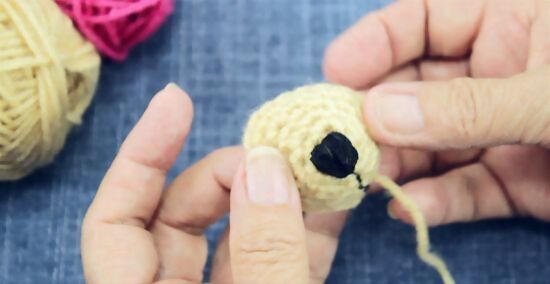
Use a darker color yarn to sew on the nose. Before you secure the muzzle to the face, thread your yarn needle with about 18 inches (46 cm) of a dark color yarn, such as dark brown or black. Then, sew through the tip of the muzzle with the yarn to form the nose. You can sew in an upside down triangle design going back and forth across the tip of the nose until it is fully covered. Tie the yarn on the inside of the muzzle when you are satisfied with the appearance of the nose and then cut the excess yarn.
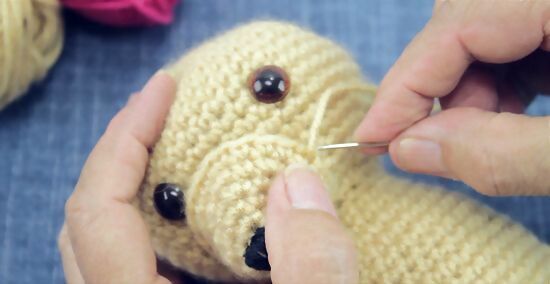
Sew the muzzle partially into place. Next, to attach the muzzle to the teddy bear’s face, thread the yarn that you left extending from the last stitch on your muzzle through the eye of the yarn needle. Then, being weaving in and out of the edges of the muzzle and the face to connect them. Stop when you have just a few inches left to sew onto the face so that you can stuff the muzzle. If desired, you may pin the muzzle onto the teddy bear’s face first to check the position.
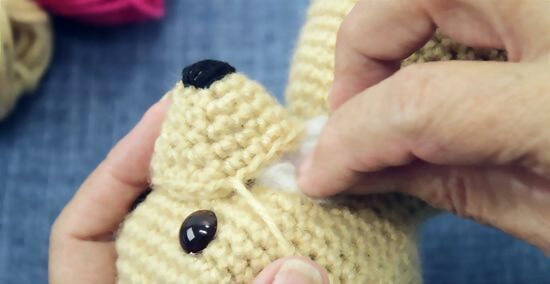
Stuff the muzzle before you finish sewing it completely into place. Fill the muzzle with polyfill stuffing to give it a nose-like appearance. Keep stuffing the muzzle through the gap that you left until you are satisfied with its appearance. Then, sew up the gap that you left and tie off the yarn. Cut the excess yarn.
Creating the Ears
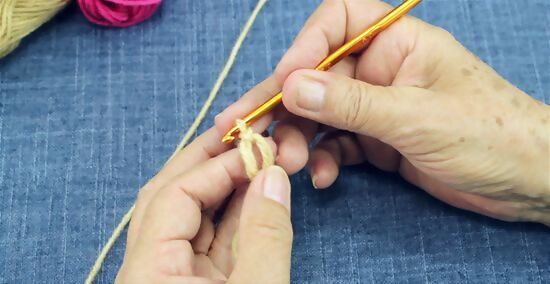
Make a magic circle and single crochet into the magic circle 6 times. Start the ears the exact same ways as the head and muzzle. Create the magic circle, secure it with a slipstitch, and then work 6 single crochet stitches into the circle. Tug the tail to tighten it, and then slipstitch to connect the first and last stiches.
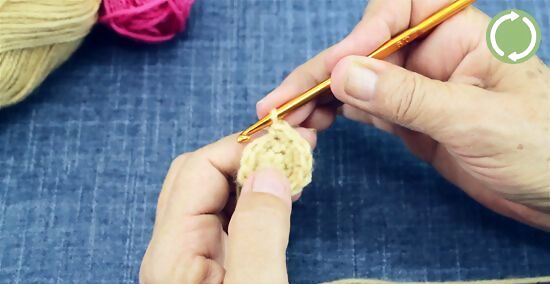
Work 2 single crochet stitches into every stitch. Chain 1 and then single crochet twice into every stitch in the round. This will double your stitches and bring your total from 6 to 12 for round 2.
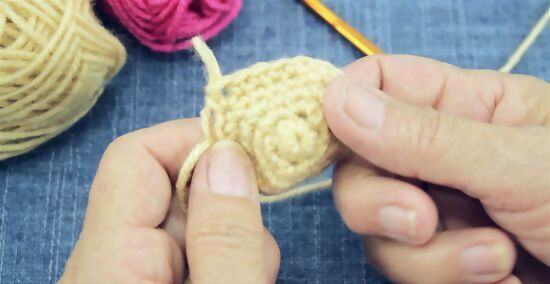
Work an increase and then single crochet for 2 rounds. For round 3, work another increase round. Single crochet 2 times in the first stitch and 1 time in the next stitch.You will have 18 stitches at the end of this round. Then, work 2 single crochet rounds to complete your first ear.
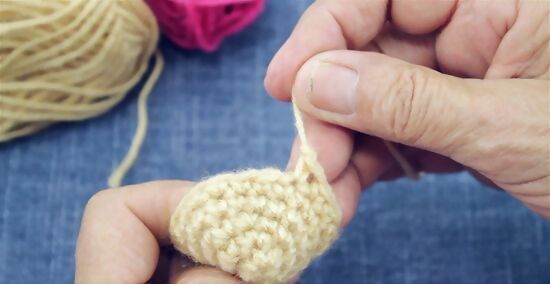
Fasten off. Tie off the last stitch in your 5th round and then cut the yarn about 12 inches (30 cm) from the last stitch. This will provide plenty of yarn to sew the ear into place.
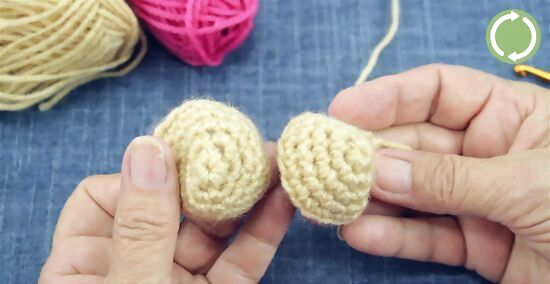
Repeat to create the second ear. Make the second ear exactly the same way as the first ear so that they will be identical.
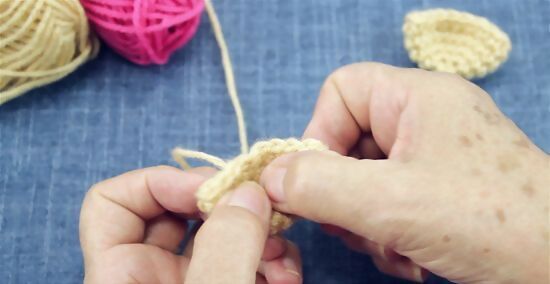
Fold the circles to form half circles. To form the ears, all you need to do is fold them in half. Do not stuff the ears with filling. Just fold them so that one side is rounded and the other is straight. The ears should resemble half-moon shapes.
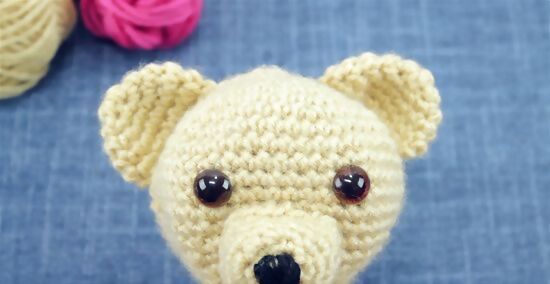
Sew the ears onto the top of the teddy bear’s head. When you have completed your second ear, use the tail yarn that you left to sew the ears onto the top of the teddy bear’s head, or you can place then off to the sides slightly if you prefer. Thread your tail yarn trough the eye of the yarn needle and then sew along the bottom edges of the ear. Tie off and cut the excess yarn when you are finished sewing each ear into place.
Crocheting Arms and Legs
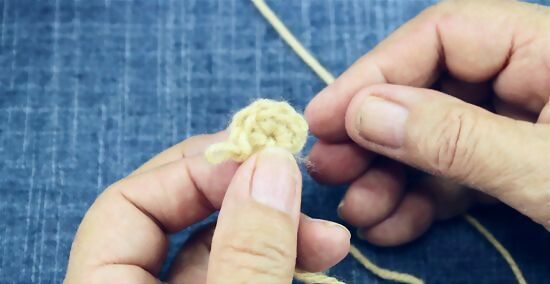
Make a magic circle and single crochet into the magic circle 6 times. You will also start each of the arms and legs the exact same way as the head, muzzle, and ears. Create a magic circle, secure it with a slipstitch, and then work 6 single crochet stitches into the circle. Tug the tail to tighten the circle, and then slipstitch into the first stitch in the round to connect the first and last stiches.
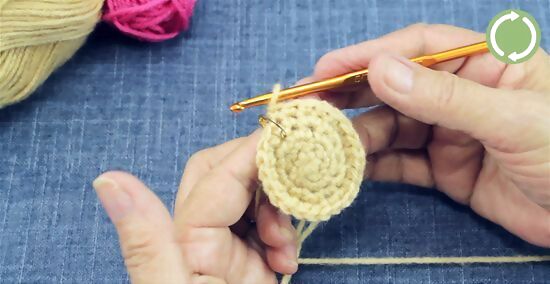
Increase for the next 3 rounds. You will need to work the next 3 rounds as increases. Follow this sequence for the rounds: Round 2: Work 2 single crochet stitches into every stitch. Repeat this sequence for the whole round. You will have 12 stitches at the end of this round. Round 3: Single crochet 2 times in the first stitch and 1 time in the next stitch. Repeat this sequence for the whole round. You will have 18 stitches at the end of this round. Round 4: Single crochet 2 times in the first stitch and 1 time in the next 2 stitches. Repeat this sequence for the whole round. You will have 24 stitches at the end of this round.
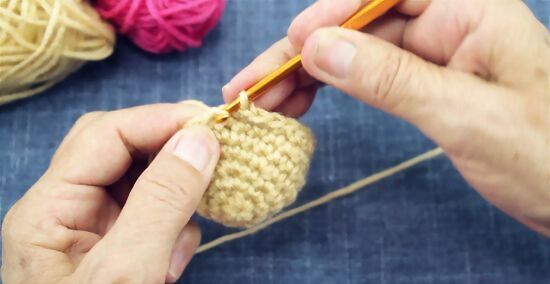
Single crochet into every stitch in the next 2 rounds. For rounds 5 and 6, work one single crochet stitch into every stitch in the round. You will still have 24 stitches at the end of each of these rounds.
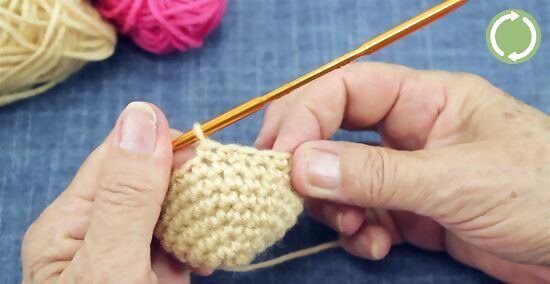
Decrease for the next round. Single crochet 2 together and then single crochet into the next 2 stitches 1 time. Repeat this sequence to the end of the round. You will have 18 stitches at the end of round 7.
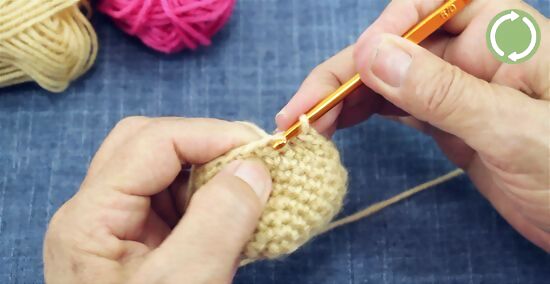
Work 1 single crochet stitch into every stitch for the next 6 rounds. Next, you just need to expand the limb. To do this, single crochet 1 time into every stitch in the round for the next 6 rounds. If you want your limbs a little shorter or longer, then you can either work a couple less rounds or a couple more rounds. For example, if you wanted your teddy bear’s arms to be a little shorter than his legs, then you could work 4 rounds for both of the arms and 6 rounds for both of the legs.
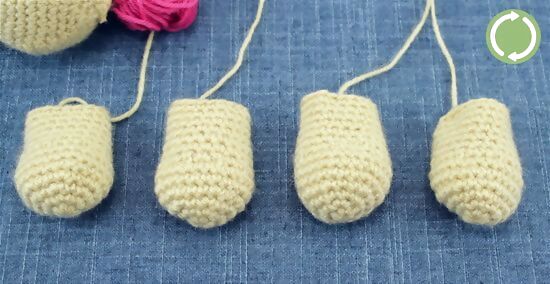
Fasten off the last stitch. After you finish the last round, tie off the last stitch and leave about 12 inches (30 cm) of yarn to use for sewing the limb into place. Repeat the process to create the other limbs. Keep repeating this process until you have created 2 arms and 2 legs for your teddy bear.
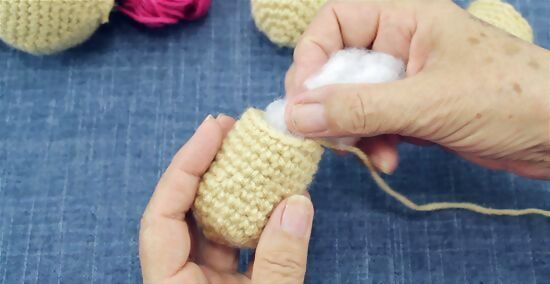
Stuff the limbs. Fill the limbs with some polyfill stuffing to give them some volume and make them look like arms and legs. Don’t overstuff the limbs or they may stick out or be hard to move after you sew them into place.
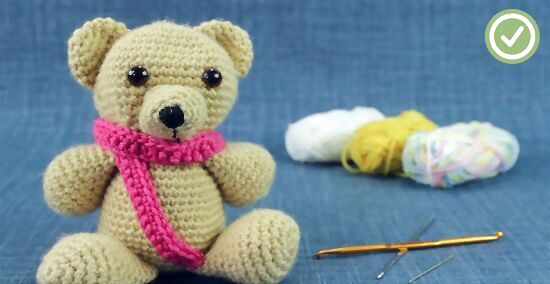
Sew the limbs onto the body. After you have stuffed the limbs to your liking, sew each one onto the teddy bear’s body where you would like it to go. Place the legs at the bottom of the teddy bear’s body and the arms at the top outer edges of the teddy bear’s body. Sew all the way around the opening of each of the limbs to attach them to the body and prevent the stuffing from coming out. Then, tie off the yarn and cut the excess.\ After you sew all 4 limbs into place, your teddy bear is complete!






Comments
0 comment