
X
Research source
We’ll walk you through the process of creating a basic bubble braid step-by-step, and we’ll go over some fun bubble braid variations, so keep reading!
- To do a bubble braid, start by pulling your hair up into a ponytail at the height of your choice.
- Next, add an elastic hair tie a few inches down from the original one. Keep adding more hair ties down the length of your hair in equal intervals.
- Finally, gently loosen the sections of hair between each elastic to create your bubbles. Finish with a bit of hairspray to hold everything in place.
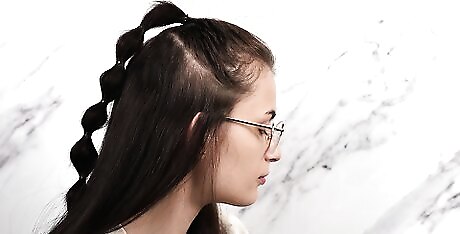
Basic Bubble Braid
Prep your hair with styling cream or pomade. Start by applying styling cream to get your hair prepped and frizz-free, and to help hold the hairstyle in place. If you have a go-to styling cream that you typically use before braiding your hair or creating an up-do, that should work perfectly! If you have fine, straight hair, opt for a lightweight cream to avoid weighing down your hair. If you have thicker, wavy, or curly hair, try out a medium to heavy weight styling cream to lock in moisture. If you need to make sure your hairstyle stays in place throughout a long day, add a bit of pomade for a bit of extra hold.

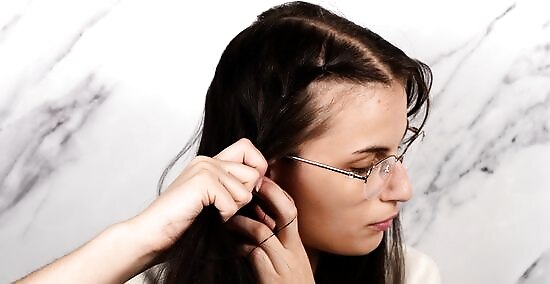
Pull your hair up into a basic ponytail. Choose the height of your ponytail depending on the vibe you’re going for with your bubble braid. If you’re looking for a more dramatic look, try out a slicked-back high pony. If you’re looking for something more relaxed, start out with a looser, lower ponytail.
Add hair ties in equal increments down your ponytail. Start by adding an elastic hair tie a few inches down from the original one, and continue adding more hair ties down the length of your hair in equal intervals. If you want to create several small bubbles, add in more hair ties at shorter intervals. If you want to create just a few large bubbles, add fewer elastics and space them further apart from each other. This step is entirely customizable and up to you, so don't be afraid to get creative with it! If you have thicker hair, try using thicker elastic hair ties to make sure the style stays in place.

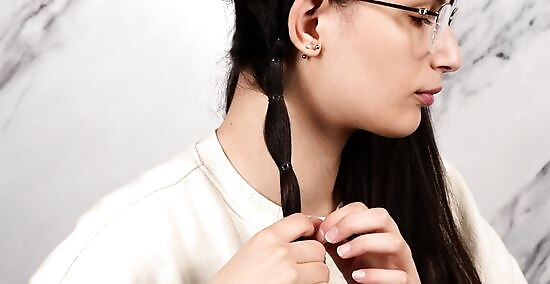
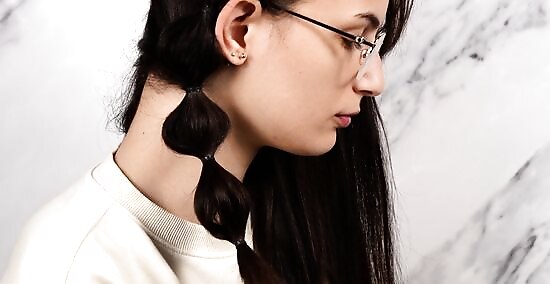
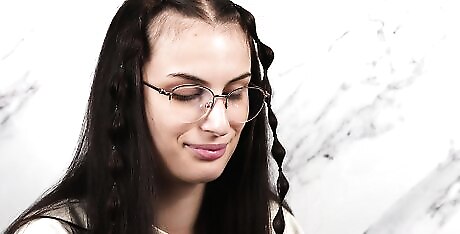
Pull at the hair between each elastic gently. Loosening each section of hair creates the “bubble” like appearance of the style. If you have fine or thin hair, you might want to add in more styling product or tease the strands a bit to create larger bubbles.

Finish your style with hairspray. Once you’ve achieved the perfect bubbles, it’s time to make sure everything stays in place. Spray in a bit of hairspray all over to avoid flyaways and frizz, and to make sure your style lasts the whole day long.
French Bubble Braid

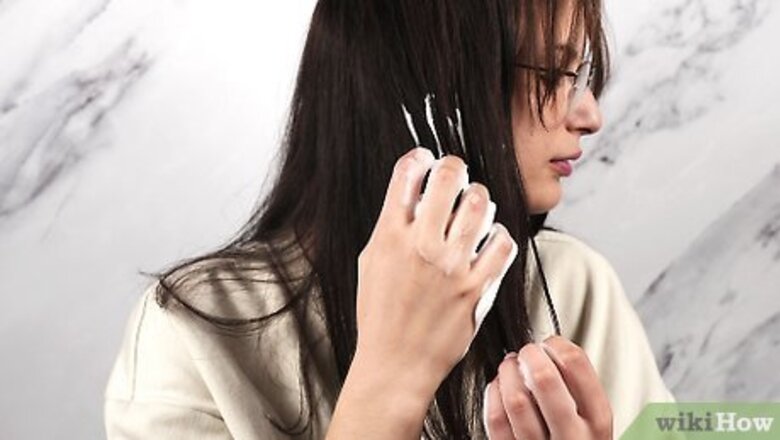
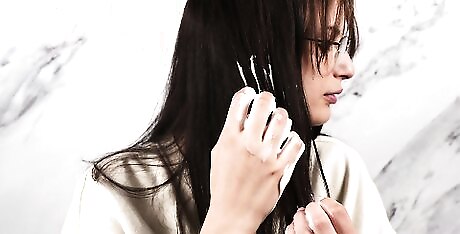
Part your hair down the middle. Start by parting your hair down the center of your head, just as you would if you were creating two basic french braids. Try to make sure you have equal sections of hair on each side.
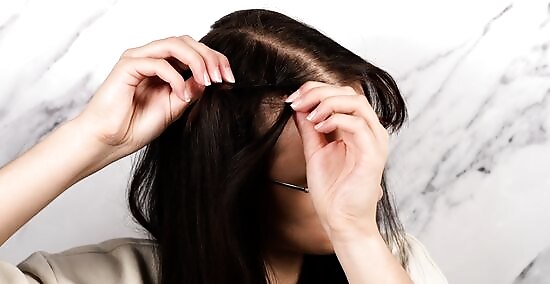
Secure a small section of hair with an elastic. Starting on one side, separate a small section of hair at the top of your head and secure it with a small elastic. Make sure the section of hair is about the same size you would start with for a normal French braid.
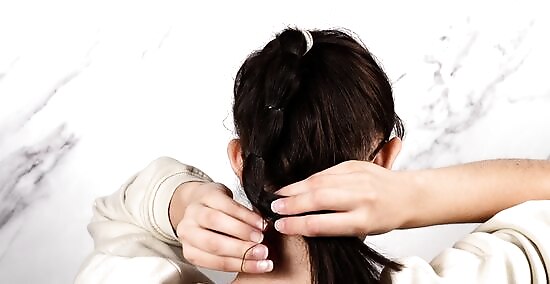
Continue adding hair ties in equal intervals down your scalp. Grab another small section of hair and add it to the first section, securing both with another elastic. This new elastic should be a few inches down from the original one. Repeat this process until you’ve incorporated all of your hair. At the end of this step, all of your hair should be secured with an elastic at the base of your scalp in a low ponytail.
Finish by adding elastics at equal intervals down the length of your hair. Do this until you’ve gone down the entire length of your hair, like you would for a typical bubble braid.
Loosen the sections of hair between each elastic gently. Carefully pull at each section of hair to create your bubbles, from the top of your head all the way down the length of your hair. This variation of the bubble braid can be a bit more difficult to achieve, so don’t be afraid to ask a friend for help!
More Bubble Braid Options
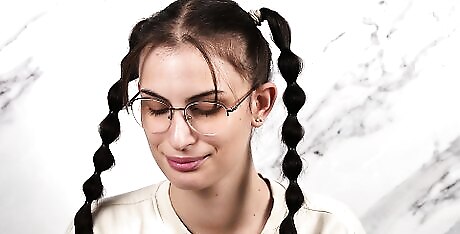
Bubble Braid Pigtails For a fun variation on the bubble braid, try out bubble braid pigtails. Start by pulling your hair up into two basic pigtails. Next, place small hair elastics in equal intervals down the length of your hair on each side, just like you would for a typical bubble braid. Finally, gently pull at the sections of hair between each elastic to create the bubble effect.
Half-Up Half-Down Bubble Braid Another fun option is the half-up half-down bubble braid. To achieve this look, first pull your hair up into a half-up half-down style. (This involves sectioning off the top half of your hair and pulling it up into a ponytail while leaving the rest of your hair down.) Next, place small hair elastics down the length of this ponytail in small intervals. Finally, gently pull at the sections of hair between each elastic to loosen the hair and create bubbles.
Face-framing Bubble Braids If you want to incorporate bubble braids into your hairstyle but want to wear most of your hair down, try out some fun, face-framing bubble braids. To start, separate a small section of hair on either side of your face. Secure each of these sections with a small elastic an inch or two from your scalp. Next, place small elastics in equal intervals down the length of your hair in each of these section. Finally, gently pull at the sections of hair between each elastic to loosen them up and create bubbles.


Comments
0 comment