
Canceling Using a Browser
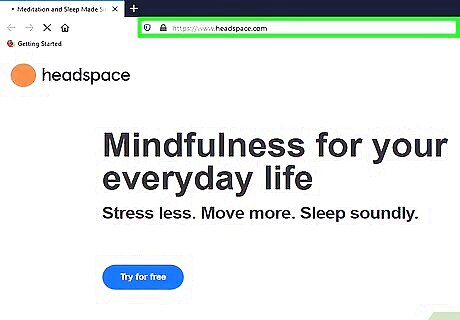
Visit the Headspace website with a browser. Subscriptions can’t be canceled through the app, so use a desktop or mobile browser for this process. Visit the Headspace website by going to this URL: https://www.headspace.com/
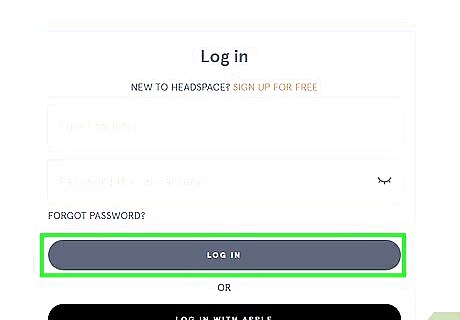
Log in to your account. In the top right corner of the window, you will see “Log in” directly to the left of the large orange button that says, “Sign up for free.” Clicking on “Log in” will take you to a page that requires you to enter your email address and password.
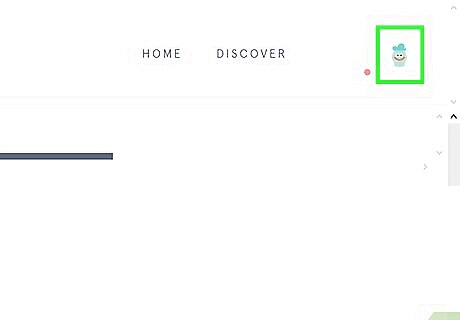
Click on your name in the top right corner. Once you are logged in, you should see your first name in the top right corner of the app. Click on this to go to your account settings. If you are using a mobile browser, you will see “Profile” instead of your name.
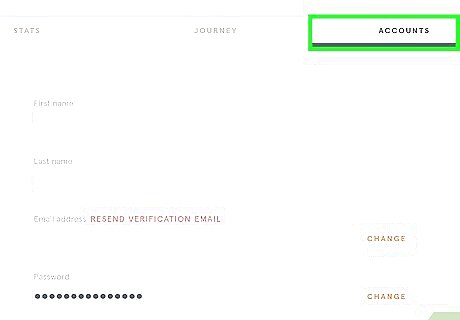
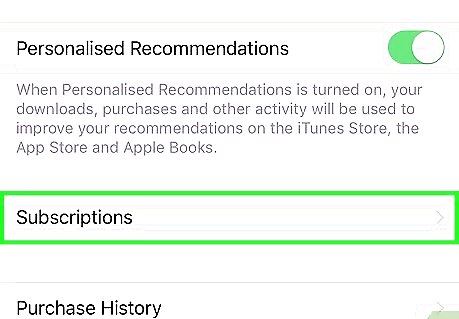
Select the Accounts tab. You will now see three tabs to choose from: Stats, Journey, and Accounts. Click on “Accounts,” which will be the tab all the way to the right.
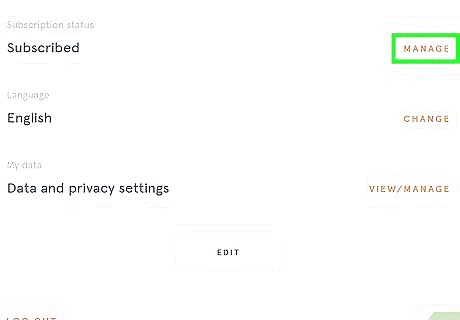
Scroll down and click Manage next to your subscription. Right beneath your password, you will see the option “Subscription status.” Next to that option, you will see “Manage” in large orange text. Click on this to proceed.
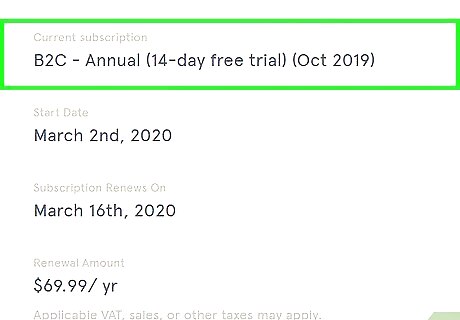
Click Change Subscription. You will now be on a page that lists your current subscription. Find the “Change Subscription” option and click on it.

Select Disable Automatic Renewal. Selecting this option will keep Headspace from renewing your subscription at the end of the current billing cycle. You will still be able to access and use the app for the remainder of the time you already paid for.
Canceling Through iTunes
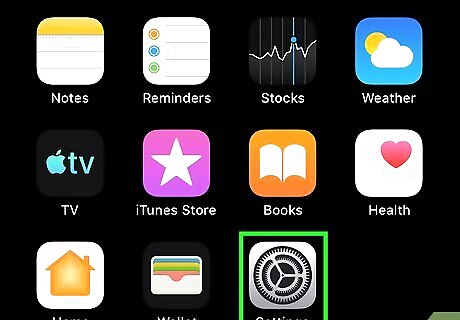
Open your Settings app. If you purchased your Headspace subscription through iTunes, you can use your iPhone to cancel your subscription. The “Settings” app has a light gray background and a dark gray icon that looks like a series of gears. Tap on this to open it up and get started.
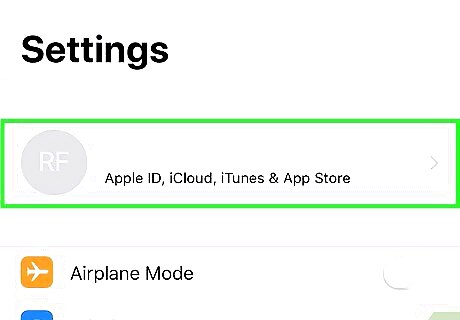
Tap on your name at the top of the settings. At the very top of the “Settings” app, you will see the name associated with your account. Tap on this.
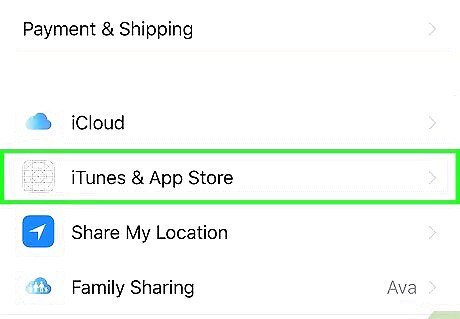
Select iTunes & App Store. Find “iTunes & App Store” in the menu and tap on it. This option will be next to a blue icon with three white lines in the shape of an “A.”
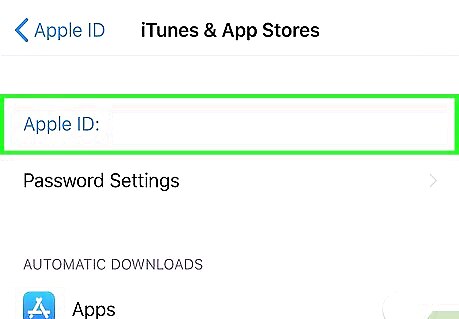
Click on your Apple ID. At the top of the screen, you will see “Apple ID” and your email address, which will be bright blue. Tapping on this will bring up a pop-up menu.
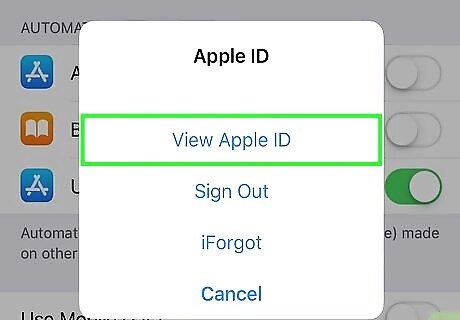
Tap View Apple ID. At the very top of the pop-up menu, you will see “Apple ID” again. Make sure to select this option.
Tap on Subscriptions. Near the bottom of the screen, you will now see “Subscriptions.” Scroll down if necessary, and then click on it to review all the services you’re currently subscribed to.
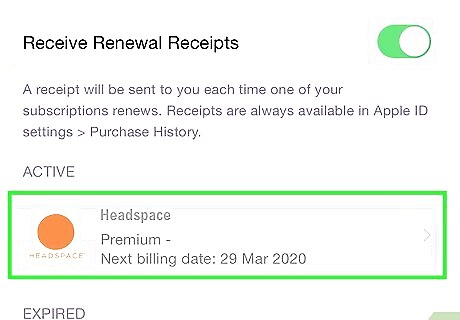
Find and select Headspace. Depending on the number of subscriptions you have, you may need to scroll down to find it. Find Headspace on the list, which should be next to its orange circle app icon, and tap on it.
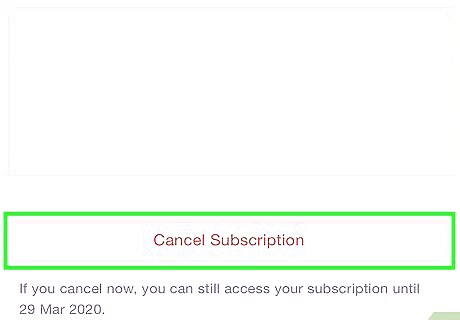
Select Cancel Subscription. You will now be taken to a page that lists your current subscription plan and the other options Headspace has available. Find the “Cancel Subscription” option and tap it to cancel Headspace.
Canceling Through Google Play

Open the Google Play app. If you purchased your Headspace subscription through Google Play, you can use your Android device to easily cancel it. The Google Play app has a white background and a triangular icon that’s blue, green, red, and yellow.
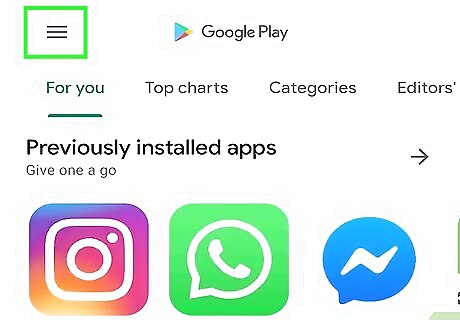
Tap on the three horizontal lines ☰ in the top left corner. This will bring up the Google Play menu.
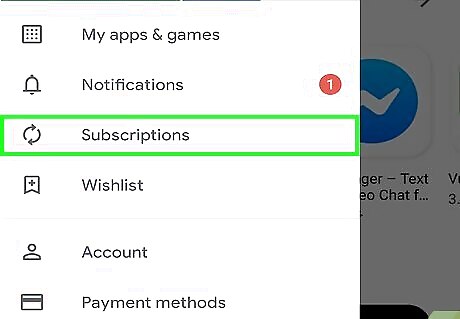
Tap on Subscriptions. This should be the third option in the menu, directly beneath “Notifications.”
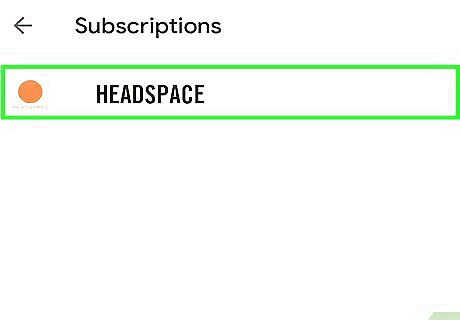
Find Headspace among your list of subscriptions. Depending on how many subscriptions you have, you may have to scroll down to find Headspace. Once you find Headspace, tap on it.
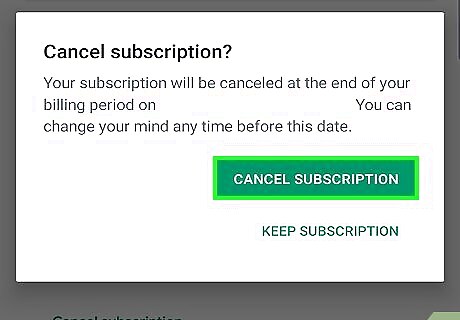
Select Cancel Subscription. This will stop Headspace from auto-renewing at the end of the current billing cycle.


Comments
0 comment