
Building the Aquarium Stand Frame
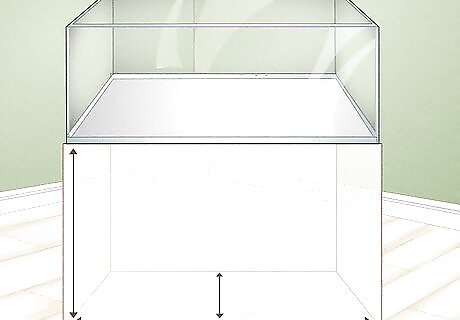
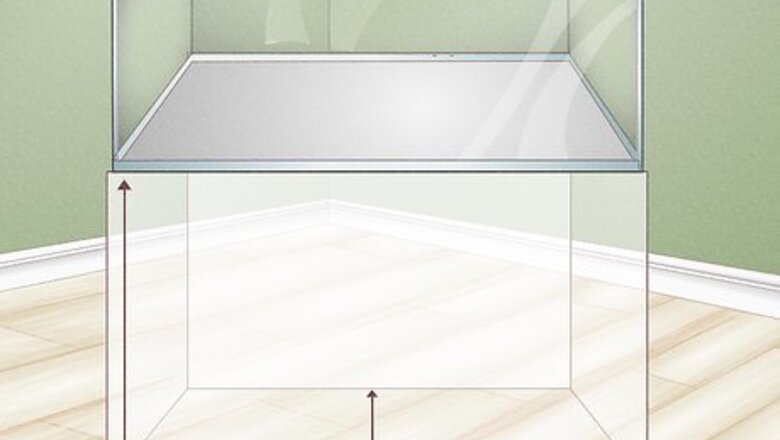
Determine the dimensions of your stand based on your aquarium’s size. Your stand can comfortably be built up to 3 feet (0.91 m) high, while the length and width of the frame should be equal to the size of your aquarium with ⁄2 inch (1.3 cm) added to each side. For example, if your aquarium measures 10 inches (25 cm) by 20 inches (51 cm), then the sides of your stand should be 10.5 inches (27 cm) and 20.5 inches (52 cm). Remember that your aquarium will also be holding several gallons of water which will add on weight. Make sure your stand will be sturdy enough to support the filled tank.
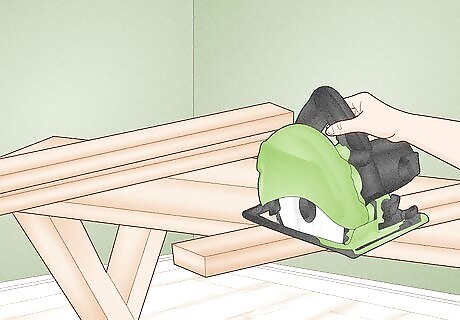
Cut your pieces of wood to match the dimensions of your stand. Use a circular saw to cut 2 2x4s to the desired length, 4 2x4s to the desired width, and 8 2x4s to the desired height. For example, for an aquarium stand that you want to be 3 feet (0.91 m) tall, 3 feet (0.91 m) long, and 1.5 feet (0.46 m) wide, you’ll need to cut 2 2x4s to be 36.5 inches (93 cm), 4 2x4s to be 18.5 inches (47 cm), and 8 2x4s to be 36 inches (91 cm).
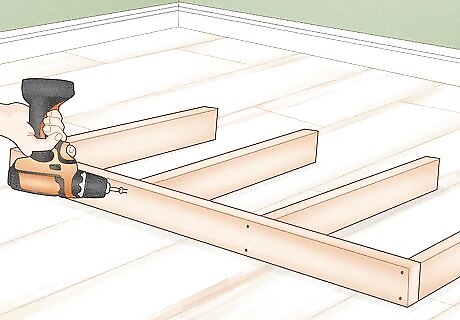
Attach the 4 smaller 2x4s to 1 side of a length-cut 2x4. Place 2 of the smaller 2x4s along the top and bottom of the thin side of the longer 2x4 and place the 2 other smaller pieces in the middle. Then, use a power drill to attach the smaller 2x4s to the larger piece using 2.5 in (6.4 cm) construction screws. Make sure the 4 smaller 2x4s (which will serve as cross braces for the frame) are set at equal distances apart from each other. You may also want to use wood adhesive to ensure that the 2x4s are securely attached to each other.
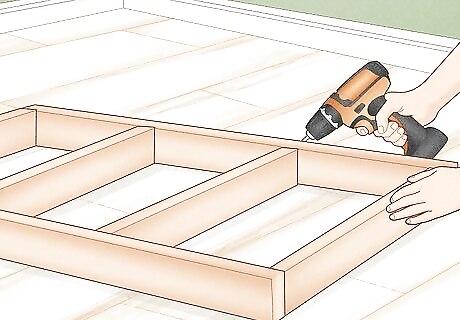
Lay the other length-cut 2x4 along the frame and attach it to the smaller pieces. Use your power drill to attach this 2x4 to the part of the frame you’ve already built with 2.5 in (6.4 cm) construction screws. Make sure all of the 2x4s are securely fastened to each other before proceeding.
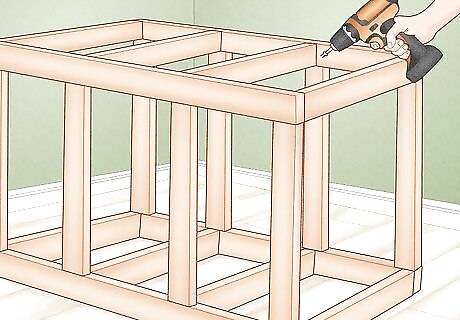
Attach a height-cut 2x4 at every corner and cross brace location on your frame. You should install all 8 of your height-cut 2x4s, using a power drill and construction screws to drill the 2x4s together. You can also use finishing nails or wood glue to help secure these 2x4s to the frame. Install these vertical posts so that their long sides run parallel to the cross braces on your frame.
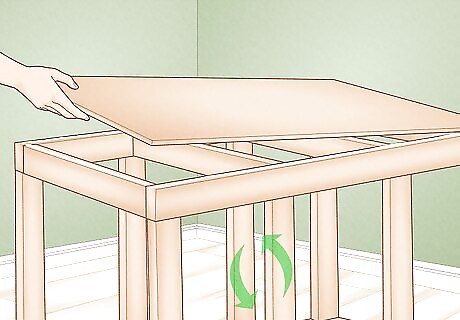
Cut and install a piece of plywood to the bottom of the frame. Trace the exact shape and measurement of your frame onto a large piece of plywood and use a jigsaw to cut out this shape. Then, use wood glue to fasten this bottom piece to the tops of your vertical posts. Once this glue has dried, flip the frame over so that the plywood is on the bottom. You may also opt to use finishing nails to complete the installation. Allow the wood glue to dry for at least 2 hours before moving forward. If you have the extra time, though, you may want to wait 24 hours just to make sure it’s completely bonded.
Covering the Frame with Sheeting
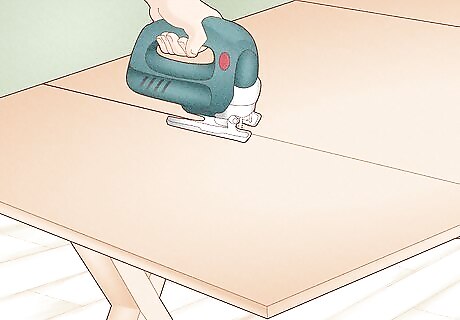
Cut 4 pieces of wood sheeting to match each side of your stand. Measure the front and both sides of your aquarium stand, then use a pencil to trace 3 rectangles matching these measurements onto a piece of wood sheeting. Then, cut out these shapes with your jigsaw. Make sure to cut spaces in the front piece of wood sheeting for any doors you plan to install in your stand. You don’t need to attach sheeting to the back of the stand unless it will be visible or you plan to store a lot of items in the stand that might fall out of the exposed back.
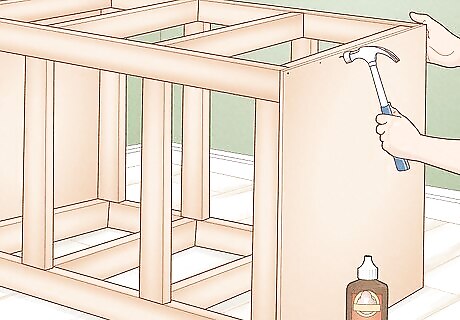
Attach each piece of sheeting securely to the sides of the stand. Use wood glue to glue each piece of wood sheeting to its corresponding side. Then, use a hammer and finishing nails to make sure each piece is securely fastened to the frame. If the visible nail heads are unsightly, you can shove them deeper into the wood with a countersink punch, then fill the holes with wood putty.
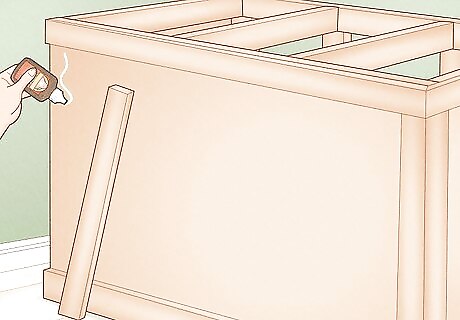
Add trim to the sides of the frame if you want to make it look nicer. This isn’t strictly necessary for your stand to be functional, but it will certainly make it appear less rough. Measure and cut your trim pieces with a jigsaw to fit around each corner of the aquarium stand. Then, attach to them to each corner using wood glue.
Staining and Completing the Aquarium Stand

Sand all areas of your stand so far to smooth them out. This is very important not only for making your finished stand smoother and less jagged in appearance, but will also make the finish look nicer. Use a fine grit sandpaper (around 220) to get the best result. Avoid using a coarse or medium grit sandpaper to sand your stand, as these may actually do some damage to your wood.
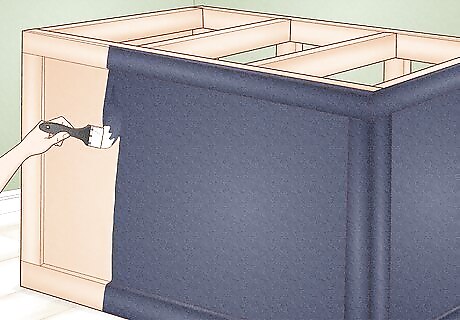
Paint or stain your finished stand in the color you desire. Use a stain that is designed to be used with whatever type of wood you used to build your frame. Apply at least 2 coats of stain with a stain brush and allow it to dry completely. Then, use a paintbrush to paint your stand in your desired color. You should apply at least 1 coat of paint to your stand (if you intend to paint it), but there’s no harm in applying 2 coats overall.

Attach doors to the front of your stand, if desired. Follow the manufacturer’s installation instructions when attaching the doors to the stand. Unless otherwise instructed, attach the hinges to the front of the stand first, then attach your doors to these hinges. Make sure your doors have been stained and painted before attaching them. Store-bought doors have probably already been stained and painted, so you only have to worry about this if you’re making the doors yourself.


Comments
0 comment