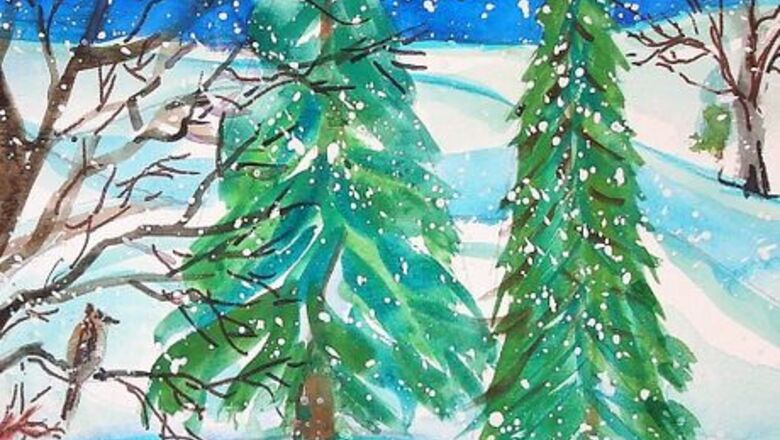
views
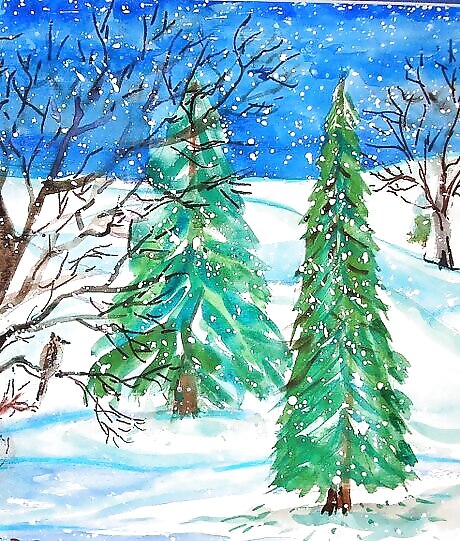
Study the structure of the evergreen tree. Do it by viewing them growing outside or using the internet for reference. For almost all evergreen trees, the structure is the same. They have a strong central trunk that is thick at ground level but tapers as it grows upward.
Sketch the composition first. Lightly draw an evergreen's trunk. Use an ordinary #2 pencil. Use thick, 140 lb. watercolor paper.
Study and draw the branches of the tree. Branches sprout from the trunk in all directions; they are heavier toward the bottom and get thinner as they grow upward. Sketch branches on the trunk you've drawn. Make lines that appear to be growing out of the trunk on all sides and angled slightly downward.
Erase your pencil lines, with the plan to leave as faint an image as possible as your guide.
Sketch the foliage. Green needles grow off each branch, surrounding it. Typically, pine needles grow in densely packed clusters along these branches, curving outward slightly at the edges. In the foreground tree, the branching pattern and the needles remain close to the trunk, making it appear skinny. In the second tree, the branches appear to be farther apart and the needles longer.
Observe the natural spread of needles and branches. To draw the greenery on branches, think of each section as a grouping, cluster or as an enclosed shape. When you paint, do branches as single strokes. Avoid extra strokes and excessive layering.
Begin painting. You will need a pointed and a ½ inch flat watercolor brush. For a palette, use a white, plastic picnic plate, a cast off white china plate or a plastic watercolor palette purchased at the craft store. Keep the center of your palette for mixing.
Activate your watercolors with a few drops of water on each pad. If using tube paints, squeeze out ¼ inch of green pigment on your palette. At the edges of your palette, squeeze out blue, yellow, brown, and a tiny dot of black. Later, at the end, squeeze out an inch of white watercolor pigment. If using pan colors, purchase a tube of white so you can get good coverage.
Paint the foliage. Using the tip of your brush, carry a dab of green paint to the mixing area of your palette and add water to thin it slightly. Paint strokes for greenery. Start at the trunk and sweep the stroke downward, lifting the brush at the end. Do the skinny tree with shorter strokes close together. For the other tree, do longer strokes with a little space between each.
Pull green to the mixing area of your palette. This time, add a touch of blue or brown to darken it. Dilute it with water to the consistency of cream. Paint beneath each branch to create shadows—this will make the branch stand out slightly. Do all branches and allow both trees to dry thoroughly.
Paint the two small trunks with brown. Add a swipe of black at one side. Create tree branches. Use a pointed brush to draw a series of branches on the left as if a portion of a deciduous winter tree is showing. Add a bird to a lower branch. Add a small, naked, brown, skeletal tree at the far right.
Paint the snow. Your white paper is the snow; you will paint only the blue shadows. Change the water and wash brushes thoroughly. Mix a small dab of blue paint with water to make a very diluted shade of blue. Paint the horizontal shadows in single strokes from side to side. Make the suggestion of a hill.
Paint the sky. Make a puddle using less water to create a medium shade of blue. Test it on a scrap. The paint mixture should cover and show the color of the blue pigment but still allow the white of the paper to show through. Let this dry thoroughly.
Accent the branches with swipes of white snow accumulation. Use white watercolor pigment diluted to be workable and to go on smoothly. Test to be sure the mixture will give good coverage.
Make falling snow. Spatter using a toothbrush or a bristle brush to create the illusion of falling snow. Test this spatter on scrap paper first, then let the piece dry. Stand it up and evaluate it.
Make minor corrections. Put gray or brown shadows under the pines. Add a few lines suggesting debris that has accumulated under the trees.



Comments
0 comment