
views
Adapting Recipes

Identify styles of cooking you most enjoy. Are you a fan of Italian, Tex-Mex, Thai, fusion, BBQ? Dozens of cuisines have been created around the world using ingredients native to that region. The simplest approach when first learning to adapt a recipe might be to start with food that’s most familiar to you. This will help you recognize when the flavors are unbalanced. You will also already be familiar with the specific cooking techniques used for that cuisine.

Look through cookbooks, magazines and recipe websites for inspiration. Find recipes you’d like to try by browsing cookbooks, magazines and recipes online if you don't already have one on hand you want to modify. Start with tried-and-true cookbooks and online recipes with many positive reviews, so you will know a recipe works well and that many like it. Finally, remember that modifying a recipe is an experiment. It could turn out to be the most delicious thing you’ve ever eaten or an inedible mess. Have fun with it! Reviews of online recipes often include information on how the reviewer adapted it. They also often discuss tricks discovered to make the dish more easily and quickly. Reviews also frequently cover what didn’t work. You can also modify a dish through examining one you’ve eaten at a restaurant or friend’s home. Write down the ingredients you remember and the cooking techniques you think were used. Make this your base recipe. Don't be surprised if the measurements and instructions don’t make sense when using an "heirloom" recipe written decades ago. For instance, how much is a "tumbler" of milk? Go to a website such as this for translations and conversions: [1]. And when a recipe calls for ingredients in European or American/British units (e.g., grams versus ounces) that you need to convert, check out sites such as this: [2].

Identify why you’ll be adapting the recipe. Is it because you don’t like all the ingredients but enjoy the dish overall? Are you adapting it to increase its yield or portion sizes? To make it healthier or to accommodate allergies? The answer will guide you in adapting it successfully. Here are some tips and links to websites that will help you a) convert yield and portion size and b) adapt recipes to be healthier and to accommodate allergies. Conduct online searches using the name of the dish and words such as “gluten free,” “dairy free,” “vegan,” “sugar free” and so forth when modifying for health or allergy purposes. You’ll have a better idea of the ingredients you can substitute after reading a few of these recipes. Here is a chart for adapting recipe ingredients to make them more healthy: [3] Additionally, food scientists have found that people don’t notice much of a flavor difference when the following are changed: reducing sugar and fats by 1/3, omitting salt or reducing it by 1/2, substituting whole wheat flour for 1/4 to 1/2 of all-purpose flour, and substituting finely ground oat bran or oatmeal for 1/4 of all-purpose flour. Lastly, here is a website to convert yield and portion sizes: [4].

Make the recipe before adapting it. It’s difficult to change a recipe for the better until you’ve made it and know its starting point. You also get a lot of useful information from making it “by the book” the first time. For example, were there unnecessary steps, or ones that you can simplify? Were there ingredients that seemed unimportant to the final taste? How is the batter supposed to look?

Know where you can’t make changes to a recipe. Some parts of recipes – particularly those for baked goods – cannot be changed. This is because these foods use precise ratios between and among necessary structural ingredients. All breads, for instance, are 5 parts flour and 3 parts liquid. You wouldn’t end up with bread if you changed that ratio. So always consider the role of the ingredient when deciding if you can substitute it, and how. Signature ingredients can be swapped, but be careful because they also are typically core to a dish. For example, basil is necessary in a pesto recipe. Accent ingredients, such as blueberries in muffins, are more easily modified without risk of ruining the dish.
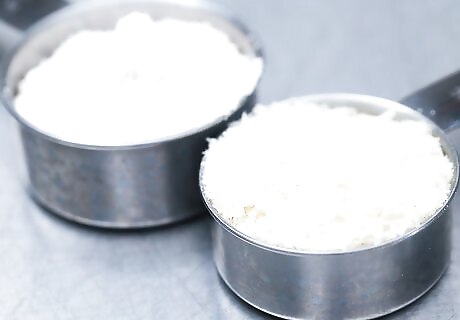
Use ratios to avoid mishaps and create more recipes. You can avoid unsuccessfully adapting many recipes once you learn the fundamental ratios. You can also use ratios to form the basis of potentially hundreds of recipe modifications. While some ratios call for cups, many call for parts. When they call for parts, they mean weight. A cup of flour, for instance, could vary in how many ounces is actually in it based upon variables such as whether a sifter was used or if the flour was packed into the measuring cup. Therefore, think in terms of ounces and get a good digital kitchen scale to use. Also remember that when ounces are the unit of measurement, weight is measured in ounces but volume is measured in fluid ounces. They aren’t equivalent. Thus, always use liquid measuring cups for liquids.

Learn the ratios for stocks and sauces. Below are the ratios for stocks and sauces commonly used in a variety of recipes. Stocks: 3 parts water, 2 parts bones Consommé: 12 parts stock, 2 parts meat, 1 part mirepoix, 1 part egg white Roux: 2 parts fat, 3 parts flour Brine: 20 parts water, 1 part salt Mayonnaise: 20 parts oil, 1 part liquid, 1 part egg yolk (measure as part of the one part liquid) Vinaigrette: 3 parts oil, 1 part vinegar Hollandaise: 5 parts butter, 1 part liquid, 1 part egg yolk

Know batter and bread ratios. These ratios, which encompass everything from pizza dough to crepes, will take you a long way in your recipe-making as well. Bread: 5 parts flour, 3 parts liquid Pasta: 3 parts flour, 2 parts egg Pie dough: 3 parts flour, 2 parts fat, 1 part liquid Biscuits: 3 parts flour, 1 part fat, 2 parts liquid Cookies: 3 parts flour, 2 parts fat, 1 part sugar Pound/sponge cake: 1 part flour, 1 part fat, 1 part egg, 1 part sugar Pate a’ choux: 1 part flour, 1 part fat, 2 parts liquid, 2 parts egg Muffins: 2 parts flour, 1 part fat, 2 parts liquid, 1 part egg Fritters: 2 parts flour, 2 parts liquid, 1 part egg Pancakes: 2 parts flour, ½ part fat, 2 parts liquid, 1 part egg Crepes: ½ part flour, 1 part liquid, 1 part egg Pot stickers: 2 parts flour, 1 part liquid Crackers: 4 parts flour, 1 part fat, 3 parts liquid

Study the ratios for custard, crème anglaise and sweet sauces. These will have all those with a sweet tooth chomping at the bit, especially after creating a recipe based upon a cake or pie dough ratio. Custard: 2 parts liquid, 1 part egg Crème anglaise: 4 parts milk or cream, 1 part egg yolk, 1 part sugar Chocolate sauce: 1 part cream, 1 part chocolate Caramel sauce: 1 part cream, 1 part sugar

Take time to consider what would make the recipe better. Before randomly substituting ingredients or cooking techniques, taste the food from the original recipe and think about what you like and don’t like about it. Would a different spice improve it, or more/less of the spice used? Might swapping a certain ingredient give it a better texture? If so, think about ingredients that would accomplish this without changing the flavor. If cooking for others, ask them for their thoughts on the dish as made according to the original recipe. What do they like or dislike?
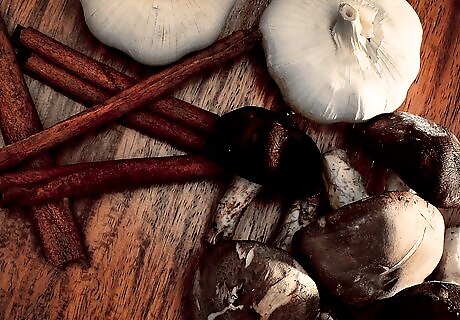
Know that flavor is not the same as taste. When adapting a recipe, it’s critical to understand the difference between flavor and taste because interchanging ingredients can dramatically alter the dish’s flavor. Taste is what our taste buds perceive when a food touches one of the now five identified taste receptors on the tongue. There are five scientifically identified tastes: salty, sweet, bitter, sour and umami. Flavor, on the other hand, is a combination of taste; the aroma of the food; and the texture of the food. Balancing the tastes is necessary for a nicely flavored dish. Knowing which tastes balance each other will help you decide how to best modify recipes and to correct flavor imbalances. Thus, these tastes and ways to balance them are discussed in part 3.

Make your changes to the recipe. In many cases, this will involve swapping ingredients or changing the amounts of various ingredients you use. Focus initially on exchanging ingredients with similar textures and flavors. And make sure you’re sticking to fundamental ratios when doing so. Experiment with ingredients having different tastes and textures after you've made it the first time. But remember that ultimately the tastes must be balanced, or the modification will not have the flavor you want. Take detailed notes each time you modify a recipe. You won’t be able to recreate it if you don’t. Your notes will also help you determine what didn't work in your modified recipe. They’ll also help you avoid repeating mistakes if you make it again. Here are things to include in your notes: the necessity of an ingredient, its impact on the flavor, how it reacted to other ingredients (e.g., soggy raisins in baked goods), and if it is a structural, signature or accent ingredient.

Evaluate the modified recipe. Ask yourself these questions: Was it improved or not? What did/did not work? Why? What was the final form of the recipe? Would you change anything? Considering these things will help you think of modifying recipes as a process of simply molding them as you choose. It will also make improvising easier and more intuitive in the future. The last step is to write the recipe once you’ve modified it to your liking.
Writing Your Recipe

Give it a name. Start your recipe card, or whatever you choose to use to write or type out your new recipe on, with the name of your new dish. Have fun with it but still be descriptive enough that it’s clear what will be made. If you’ve adapted it from one or more other recipes, give credit where it’s due by next noting it's an adaptation of a particular recipe. Beneath that list the number of servings and serving size, if appropriate.
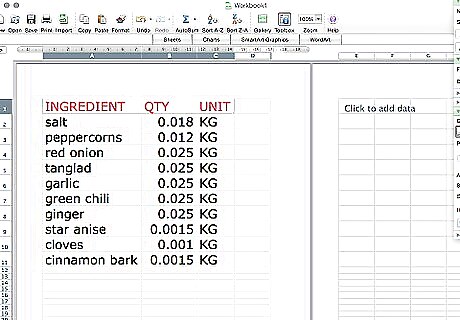
List the ingredients next. The ingredients list lets the person making the recipe (or you, if you’re making it again) formulate a preparation and cooking plan. List the ingredients in the order they’ll be used in the recipe. Use precise measurements and indicate if they need preparation. For instance, instead of writing “1 clove of garlic” when the instructions later say to “add 1/2 tablespoon minced garlic,” write “1/2 tablespoon garlic, minced.” If an ingredient is used more than once in a recipe, list it where it’s first used. Then write “divided” after it, set off by a comma. So, for example, if a recipe calls for 6 tablespoons of extra virgin olive oil to first sauté vegetables and to later create a vinaigrette, you’d write, “6 tablespoons extra virgin olive oil, divided.” If a dish has different elements, such as a pie has a crust and a filling, break up the ingredients list with headings such as “Crust” and “Filling.” Don’t use two numerals together; set the second off with parentheses. For example: “1 (12-pounce) package of cream cheese.” Be literal in your measurements. A “cup of chopped spinach” isn’t the same as a “cup of spinach, chopped.” The latter would obviously have much less. Capitalize ingredients that start with a letter instead of a number. For example: “Sea salt to taste.” If preparing an ingredient is easy, set its description off with a comma after the ingredient. For example, “1 stick of butter, melted.” Use generic names rather than brand names. So, for instance, say whipped cream instead of Cool Whip.
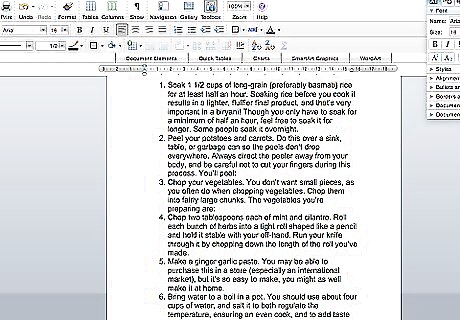
Write the instructions. Think through the steps – including time spent pre-heating the oven, bringing the water to a boil or getting the grill going – and organize it to decrease dead time. Make sure each step is in the proper order as well. You don’t have to write in sentences, but you can. This is your recipe, so write it in your words and style. Be descriptive by providing visual cues like “barely translucent,” “golden, pebbly top,” “almost iridescent,” etc. Also give warnings when something is tricky or dangerous. State exact or approximate cooking times, with descriptors to indicate when something is done. Separate each step into a new paragraph. If you're mixing all dry ingredients in one bowl, for example, make that one step (and its own paragraph). As with the ingredient list, separate different parts of the process with headers. The second to last instruction should involve plating, garnishing and the temperature at which it should be served. The final instruction should discuss storage, if that applies. For example, “Freeze muffins individually in plastic wrap for up to 30 days.”

Proof, sign and date. Check over your work for errors, give it a personal touch if you’d like and sign and date it. If you wrote it on a recipe card, go online and get a vintage, metal recipe box and start filing away. If you printed them, create a recipe book using scrapbooking materials or a photo album. You can even create your own online recipe book on websites such as these: [5], [6] or [7].
Balancing Recipes with the Six Tastes

Learn the functions of salt. Salt isn’t, as most think, used in a dish so it will tasty salty. Instead, it has three functions: to reduce bitterness, enhance sweetness and to heighten the aromas and natural tastes of other ingredients. While not all dishes need salt, it generally enhances the overall flavor of most so they don’t taste flat. If you have a dish that tastes flat or bitter, try adding a three-fingered pinch of salt before anything else. Taste it again. If it’s still not right, add a little more and give it another taste. That might be all it takes. If not, proceed to balancing in other ways. Salt absorbs into food as it sits. If you add too much salt, you can try increasing the sweet or sour components or by diluting the dish a bit with water. You can also try to compensate by adjusting the side dishes. For example, don’t salt the rice or add a sweet or sour side dish. To avoid over-concentration when reducing liquids, add salt after the liquid is reduced.

Find sweet outside of sugar. The taste of sweet is a great contrast to sour and salty tastes. It can help balance dishes with ingredients having these tastes or if a dish’s flavor becomes too salty or sour. While the sweet taste in most foods comes from sugars – cane sugar (granulated, turbinado, brown, powdered, bakers, fruit, etc.) and beet sugar – it can also come from molasses, maple syrup, honey, carrots, mango and other sweet foods. So consider these as alternatives when creating your recipes. Sweet really benefits from sour, which is why a squeeze of lemon juice over a fruit salad or cream cheese frosting on cake work so well together. Unfortunately, because people are consuming more and more packaged foods that often have a lot of high fructose corn syrup and the like, we have become more tolerant of sweetness and require more of it to taste it.

Brighten up dishes with sour. At many restaurants, bottles of vinegar are sitting on the table and lemon wedges are served on the side with a number of entrees. That’s because sour as a taste brings out the natural flavors in foods. It also balances sweetness and spiciness and enhances saltiness. It’s generally found in acidic foods like limes, lemons, oranges, sour cream, yogurt and pickled veggies. It’s also in vinegars like balsamic, sherry, red, apple cider and rice. Many other fruits are also classified as sour: raspberries, blueberries, red currants and grapes. If a dish is too sour, add something sweet or something with fat to balance it. Sour also helps to balance foods that are too spicy.

Beware and be fond of bitter. Bitter is offensive at best and inedible at worst when used in large quantities or when not balanced. But when in harmony with other tastes, particularly sweetness, it adds depth and richness to food. It’s tarty edge also perks up the taste buds. Chocolate and coffee are naturally bitter, as are olives; greens like radicchio, arugula, dandelion and kale; hops; bitter melon; brussel sprouts; turnips; chicory; and grapefruit. Pomegranate juice is used often as well. Experiment with adding arugula, chicory and endive to your salads; thicken sauces with unsweetened chocolate; or deglaze with a bitter liqueur Campari instead of a juice or stock.
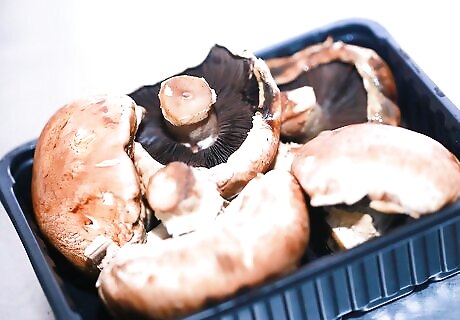
Discover a fifth taste, umami. The last taste discovered, umami, is described as savory or mouthwatering, though there’s not an exact translation from Japanese to English. It amplifies the flavor of a dish and is found in a variety of meats, such as beef, pork, chicken, and cured ham; vegetables, such as shitake mushrooms, truffles, Chinese cabbage, soy beans, and sweet potatoes; seafood, such as prawns, squid, tuna, mackerel, seaweed, and shellfish; and cheeses like parmesan, Gruyere, and Swiss. It’s also in green tea, tomatoes and soy sauce. Bacon also triggers the umami taste. Aging, curing, ripeness and fermenting all enhance umami. Going overboard is difficult to correct. The best way is typically to add more ingredients that are not umami-rich.
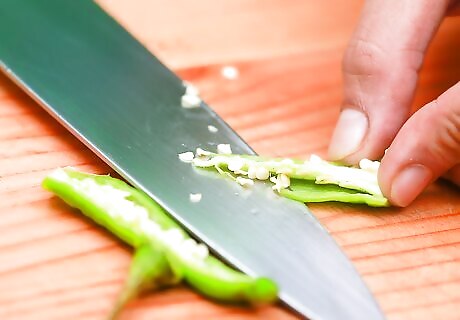
Don’t forget other “tastes” in your recipes. While spicy, floral, earthy, minty, buttery, fruity and so forth aren’t technically tastes in the sense that they aren’t processed by our taste buds, they are tastes in the sense that they are notes in foods that we identify with dishes. For example, if something becomes too spicy, you can balance it with a sweet taste. Think of Mexican chocolate with its pinch of cayenne pepper.


Comments
0 comment