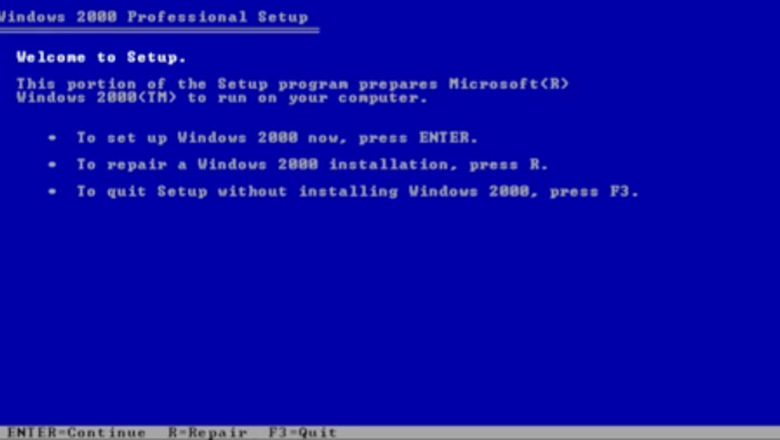
views
The installation, depending on your computer specs, will take about 30 minutes. The following steps should be identical regardless of whether the installation is performed on actual hardware or a virtual machine.
Preparing for Installation
Check if your PC meets the recommended specifications to run the OS. These are: CPU: 300MHz Memory: 256MB (Professional edition will run on less) Free Space: 5GB You will also need a Windows 2000 installation disk, along with its 25 digit product key.
Ensure the PC boot order in the BIOS is configured correctly. For this installation, it will need to boot from the CD first. This is normally enabled by default, but you can check first. To do this: Restart your computer. As soon as it begins to restart, press the key that allows you to enter the BIOS/UEFI settings. This varies by make and model, but common options are F2, F10, Del, Esc and F12. Find the Boot menu, which may be labelled as Boot Options, Boot Order, Boot, or similar. Usually, you can move through different tabs using the arrow keys. Look at the list. The order the devices are listed in is the order in which your computer will look for operating system information. Follow the onscreen instructions (which will usually involve the arrow keys or the + and - keys) to move the CD/DVD drive or Optical Drive to the top of the list. Find the Exit menu and select Exit Saving Changes or similar. If a confirmation prompt appears, click Yes to confirm the changes. Your computer will now restart automatically and attempt to boot from the CD first as specified.
Formatting the Hard Drive
Insert the installation CD into the PC. Then, switch on your PC.
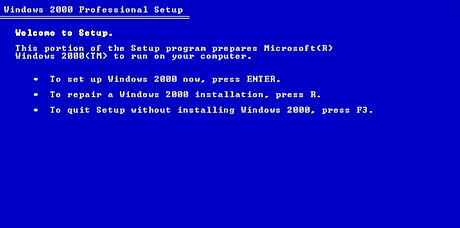
Press ↵ Enter to begin the installation process.
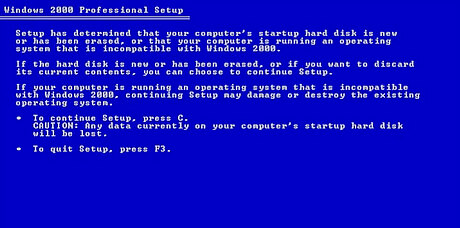
Press C to continue. This keypress acknowledges Windows' warning of the empty hard drive.
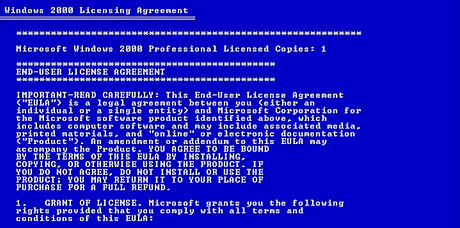
Press F8 to accept the licence agreement.
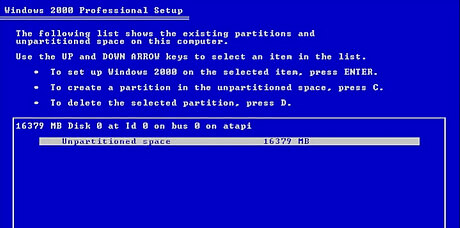
Press C to start the process. This will create a partition on the hard drive where the operating system will be installed. This way, the installation is isolated from other data on the drive.
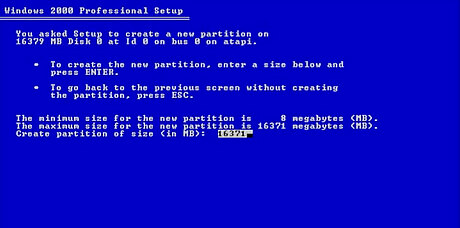
Leave the partition size that Windows recommends (in this case 16371MB). Then, press ↵ Enter.
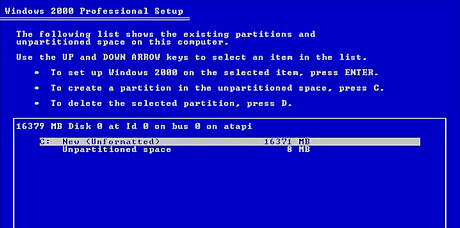
Ensure that the relevant partition is highlighted. Then, press ↵ Enter to install Windows 2000 in it.
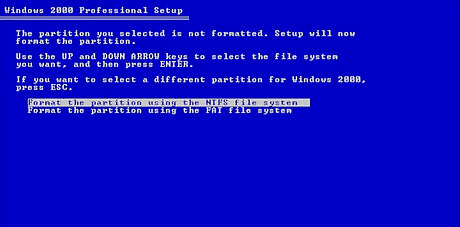
Ensure Format the partition using the NTFS file system is highlighted. Then, press ↵ Enter. Only format as FAT if you require DOS compatibility.
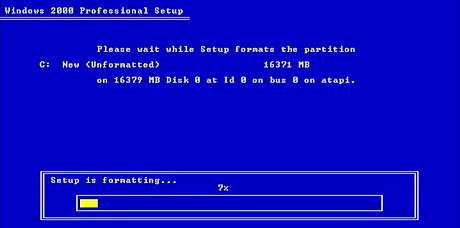
Wait while Windows copies files to the new partition. No user input is required during the next few screens. This will take longer for larger hard drives.
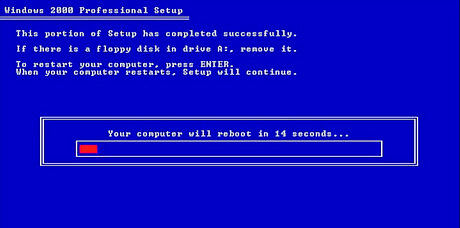
Leave the CD in the computer and press ↵ Enter to restart. If you don't press anything, the computer will restart automatically in 15 seconds.
Installing Windows 2000
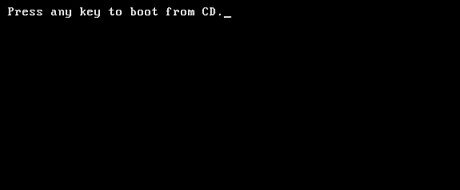
Avoid pressing any keys on your keyboard if confronted with this screen. Doing so will send you back to the beginning of the setup. If you do accidentally press a key, exit the setup and restart the computer.
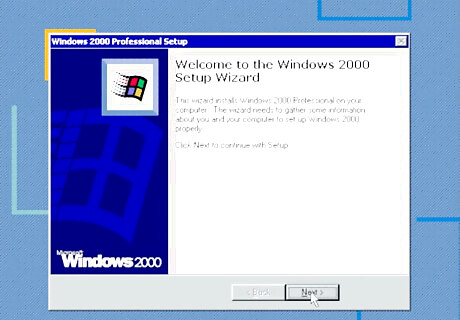
Click Next > to proceed with the installation.
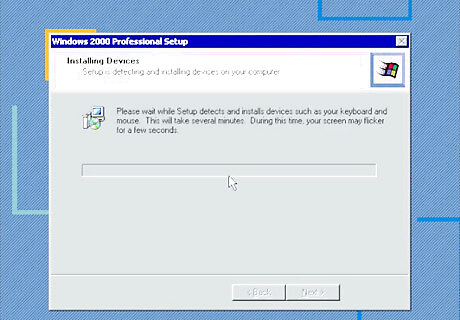
Look out for this next screen requiring no user input. Do not be alarmed if your screen flickers here: it is completely normal.
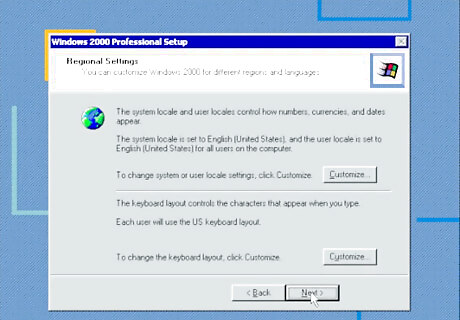
Click Next > if you're happy with the default settings. Otherwise, click on the Customize boxes to adjust them.
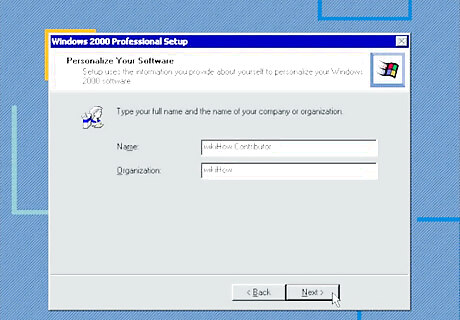
Type in your name and/or organisation. Then, click Next >.
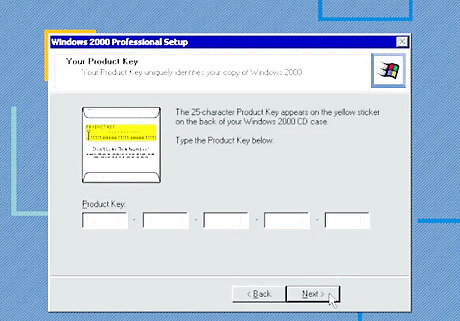
Type in your product key and click Next >. This should have come with the installation disk and will be 25 digits long. Don't input the hyphens while typing in the product key. These text boxes automatically default to capitals regardless of Caps Lock settings. The text automatically jumps to the next box, thus allowing you to type continuously. This also works backwards if you have made an error typing the product key.
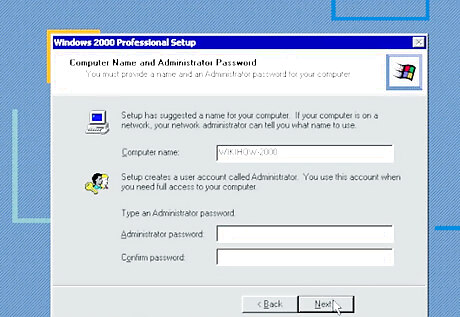
Decide on a computer name. The default name Windows chooses will work perfectly fine. However, WIKIHOW-2000 is being used as an example here. Then, set an administrator password and confirm it in the field below. Once you are done, click Next > to proceed. A memorable computer name is a good idea if you later set up a WORKGROUP.
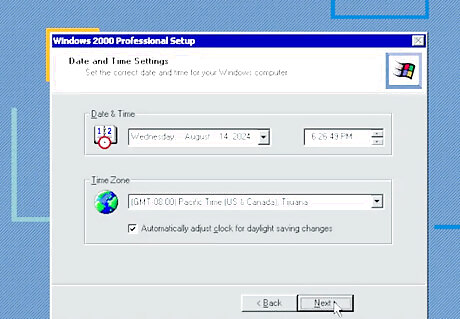
Set the correct date and time. Toggle between options using the > icons and dropdown menus. Then, click Next >.
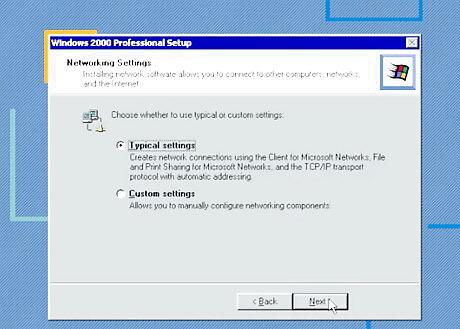
Select Typical settings and click Next >. Selecting Typical settings sets default network settings such as File and Print Sharing for Microsoft Networks, Client for Microsoft Networks, and TCP/IP protocol that uses Dynamic Host Configuration Protocol (DHCP). If you wish to configure different settings for your network environment, you can click Custom Settings and then Next > to configure these yourself. When you are done, click Next >.
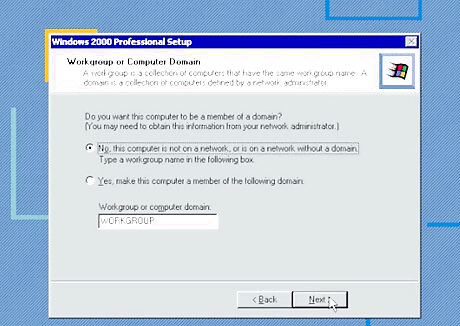
Decide whether you want to connect to a network. If you don't, click No, this computer is not on a network, it is a network without a domain. If you do, click Yes, make this computer a member of the following domain and type the relevant workgroup or domain name in the box. When you are done, click Next >. If you indicate that you're part of a domain, enter the relevant network details when prompted and click Next >.
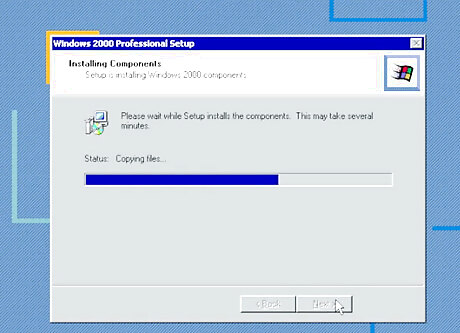
Wait while Windows installs all the necessary components. This should take around 5 minutes during which no user input is required.
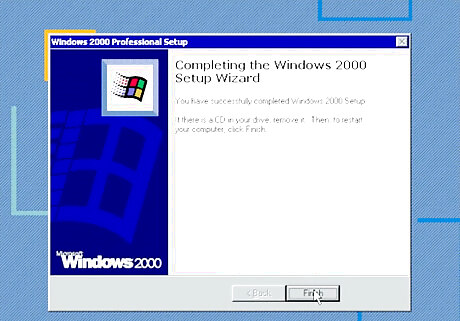
Remove the installation disk from the CD drive and click Finish to restart the computer.
Finishing the Installation
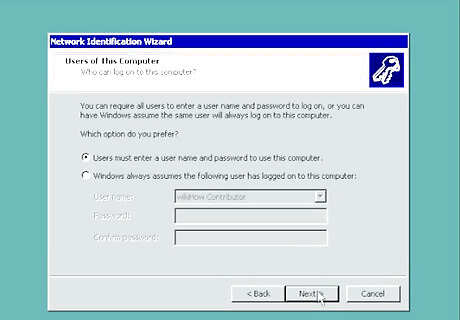
Select the first option. This way, you have the option to login as either an Administrator or as another user, upon booting. In this instance, the user is named "wikiHow Contributor". Then, click Next >. If there's only going to be one user, check the second option (Windows always assumes the following user has logged on to this computer). Then, select the relevant user from the dropdown list, enter and confirm your password, and click Next >.
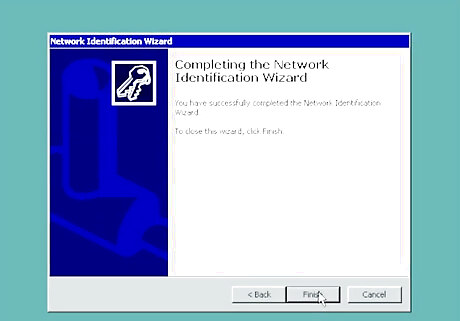
Click Finish
Booting to Desktop
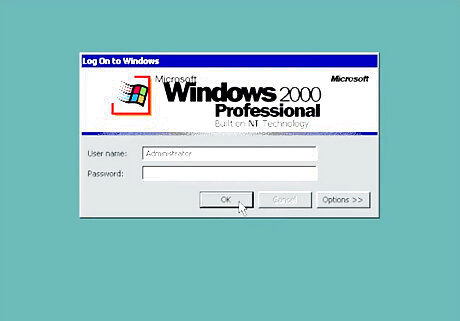
Type in your username and password. Then, click OK.
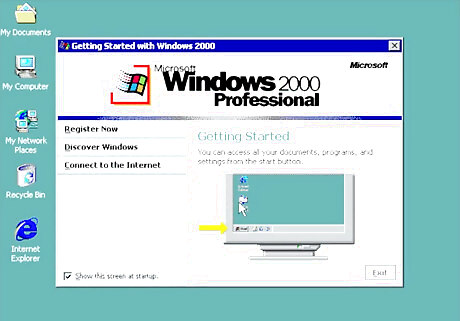
Look out for the Getting Started with Windows 2000 popup. Windows 2000 has successfully been installed and is now ready for use! For additional functionality and security, you can install service packs to the operating system.
Shutting Down

Click Start in the bottom left-hand corner of the screen. This will open the start menu.

Click Shut Down.... This is the bottom option in the menu that appears
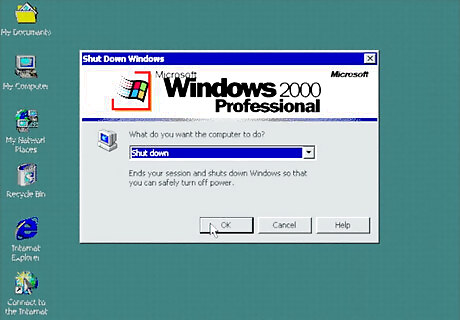
Ensure Shut down is highlighted in the drop box. Then, click OK. The computer will automatically power off.


Comments
0 comment