
Gathering and Preparing the Logs
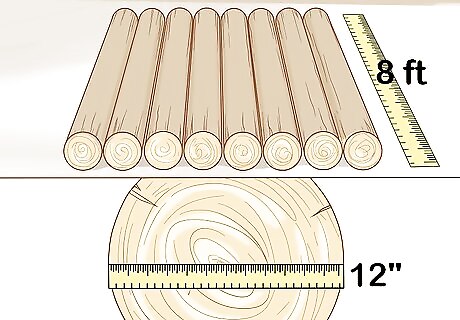
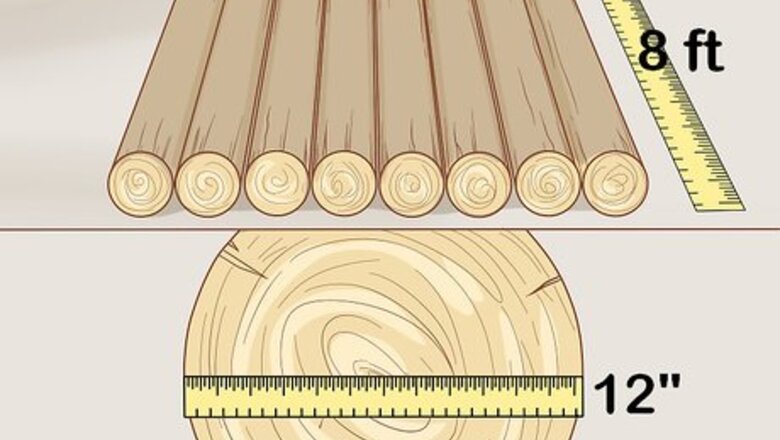
Gather eight 8 ft (2.4 m) logs that are about 12 inches (30 cm) thick. These will be the main, floating logs that make the raft's body. Great choices of wood include cottonwood, poplar, and spruce. Don't use heavy, dense woods, such as oak, or they won’t float. Find your logs in a forest or buy them from a logger. If you're in a forest but can't identify trees, choose logs that feel lighter compared to others. Use a handsaw to cut down longer logs until they are about 8 feet (240 cm) long. You can also use a hatchet to chop down saplings. Don’t use logs that feel heavy. It means that they are waterlogged and won't float as well.
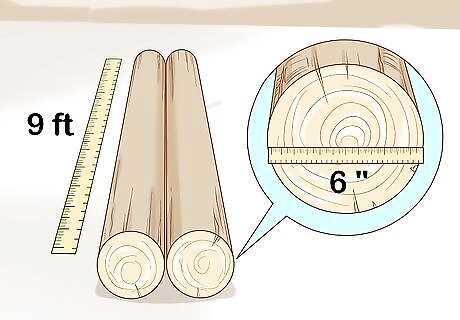
Find two 9 ft (2.7 m) logs that are about 6 inches (15 cm) thick. These will be the connecting logs, which you'll be placing across the body of your raft. You need the extra length so that you can secure the ropes to them. Use the same type of wood that you did for the main logs.
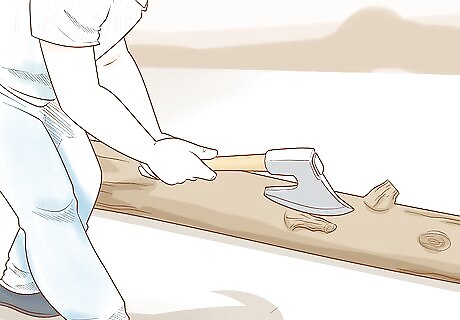
Remove the knots and bark with a hatchet. While removing the bark is not absolutely necessary, removing the knots, stubs, and smaller branches is. If you don't do this, then the raft won't fit together as nicely. Use a hatchet to hack off the little knots, stubs, and branches stemming off of your logs. If you are camping, consider saving the bark and knots for kindling.
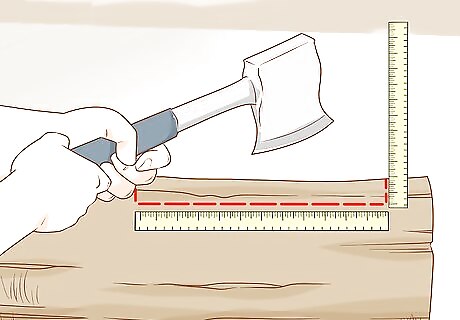
Cut notches into the logs if you have the time. This is not completely necessary, but it is highly recommended because it will help the logs fit together better. Use a hatchet to make 2 in (5.1 cm) deep notches into both ends of each log. Make sure that the notches span the width of the log and are about 1 to 1 ⁄2 feet (30 to 46 cm) from the ends. Make sure that the notches are on the same side of each log, sort of like those you'd use to make a log cabin. Alternatively, flatten the entire side of each log with a hatchet.
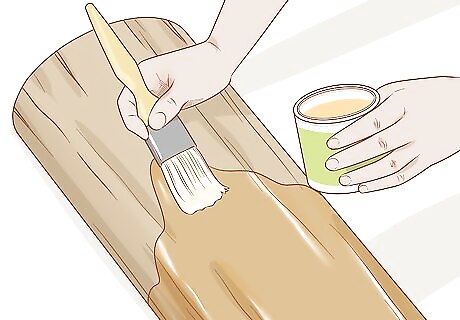
Varnish the logs, if desired. This will help make the wood water-tight and keep it from rotting. Use a brush to apply 3 to 5 thin coats of varnish, allowing each coat to dry to the touch before applying the next. After you've applied the last coat, wait for the varnish to dry and cure completely. This may take a few days. You don’t have to do this, but it can help make your raft last longer, especially if you plan on using it more than once.
Creating the Frame
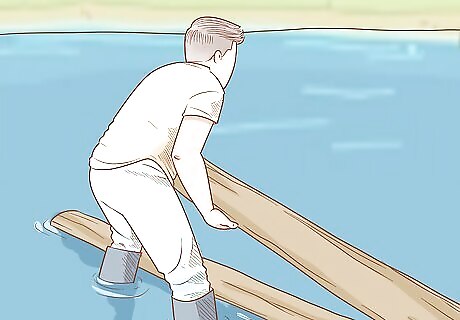
Bring your logs into the water. You need to go far enough from the shore so that logs can float; about calf-deep should be fine. Not only will this make it easier to assemble the logs, but you won't have to drag the completed raft across dry land. Roll the logs towards the body of water. You can also drag them by hand, or pull them with rope. If the logs are too heavy for you, ask a friend to help you bring them into the water. You don't have to bring all of the logs into the water, but have them close by so that you can easily grab them.
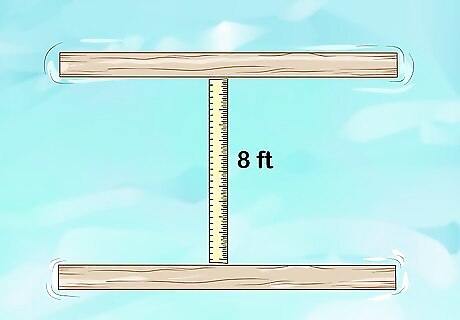
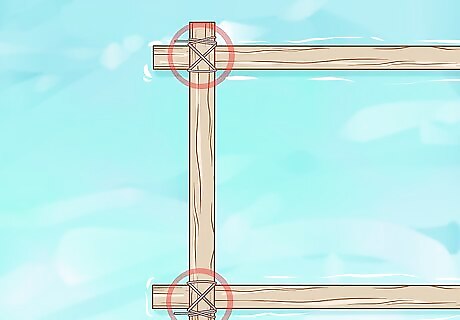
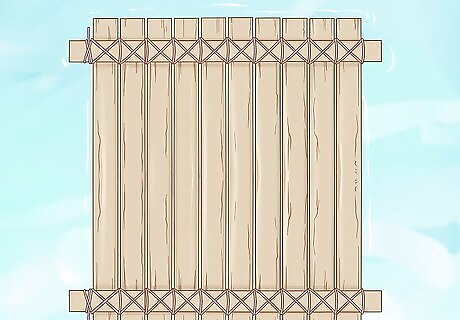
Place 2 floater logs parallel to each other, about 8 feet (2.4 m) apart. If you have not already, pull 2 of your main floater logs into the water, and place them side-by-side. Orient them horizontally so that they make an equals (=) sign. Make the logs about 8 feet (2.4 m) apart. You are using your 8 ft (2.4 m) long, 10 to 12 in (25 to 30 cm) thick logs for this.
Set your thin, connecting logs across the 2 main logs. You should end up with a rough square or rectangle shape. Place these logs about 12 inches (30 cm) from the ends of the floater logs. Move the floater logs closer or further from each other until the ends of the connector logs stick out by about 6 inches (15 cm). If you flattened 1 side on each log, make sure that the flat sides are touching. If you cut notches into the logs, then make sure that the notches are facing each other so that they fit.
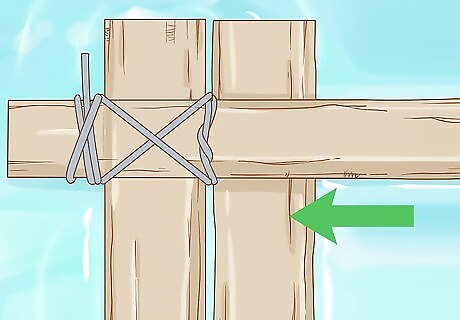
Tie your rope around a connecting log using a clove hitch knot. Choose a connecting log to start with, then drape the end of your rope across the end, right next to the left floater log. Wrap the rope's short end around the connecting log. Cross it over the longer end of the rope to create a slant. Bring it under the connecting log, then pull it under the slanted rope. Give it a pull to tighten the knot. The short end of your rope needs to be long enough to wrap around the circumference of your connecting log 2 to 3 times.
Wrap the working end of the rope around the floating log to make an X. Take the longer, working end of the rope. Wrap it around the floating log once, then pull it across the connecting log at an angle. Wrap it around the floating log again, then cross it over the connecting log to make an X shape. Pull the rope tightly so that the logs don't slide around.
Tie the rope around the connecting log with an overhand knot. Wrap the rope loosely around the connecting log, making sure that you're on the other side of the main log (working away from the clove hitch knot). Pull the rope under the looped rope, then give it a sharp tug to tighten the knot.
Repeat the process for the bottom connecting log on the left side. Take a new piece of rope and tie it to the end of the bottom connecting log using a clove hitch knot. Wrap it around the main log 2 times to make an X, then wrap it around the connecting log once. Finish off with an overhand knot. Don't tie the connecting logs to the right side of the frame just yet. You will do that last.
Finishing the Raft
Slide your next floater log into place. Take another 8 ft (2.4 m) floater log and push it under the 2 connecting logs. Roll it towards the left side of the frame. Make sure that the ends of this log are aligned with the ends of the first log.

Wrap the rope around the main log, to each side of the connecting log. Go to the top connecting log and wrap the rope around it once. Next, wrap it around the main log to 1 side of the connecting log. Bring it under the main log, then wrap it around the main log again, this time to the other side of the connecting log. You don't have to make an X with the ropes like you did for the frame, but you can if you want to.
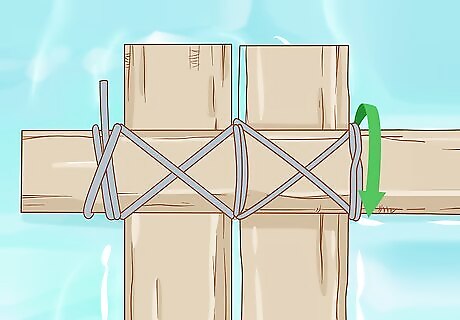
Wrap the rope around the connector log, finishing with an overhand knot. This is just like what you did when doing the frame. Wrap the rope around the connecting log once, then pull the rope under the wrapped rope to create an overhand knot. This completes your wrapping pattern.

Tie more logs to the top connecting log until you reach the right side. Follow the same process as you did before. Wrap the rope around the connecting log with an overhand knot. Add the next log, then wrap or cross it 2 times around the log. Wrap it around the connecting log with an overhand knot, add another main log, and so forth. You may end up with some gaps between the logs, which is fine. The last log may end up more or less than 6 inches (15 cm) from the end of the connecting log. This is okay.
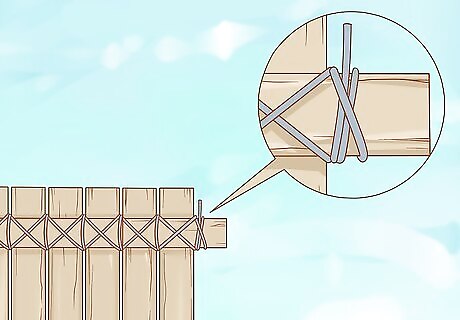
Finish with a clove hitch knot. Wrap the rope around the end of the connecting log. Cross it over the wrapped rope, then wrap it under the log again. As you're coming up, pull it under the crossed rope, then pull it tightly. Cut off the excess rope with a hatchet or scissors.
Repeat the entire process for the bottom connecting log. This side will be a little tricky because you'll have to move the logs around more in order to wrap the rope around them. You may have to uncoil the rope and push it through the spaces between the logs, like threading a needle. Make sure that the logs are straight as you tie them. You may have to slide them a little to the left or right so that they are not crooked.


Comments
0 comment